Workpiece deformation after unclamping: how to reduce the risk
Workpiece deformation after unclamping is often linked to pass sequence, clamping and residual stresses. Here's what to check to reduce the risk.
Why the workpiece shifts after unclamping
A workpiece that looked true in the chuck can move by a few hundredths, and sometimes by a few tenths of a millimeter, once unclamped. The usual reason is simple: while the jaws hold the blank they slightly change its shape. When the clamp is released, the metal partially returns toward its free state and the geometry changes.
This normally happens for several reasons at once. The chuck does not compress the part perfectly evenly, the cutting tool heats the metal, and allowance along length and diameter is not always removed symmetrically. Add internal stresses in the blank and the shift after unclamping no longer looks accidental.
The problem is most noticeable on long, low-stiffness shafts, thin-walled bushings and rings, and where a large allowance is removed in one or two passes and the finish size is almost immediately taken. A long part has little stiffness, so even moderate clamping force changes its shape. For thin-walled parts the situation is worse: under the jaws they may look round only while held by the chuck.
Heating also has a noticeable effect. One zone often heats more than another, especially during a long continuous cut or if chip evacuation is poor. While the metal is hot the size looks normal. After cooling the geometry changes, and that shows up on measurement.
Another common cause is uneven metal removal. If a more stressed layer remains on one side than the other, the part will "relax" to one side after the clamp is released. In roughing this is easy to miss because the allowance still hides the error.
Most often the problem appears on the finish size. In the chuck an indicator may show an acceptable value, but after unclamping the part loses concentricity, runout or diameter. So checking only the result in the clamp is insufficient. The real picture is the part after unclamping, when nothing presses on it anymore.
What to check before the first pass
Runout problems often start before cutting. If the blank sits unevenly, the jaws press with a tilt or the overhang is too large, a finish pass won't save the part. Before starting the program it pays to spend a few minutes on a basic inspection.
First check runout. Rotate the blank and measure radial, and if needed face runout with an indicator. If the part already shows significant displacement in the chuck, re-clamp and re-establish the datum. Otherwise the machine will remove metal relative to the actual clamped position and the deviation will worsen after unclamping.
Next assess the geometry of the blank. The biggest problems come from long thin sections, sharp diameter transitions, thin walls and areas near grooves. These zones cannot be machined like a normal section. They bend more readily during cutting and more readily change shape after unclamping.
Also check the jaws. Dirt, small chips, nicks and wear easily introduce tilt even in a good chuck. Clamping force matters too. Too little force lets the part shift; too much crushes a thin-walled or long blank.
Before the first cut it's also useful to decide where to leave a small allowance. This is especially important for long shafts, bushings and parts made from materials with significant internal stresses. If you doubt stability, do not remove the entire allowance in one go. A small allowance for re-fixturing is almost always cheaper than reworking a batch.
The habit is simple: before starting, check blank seating, weak zones, jaw condition and the allowance plan. It takes little time and immediately reduces scrap risk.
Suggested pass sequence
Often a workpiece shifts not because of one big mistake but because of a series of small decisions during machining. If the pass order is poorly chosen, metal is removed unevenly, the part overheats and stresses are released after unclamping.
A generally reliable scheme works like this:
- Remove the main allowance with roughing passes without excessive force. Several gentle passes usually give a more even geometry than one heavy cut.
- Do not take the finish size on the first setup. After roughing leave a small allowance for the finish.
- Distribute metal removal along the length and around the circumference. If you work only in one area for long, the part will pull toward that side.
- After roughing let the part cool. Even a short pause helps reveal the real metal condition.
- Before finishing do a check after unclamping and only then return for the light finish pass.
In practice it looks simple. For example, when turning a long shaft you first remove the bulk of the allowance in several zones, then move to the other side, pause and check whether any shift appears after unclamping. If the part already moved, the finishing scheme can still be adjusted.
A common mistake is to nearly finish one side to size and leave the other for later. Worse is when the operator does the finish pass on the first setup while the part is still rigidly clamped and appears true. After removing from the chuck that trueness quickly disappears.
If a part tends to move, spending an extra 10 minutes on a pause and check is better than reworking the whole batch.
How to support the part during machining
For long parts a single chuck clamp is often not enough. While the tool removes metal the blank springs, and after unclamping that elastic deformation becomes a noticeable shift.
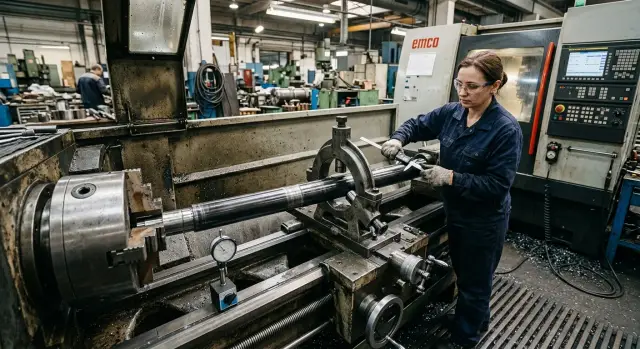
For long shafts and axles use a tailstock centre or a steadyrest. The choice depends on part shape and the cutting location. If machining is near the free end, the support should be as close to the cutting zone as possible. Then the part vibrates less and deflects less under cutter load.
A common mistake is to fit the support and overtighten it. Then the centre or steadyrest rollers do not support but bend the part. The machine cuts one geometry and after removing the support you get another.
Work with steadyrests calmly and without rush. First check runout, then bring rollers or pads up smoothly and ensure the part rotates without excessive force. If contact causes overheating or audible noise, the support is likely overtightened.
On the finish pass there's another nuance: the support must not prevent the cutter from reaching size along the full length. Sometimes a steadyrest is left in an accessible but inconvenient position and later produces a step or mark. Plan the cutter path and support repositioning in advance.
For thin-walled parts the requirements are stricter. Standard hard jaws easily crush rings, bushings and thin cups at the clamping moment. For these parts use soft jaws matched to the size. They distribute force more evenly and distort the shape less before cutting.
The rule is simple: the longer and thinner the part, the more careful you must be with support. In practice a precise support at the correct point with moderate pressure usually beats an excessively strong clamp. If such parts are processed regularly, compare your working scheme with machine and tooling recommendations. EAST CNC, for example, covers lathe selection, commissioning and service to help determine whether the current layout suits a specific task.
Working with internal stresses
Internal stresses often arise before the part reaches the machine. They are influenced by how the blank was cut, edge overheating, straightening and even storage. If a bar or forging rested for a long time on two supports, the metal may already have taken a slight bend.
So runout after unclamping is often linked not to a programming error but to the blank itself. One pass removes a layer of metal, the stress balance changes and the part shifts to one side.
Before finishing
Do not try to remove the entire allowance at once. When an operator makes a deep roughing cut in one go the section quickly loses stiffness and stresses are released suddenly. After that the finish pass follows the new bend rather than correcting it.
It's much more reliable to remove metal step by step: roughing with a reasonable allowance, pause, check and only then finish. A practical order is: remove the bulk of metal in several passes, leave allowance for the finish, unclamp and inspect the free-state shape, let it cool and then re-clamp.
Such a pause often saves time. If the part moves after unclamping you will see it before finishing, not after the final size is done.
Avoid overheating the metal
A dull tool and heavy cutting mode create two problems at once: they remove metal roughly and overheat the blank. While clamped the chuck partially holds the shape. After unclamping the heated zone cools and the size drifts.
So watch simple things: use sharp tools, do not exceed feed and depth without need, avoid repeated passes over the same spot and check the part after a pause or measurement rather than by eye.
A good example is a long shaft after rough turning. If you immediately finish it while it's hot and then remove it from the chuck, it may move noticeably. If you unclamp the shaft after roughing, check runout and let it rest, the picture will be more honest. Then it's clear what to correct: cutting mode, allowance or the blank itself.
If the part already shifts in the free state after roughing, the finish pass will not hide it. Better step back than produce scrap at the finish.
A simple example with a long shaft
On our shop a steel shaft about 600 mm long and 40 mm diameter was being turned. The blank was clamped short because they wanted to quickly remove a large allowance on one side. The operator made a heavy roughing pass and at that moment everything looked normal: in the chuck the part held size and runout did not seem dangerous.
The problem appeared after unclamping. The shaft was taken off, placed on V-blocks and measured along its length. Instead of a straight cylinder there was a slight taper. On the side where more metal had been removed the diameter reduced more. While clamped the chuck partially supported the shape and hid the deviation. Once the clamp was removed the shaft took a more natural position.
The cause was found quickly. The short clamping for that length provided weak support, and the large single-pass removal added load and heat. For a long part that was enough to produce a noticeable deviation after unclamping.
Correction started with simple steps. The shaft was re-mounted, a steadyrest added and the cut per pass reduced. Instead of one heavy pass they made several gentler ones. The cycle became a bit longer, but the part behaved more calmly and the taper after unclamping decreased.
Another measure helped. After semi-finish they did not immediately finish to size. They gave the shaft a short pause, re-mounted it and only then performed the finish. This stop does not remove internal stresses completely, but it often helps the part stabilize. Re-fixturing revealed the shaft's true position and the finish pass went more evenly.
This example shows where accuracy is usually lost: clamping a long part too short, removing too much metal in one pass, machining without a steadyrest at large overhang and rushing the finish without a pause and re-check.
If a shaft looks true only in the chuck and shifts after removal, the problem is usually not measurement. It's typically the clamping scheme, pass order and support during machining.
Mistakes that cause shifting
Runout after unclamping rarely comes from a single cause. It's usually the result of several habitual errors. The machine may show normal size in the chuck, but after removal the part changes shape by a few hundredths or more. For a batch that's enough to cause scrap.
One frequent mistake is over-tightening the chuck. The operator tightens the jaws more to eliminate vibration and avoid pulling out. On a short stiff blank this sometimes passes without consequence, but on a long or thin part the chuck itself creates deformation that appears after unclamping.
Trying to take the finish size on the roughing setup also causes trouble. If internal stresses haven't yet relaxed the finish pass looks fine only on the machine. After unclamping size and runout change.
With long parts the error is obvious. If you turn a shaft without a centre or steadyrest the cutter deflects the part and it springs back. Externally this looks like slight vibration or a barely noticeable taper. After removal the picture is completely different.
Another bad habit is removing all allowance from one side only. The metal heats unevenly, cutting forces act in one direction and internal stresses redistribute suddenly. The part behaves much more calmly when allowance is removed stepwise and without strong asymmetry across the section.
A separate mistake is checking size only while the part is clamped. It is easy to miss ovality, runout or diameter change because the clamp hides the real shape. A proper check is simpler than it seems: unclamp the part, let it cool and measure again in the free state.
Common signs of the problem include:
- size shifts after re-fixturing;
- the part is round in the chuck but oval outside the machine;
- the end of a long shaft shows changed runout after unclamping;
- a finish pass yields inconsistent results on identical blanks.
If these symptoms repeat, don't immediately blame the material or machine. First check clamping force, pass sequence and part support. In most cases the cause is there.
Quick checklist before finishing
Before the finish pass it's useful to stop for a minute and check basic things. This pause often saves size, roundness and shape, especially if similar parts have shifted after unclamping in the past.
If the blank runs out of tolerance, the finish pass will only mask the problem. After removal the deviation will appear even more. So before finishing go through a short list:
- check runout in the working zone;
- make sure the part sits in the jaws straight and without excessive pressure;
- assess remaining allowance at transitions;
- let the part cool after a heavy cut;
- place a support closer to a weak spot if the machining plan requires it.
Also review the pass sequence. If roughing removed a large volume on one side while material remains on the other, stresses redistribute unevenly. In that case add an intermediate pass rather than hoping for one precise finish pass.
Don't forget a control unclamp. The method is simple: machine the nominal size, unclamp the part, let it "settle", re-clamp with moderate force and check with an indicator what changed. On a long shaft this step quickly shows a shift of a few hundredths while it can still be fixed.
If any item raises doubt, don't rush the finish. Five minutes of checks is almost always cheaper than rework or scrapping finished parts.
What to do next on the shop floor
If runout after unclamping appears not on every batch, it's best to catch the problem at the machine. Usually a few precise checks help more than a long argument about causes: when the deviation first appeared, how the part was held and what changed compared to a good run.
Four steps are usually enough. First determine at which transition the shift first occurred: after roughing, after semi-finish or only after unclamping. Then compare a good and a bad part — clamping force, overhang, length held in the chuck, steadyrest or centre position. After that update the setup map: pass order, measurement points, support scheme and finishing conditions. If the issue remains, review the whole machining scheme. Sometimes the problem isn't one mode but that the current tooling or machine layout is unsuitable for the part's length, diameter or material.
A simple approach works well: collect a few facts for each part rather than argue about causes. For example, one batch of long shafts was turned with centre support and moderate clamping, another without support and with tighter jaws. After unclamping the difference showed up quickly, and finding the problem became easier.
If the situation repeats, involve more than the shop floor. To understand whether the current setup, tooling and supports are enough for a specific part it makes sense to contact the equipment supplier. For such analyses the EAST CNC blog and specialists on east-cnc.kz publish materials on machining, equipment reviews and practical setup and service recommendations.
FAQ
Why does a workpiece look straight in the chuck but shift after unclamping?
Because the jaws slightly alter the workpiece shape while clamped, and when the clamping is released the metal partially returns to its free state. Heating, uneven material removal and internal stresses in the blank make the effect stronger.
Which parts are most likely to shift?
Long shafts with large overhangs, thin-walled bushings, rings and parts with sharp diameter transitions are most prone to shifting. They have low stiffness, so even normal clamping and a heavy cut can change their shape.
What should be checked before the first cut?
First check radial and face runout, the blank seating and the condition of the jaws. Then evaluate overhang, weak zones of the part and decide where to leave a machining allowance for re-clamping.
Can the problem be solved by clamping harder?
Usually not. A stronger clamp can suppress movement during cutting, but on long or thin parts it itself creates deformation that appears after unclamping.
What order of passes works best?
Remove the main allowance in several roughing passes and do not finish to size on the first setup. After roughing, let the part cool, check it after unclamping and only then do a light finish pass.
Why pause after roughing?
A pause lets the part cool and settle into a more honest shape. If runout appears, you'll see it before finishing and can adjust mode, allowance or clamping accordingly.
When should a centre or steadyrest be used?
Use a centre or steadyrest when the shaft is long, the overhang is large, or the cut is near the free end. Place the support as close as possible to the cutting area and avoid over-tightening, which will bend rather than support the part.
How to machine thin-walled parts without runout?
For rings, bushings and thin cups use soft jaws sized to the part and apply moderate clamping force. This spreads the pressure and reduces crushing before cutting begins.
Why does re-clamping before finishing often help?
After roughing and unclamping the part shows its shape without chuck pressure. Re-clamping before finishing helps remove hidden runout and hit the target size more accurately.
What to do if runout repeats from batch to batch?
Compare a good and a bad part by clamping force, overhang, length held in the chuck, support position and the sequence of passes. If the issue persists, review tooling and machine layout for that length, diameter and material.