Part machining cost: what on the drawing drives the price
We review which chamfers, grooves, radii and tolerances unnecessarily raise the cost of machining a part, and how to simplify the drawing without harming function.
Why a drawing can significantly raise the part cost
The price of a part grows not only because of the material or the batch size. Often the drawing itself pushes the price up. If it contains unnecessary dimensions, tight tolerances and small features without a clear purpose, the shop spends more time and the part doesn’t perform any better.
The machine cuts metal quickly. What costs more are the setup, adjustments and inspection. Sometimes an extra 10 minutes are spent not on cutting, but on achieving a size, changing a tool, or rechecking the part after an operation.
Drawing manufacturability directly affects cost. One unnecessary dimension can require a separate pass or even flipping the part. On paper that’s a small thing. In production it’s another setup, another measurement and another risk of scrap.
Tight tolerances also raise the price fast. If an exact dimension is specified where the part would work fine with a wider tolerance, the operator spends more time dialing in the size and inspection takes longer. In small runs this is especially visible: preparation can sometimes cost more than the cutting itself.
A nonstandard feature almost always brings extra expense. The shop may need a different insert, drill, toolholder or a special program. Even a seemingly simple detail changes the processing route if the usual tool can’t do it.
Cost usually increases in one predictable way:
- the drawing requires more setups;
- the operator spends more time adjusting sizes;
- the shop changes tools more often;
- inspection takes longer.
A simple example is a bushing used as a spacing sleeve. Its critical features are length, outer diameter and the fit of the hole. But the drawing added a precise chamfer with a specified angle, a narrow groove and a fine surface finish on an end face that isn’t mated to anything. The part remained a bushing, but operations multiplied and the price went up.
A good drawing isn’t one with more dimensions. A good drawing shows what really matters for part function and what can be simplified without loss of performance.
Chamfers and radii that add unnecessary minutes
In practice machining cost often grows because of small details that look harmless on a drawing. Chamfers and radii are a typical example. They are frequently added “just in case,” and the shop then spends extra time on each tool pass.
A common scenario is a chamfer on every edge. If the part only fits into an assembly at two locations, chamfers are needed only where they help assembly or remove a sharp edge. When chamfers are everywhere on a shaft, bushing or flange, the operator makes more entries and the programmer adds unnecessary transitions.
Even more costly is a set of different chamfers on one part without a clear reason: 0.5 x 45° on one face, 1 x 45° on another, then 0.8 x 30°. It can be done, but the shop must modify the program, change tools more often and inspect more dimensions. If all chamfers serve the same purpose, it’s better to specify one common size.
Very small chamfers also add extra minutes. Sizes like 0.1 x 45° or 0.2 x 45° are hard to hold reliably. Slight tool wear, a burr after cutting, or a minor offset already change the result. As a result the time is spent not on the chamfer itself but on adjusting the process and additional inspection. If the exact value doesn’t affect function, it’s wiser to specify a standard edge break or deburr within a clear range.
Radii present similar problems, especially in internal corners. A small radius requires a thin or special tool. Such a tool runs less rigidly, needs lower feed rates and wears faster. If an internal corner isn’t part of a precise fit, increase the radius to a standard size that a regular tool can handle.
A simple approach helps here:
- keep chamfers only where they are needed for assembly, safety or a fit;
- don’t mix multiple chamfer sizes without reason;
- avoid specifying extremely small chamfers unless required;
- make internal radii compatible with standard tooling.
On a housing part an engineer had specified 12 identical chamfers on all outer edges. After review they left 4 — only at assembly points and where a human touches the edge. The part’s function didn’t change, but machining became noticeably simpler.
Grooves and recesses that increase cost
Grooves and recesses seem minor, but they often consume extra time. If a slot is narrow, a standard turning insert won’t fit. The machinist installs a dedicated grooving tool, performs an extra setup and cuts at lower feed rates.
So the price rises because of a few millimeters that barely affect part function. In a production run this is even more visible: extra seconds per part quickly turn into hours of machine time.
A common case is a groove “just in case” next to a fit. The designer thinks it will ease assembly. But if there is no seal, retaining ring or exit for a tool, the groove does nothing useful. The shop still spends time on a separate pass, checks groove width and deburrs. In a simple part this operation easily becomes one of the most expensive in the cycle.
Problems also arise when a recess is made deep and placed near a shoulder. After metal removal the wall loses stiffness, the tool starts to deflect, and a long blank can vibrate. The operator reduces feed, performs more finishing passes and checks the size more often. Sometimes one such recess adds more time than machining the neighboring diameter.
Another common issue is dimensions that don’t match standard tooling. If the drawing shows a groove 2.7 mm wide and 5.3 mm deep without a clear reason, the shop must find a workaround: use a special tool, make several passes instead of one, or spend longer dialing in size and shape. Each step raises the price.
Standard sizes help not only the shop. There are common tools for them, predictable cutting modes and fewer surprises at startup. Therefore every groove should have a clear purpose. If it’s not for a seal, retaining ring, tool relief or a real assembly clearance, it’s better to remove it at the drawing stage.
Tolerances and surface finish with no benefit
More often a part becomes expensive not because of its shape but because of unnecessary precision. The designer applies a strict tolerance “just in case,” and the shop then spends time on extra passes, tool selection and lengthy inspection. The result: higher cost without better part performance.
The most common case is a fit tolerance on a surface that doesn’t mate with anything. If a diameter doesn’t go into a bearing, bushing or housing with interference or clearance, it rarely needs high accuracy. A free surface usually tolerates a wider tolerance.
The same happens with surface finish. Drawings often require a very fine finish on a hidden face that doesn’t participate in sealing, locating or sliding. The shop still brings that face to the required value even though it doesn’t affect part function.
It is especially costly to apply the same tight tolerance across an entire drawing. It’s easier for documentation, but in production it creates extra work. The operator must set cutting modes more precisely, measure more often and sometimes remove the part from the machine for intermediate checks.
Inspection costs money too. If a dimension is specified too tightly, it often can’t be checked with a caliper. A micrometer, gauge or a more complex measurement method is required. In small runs, checking a couple of sizes can cost nearly as much as the machining itself.
A simple rule is: make only those surfaces precise that truly affect assembly and part function. Usually these are fits, datum surfaces, sealing zones and sliding interfaces. The rest is better specified without unnecessary safety margins.
Before releasing a drawing, quickly ask yourself:
- does this dimension affect assembly or not;
- will anyone use this surface finish in the part’s function;
- can the tolerance be relaxed one or two grades without risk;
- won’t inspection cost more than the operation itself.
How to review a drawing before sending it to the shop
Before handing a drawing to production it’s useful to do a short manufacturability check. It often takes 10–15 minutes and the savings per part can be significant — especially for turned parts with many small chamfers, grooves and “pretty” dimensions.
First, separate the functional surfaces from all others. Functional surfaces typically include fits, bearing faces, sealing seats, threads and surfaces that actually affect assembly. If a cylinder doesn’t mate with anything, it rarely needs a tight tolerance or a fine finish.
Next, remove requirements added “just in case.” A common mistake is applying the same high precision class across nearly the entire part. For the shop that means more passes, more measurements and a higher scrap risk. For the part itself there may be no benefit.
Then standardize geometry to typical sizes. If a part has chamfers 0.3 x 45°, 0.5 x 45°, 0.8 x 45° and 1 x 45°, the machinist spends time on unnecessary setups and inspection. If function permits, leave one or two typical variants. The same goes for grooves: three different widths for three different inserts is almost always more expensive than a single standard groove.
Next, look at the part from the shop’s point of view. Will the tool reach the location? Will it hit an adjacent shoulder? Can the inspector measure the dimension normally? A narrow deep recess with a small radius at the bottom can look neat on screen but almost always raises questions in machining.
Here is a short checklist that really helps:
- what actually matters for assembly;
- where can tolerances be relaxed without losing function;
- can chamfers, radii and grooves be unified;
- does a tool reach all places without special fixtures;
- how will the shop measure each tight dimension.
If any dimension raises a debate, discuss it with a technologist before launch. In practice such a conversation is almost always cheaper than revising the drawing later.
Example of a part simplified without losing function
A good example is a typical shaft where only one bearing fit was actually functional. Other surfaces didn’t participate in precise locating or load transfer. Yet the drawing made it look like every edge affected assembly.
The shaft had chamfers almost all around, even on free ends and transitions that no one used during assembly. A narrow groove was added near the shoulder. The free length after the fit was held too tightly even though that size didn’t change the assembly behavior.
On the machine this resulted in extra operations. The turner had to machine several edges separately, carefully cut the narrow groove with a thin tool, and spend more time achieving a size where a normal tolerance would have been fine. Inspectors then measured more sizes than were actually needed for assembly.
After reviewing the drawing they kept only what truly mattered for part function:
- one chamfer at the entrance to the working fit;
- a standard tolerance on the free length instead of an overly tight one;
- a simple transition at the shoulder without the narrow groove;
- inspection only of dimensions that affect fit and axial position.
The part’s function didn’t change. The bearing still fit correctly, the assembly went together without extra effort, and the shoulder still provided the stop. But machining became simpler: fewer tool changes, fewer finishing passes and lower scrap risk due to secondary, unnecessary features.
Cases like this show a simple fact: cost is often driven not by large dimensions but by small drawing decisions. One unnecessary chamfer doesn’t seem like a problem. Five such chamfers, a narrow groove and an extra tight dimension add minutes to every part.
Errors that repeat again and again
The most common mistake is simple: someone takes an old drawing, tweaks a couple of dimensions and sends it to the shop. Along with the required geometry, old chamfers, grooves, tolerances and finish requirements that were needed for a previous version of the product get carried over. The shop doesn’t argue — it just counts time, tools and inspection.
You see it in small details. A radius remains that looks good in the model but the machine prefers a standard tool entry. A complex chamfer appears on an end face though a standard edge break would suffice. The designer sees a neat shape; the technologist sees an extra pass and another check.
Another recurring error is copying requirements from a catalog or someone else’s documentation without linking them to this part’s function. If a handbook lists a tight tolerance for a bearing fit, that doesn’t mean the same tolerance is needed on an adjacent recess or on a secondary surface. The same with surface finish: it’s common to find strict requirements almost everywhere on a drawing even though only one or two surfaces matter.
One more problem shows up in the shop: a dimension was specified but no one thought how to measure it. On paper everything is tidy. On the floor it turns out the size is in a narrow groove unreachable by standard tools, or the tolerance is so tight a special gauge is required. If inspection costs more than machining, the drawing is already problematic.
Before release it helps to do a simple clean-up: remove leftovers from old templates, redefine functional surfaces, replace complex small details with tool-friendly forms, and agree in advance how each strict dimension will be measured.
What to do next
After such a review it usually becomes clear: machining cost rises not because of the whole geometry but because of a few small drawing choices. Fix the places where the shop spends extra time on an additional pass, tool change or inspection — not the “beauty” of the part.
Start with two parts that already look expensive. Break each down by operation: rough turning, finishing pass, cut-off, groove, chamfer, size check, tool change. It quickly becomes obvious which small feature adds five minutes to the cycle and raises the price of the whole batch.
Then list habitual requirements the team applies: a general tolerance “just in case,” a surface finish finer than needed, an extra chamfer “to look neat,” or a groove for a tool that’s no longer used. If a requirement doesn’t affect fit, assembly, wear or safety, reconsider it.
The same part behaves differently in a single order and in a run of 500 units. For one piece an extra operation may be acceptable. For a series it quickly becomes significant money and hours of machine time.
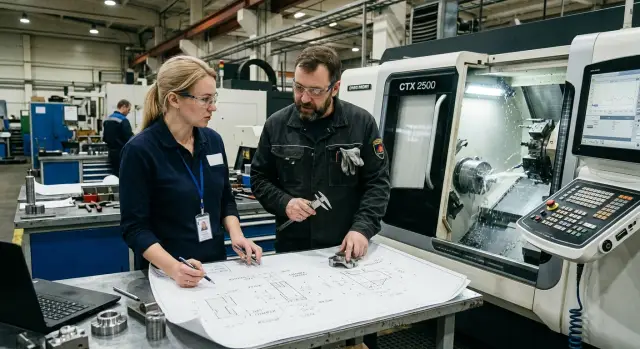
If you are choosing a CNC lathe or evaluating whether a drawing suits a shop’s capabilities, resolve these questions before launch. At EAST CNC, the official representative of Taizhou Eastern CNC Technology Co., Ltd. in Kazakhstan, this is done in practice: they help select equipment, commission it and provide service, so unnecessary drawing requirements are spotted before machining even starts. Such a conversation often saves more than trying to reduce cost after the estimate is made.
FAQ
What on a drawing most often makes a part more expensive?
Most often the price is driven not by material or diameter but by extra requirements on the drawing. Typically these are tight tolerances where they aren’t needed, multiple different chamfers without purpose, narrow grooves, and dimensions that require an extra setup or special inspection.
When is a chamfer really needed and when is it not?
Keep a chamfer where it helps assembly, removes a sharp edge, or protects a fit. If the edge isn’t touched and the surface doesn’t mate with anything, the chamfer often only adds an extra machining pass.
Why do tiny chamfers like 0.1 x 45° sharply increase cost?
Because such a small chamfer is hard to hold consistently. Tool wear, a burr after cutting, or a slight misalignment quickly change the result, so the shop spends time adjusting the process and checking the feature. If the chamfer size doesn’t affect part function, it’s better to specify a general deburring or edge break within a clear range.
Which grooves can usually be removed without harming the part?
First ask what it’s for. If the groove does not serve a seal, a retaining ring, a tool relief or an actual clearance in assembly, it’s better to remove it. Narrow grooves near a fit, often added “just in case,” are commonly unnecessary and still force the shop to do an extra pass, check the width and deburr the groove.
On which dimensions is it safe to loosen the tolerance?
You can relax tolerances on free surfaces that don’t participate in fits, locating, sealing or sliding. A wider tolerance there normally won’t change how the part works, but it lets the shop reach the size faster and spend less time measuring.
Why make chamfers and radii the same?
Uniform chamfers, radii and grooves simplify the program, reduce tool changes and cut down inspection. If a part has four similar but different chamfer sizes, the machinist wastes time on small adjustments and there is often no benefit to the assembly.
Where is surface finish most often specified unnecessarily?
Only demand a fine surface where the part slides, seals, or bears on another surface. A hidden face or a free diameter usually doesn’t need a very fine finish; specifying unnecessary smoothness raises the price immediately.
How can you tell if a dimension will be difficult to measure?
See whether the inspector can reach the feature with standard measuring tools. If the size sits in a narrow groove, behind a high shoulder, or requires a special gauge, inspection becomes slow and expensive. A good drawing considers not just machining but also practical measurement.
Should I show the drawing to a technologist before launching?
Yes — that conversation almost always pays off. A technologist can quickly spot where a tool will have trouble, where a tolerance is too tight, and where the drawing will cause extra operations. If you are still choosing a machine or planning the launch, discuss these points before the cost estimate is final.
What should I do first if a part is already too expensive?
Start by breaking down an expensive part into its operations. Look separately at rough turning, finishing passes, cut-off, groove, chamfer, size inspection and tool changes. Then remove requirements that don’t affect fit, assembly, wear or safety. This simple step usually reduces cost without changing function.