Turning thin rings without ovality: which method to choose
Turning thin rings without ovality needs precise clamping and a considered process. We compare soft jaws, mandrels and rough re-clamps.
Why the ring goes oval
Ovality in thin rings almost always starts with insufficient stiffness. The part looks simple, but a thin wall easily springs. A small chuck force is enough to change the circle's shape slightly. While the ring is clamped this isn't always noticeable. After release the metal springs back and the size shifts.
There is a second reason: during machining the ring becomes weaker. While there is still extra stock the wall holds better. When the cutter removes metal stiffness drops. So the first cut can go smoothly, but the next one at the same settings already produces ovality. The setup is the same, but the part behaves differently.
Heating also interferes. During cutting a thin blank heats up faster than a massive part. Metal expands unevenly, the ring starts to move, and after cooling the shape changes again. Because of this, a measurement taken immediately after a cut often doesn't match a measurement taken a few minutes later.
This leads to frequent confusion in inspection. In the chuck the ring can show an almost perfect size. Remove the part, put it on the bench or on a checking mandrel—and ovality appears. This is not a measuring error. The jaws were holding the wall in one state; without clamping the metal returned to another.
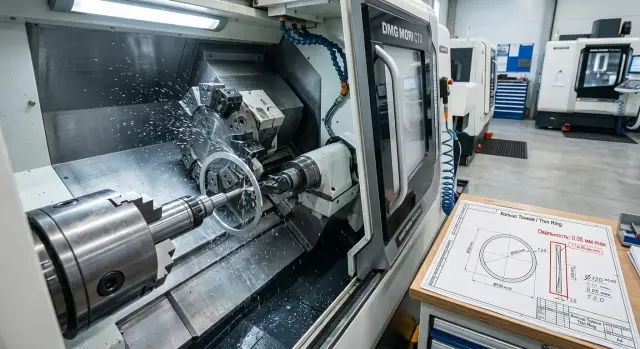
A common shop scenario looks like this: a 180 mm ring with a thin wall is bored, the dial indicator shows everything fine, but after removal an oval of 0.08–0.12 mm appears. Usually more than one cause is involved. Clamping deformed the part, removing stock reduced the section, and heat added distortion.
Ovality in thin rings rarely appears by chance. Several small factors add up. Separately they may be barely noticeable, but together they're enough for a circle to stop being a circle.
What determines the clamping scheme
Choose the clamping scheme not by habit but by how the ring behaves under load. The same clamp gives different results on an 80 mm ring and on a 300 mm ring, even if the material is the same.
First look at diameter and wall thickness. The larger the diameter for a thin wall, the easier the part deforms at clamping. If the wall is thin and stock remains, a rigid clamp often gives a good size on the machine and ovality after release.
Ring width also changes the picture. A narrow ring with a short support length holds shape worse, especially if the jaws press only on limited areas. A wide ring usually tolerates clamping better, but only with an even support and without local pressure.
Next check tolerances. If the drawing requires tight roundness and runout, the margin for error is minimal. Then "clamp gently" is not enough. You must understand in advance how much deformation the clamp will cause and what will happen after release.
Material matters. Aluminum, stainless and ordinary steel behave differently. If the blank came from tube stock or retains heat treatment stresses, the ring can distort even with light metal removal. In that case pick the clamping scheme together with the pass order, not separately.
There is also a practical question—batch size. For one or two parts you might choose a simpler method to avoid spending a shift on tooling. For a series consider setup time, repeatability and scrap risk. For a large batch a special fixture pays off faster.
Before launch it's useful to quickly check five things: diameter-to-wall-thickness ratio, ring width and real support length, tolerance for roundness and runout, material and blank history, and batch size. At this stage mistakes are cheap. After the series starts they are not.
In shops that make parts for automotive or construction equipment the common miss is the same: the process engineer looks only at the size after the cutter and underestimates the part's behavior after release. For thin rings this almost always ends with extra re-clamps or scrap.
When to choose soft jaws
Soft jaws aren't for every ring, but in their area they work very well. Typically choose them for parts with medium stiffness: the ring already holds shape but still reacts to extra clamping. In that situation soft jaws often give a cleaner, more predictable result than a quick clamp in standard hard jaws.
Simple rule: the ring should spring a little but not collapse under small force. If the part is very weak, soft jaws won't save it. If the ring is stiff enough, they often allow both roughing and finishing without trouble.
Choose them when you need quick repeatable setups, can bore the jaws precisely to the working diameter, and the part rests on a wide area rather than a thin lip.
The main rule is straightforward: bore the jaws to the real clamping diameter, not "roughly around it." If the bore is the wrong size the contact will be uneven. The ring will be misaligned in the chuck and after finishing that becomes oval.
Don't over-tighten "just in case." Soft jaws work better with low, repeatable force. Once you find a safe clamping value, keep the same setting for the whole batch. Excessive tightening is often what ruins thin rings.
Another often-missed point: the support should be wide and even. If the ring contacts the jaw in a narrow strip the clamp becomes local and the form drifts. Well-bored soft jaws spread the load over more area so the part behaves calmer.
After the first trial cut it's better to remove the part and check shape immediately. Diameter alone is not enough. Check ovality, repeat the setup and compare results. If the shape changes already at the trial, the series won't fix itself. Change the jaw bore, clamping force or machining route.
When a mandrel is needed
A mandrel helps when external clamping already damages the part's shape. If a thin ring visibly changes after being squeezed in the jaws, the finish size often shifts right after release.
This happens with a thin wall, a large diameter-to-thickness ratio and tight roundness requirements. The jaws hold the part at several points and the ring becomes temporarily not a circle but slightly "triangular." The cutter doesn't always notice this, but ovality appears after removal.
An expanding mandrel is usually used for the finish pass. It supports the ring by the ID and distributes force more evenly. For preserving shape this is often safer than squeezing the part from the outside—even with soft jaws.
If the route allows, use a fit with small interference. Too tight a fit deforms the thin-walled part from the inside. Too loose a fit gives micro-slip and hurts runout. You need a calm, predictable contact without excess force.
Before running a batch check simple things: no chips or burrs on the mandrel seat, a clean ring face that rests on the base, the mandrel's own runout without the part, and whether the part shifts after a light release and re-clamp.
In practice small details cause many problems. One layer of oily dirt or a tiny chip on the face easily adds tenths to runout, and the operator then searches for the cause in cutting regimes.
A typical example: after roughing the ring is put on an expanding mandrel and a small finish allowance is removed in one setup. If the fit is clean and the mandrel runout was checked beforehand, the geometry is usually more stable than with repeated external clamping.
On CNC lathes this route is especially convenient for series where repeatability matters. The mandrel needs careful preparation but often yields stable geometry without endless adjustments.
Why perform rough re-clamps
A rough re-clamp is needed when the ring easily changes shape under clamping and cutting. If you remove all the stock in one setup the part may look round in the chuck and oval after release. In such cases a rough re-clamp is more reliable than trying to fix the problem only by cutting parameters and clamping force.
The idea is simple: on the first setup remove the main stock but don't reach the finish size. Leave margin for form change and for how the metal will release internal stresses after unclamping. This is not overcautiousness but standard shop practice for thin walls.
After the first re-clamp check the part. Measure diameter in several sections and look for ovality, taper or local waviness. Even a few tenths difference shows that the clamp acted too harshly or the stock was removed unevenly.
The second clamp starts from a calmer baseline. The first roughing removes some stresses, and afterward the ring often behaves more stably. Because of this the finish cut runs truer and the size after release is closer to what you saw on the machine.
This route is most useful when the ring is thin and wide across the axis, the allowance is large and removed asymmetrically, the material is sensitive to release deformation, or roundness tolerance is tight.
The downside is cycle time. You need time for an extra setup, a check after the first pass and sometimes a base correction. But this is almost always cheaper than a batch ruined by ovality that can't be corrected without losing size.
In practice it looks simple. The turner first removes the bulk of metal leaving a margin, lets the part relax, does a check and only then moves to the second clamp. For thin, wide rings this approach is calmer than trying to finish everything at once.
If the drawing already makes you doubtful, don't save on the rough re-clamp. One extra setup often saves more parts than small tweaks to feed and rpm.
Example from the shop
A shop machined a thin large-diameter steel ring. The external diameter was almost on target but after the finish pass they removed the part from the chuck and got about 0.08 mm ovality. While in the jaws everything seemed acceptable; after release the geometry shifted.
At first the operator did the obvious: reduced clamping force. Sometimes that helps, but here it didn't. The ring was too compliant and even soft jaws changed form on clamping. On thin parts the difference between "holds" and "deforms" can be tiny.
They didn't rewrite the whole route—only adjusted where needed. After roughing they left a finish margin, removed the part and re-measured without clamp load. Then the picture clarified: after roughing the ring could still be corrected to size, but the finish pass in the jaws already ruined the form.
How they changed the route
They moved the finish pass to a mandrel. The ID allowed supporting the ring more calmly than squeezing the OD in the chuck. The mandrel didn't remove all risk by itself, but provided a more even support and eliminated excess circumferential squeeze.
Cycle time increased. One extra re-clamp, an additional check and a more careful finish setup were added. But the ring came out truer and the ovality after removal fit the tolerance. They lost a bit of time per part but saved much more on rework.
This case shows the problem's nature. If a part holds size only while clamped, it's not a single feed or speed issue. Usually you must change the scheme: leave a margin after roughing and take the finish size where clamping disturbs the form least.
How to choose the route
Decide the route for a thin ring by geometry, not habit. First check wall thickness, ring width and roundness tolerance. If the wall is thin and tolerance is tight, the cost of error rises immediately: the part may go oval on the first clamp.
Typical logic is simple:
- Compare wall thickness and width. A narrow ring with a thin wall holds worse in the chuck. A wider part often tolerates clamping more calmly.
- Determine where the ring is stiffer. Sometimes external clamping in soft jaws works fine for roughing. Sometimes the form holds better on a mandrel—especially for finishing the OD.
- After roughing don't remove all allowance at once. If the metal moves, leave margin for finishing. Often 0.2–0.5 mm per side is enough, but exact values depend on material and size.
- Check roundness right after the first metal removal. Don't wait until the end of the cycle. One quick check shows if the clamp pulls the part out of round.
- Put the finish pass on the calmest clamp. If the ring runs truer on a mandrel, finish there even if roughing was done with soft jaws.
In practice it looks simple. Suppose you have a 120 mm ring with a 3 mm wall and 16 mm width. If you clamp it hard and remove most stock at once, the form will drift. A wiser plan: light roughing in soft jaws, leave margin, check roundness, then move to a mandrel for a slow finish cut.
If the ring is wider and the wall thicker the route can be shorter. Then soft jaws often cover both roughing and finishing. If the part is thin and capricious, a mandrel usually gives a steadier finish.
Where mistakes happen most often
Scrap in thin rings usually comes not from the machine but from a few habitual choices by the setter. The most common mistake is simple: jaws are tightened "just in case." The ring looks held but in the clamp it already changes shape. After removal the size seems close, but the circle is already off.
With soft jaws there's another trap. Sometimes they are bored without the actual clamping load that will be used in production. At no load the geometry is one thing; under load it is another. For a thin-walled ring even that small difference can produce ovality in the finish pass.
With a mandrel the usual error is different: they check the diameter fit but forget the face support. Then the ring sits unstably, tilts a bit and springs during cutting. From the outside it looks like the machine is "drifting size," but the cause is the support scheme.
Many problems start after roughing. If you leave too little allowance the finish pass can't fix deformation introduced on the first clamp. The cutter will simply reproduce the already ruined shape.
One more typical mistake seems minor but breaks the setup. The operator measures a hot part immediately after the pass, sees a "floating" size and starts adjusting. A few minutes later the ring cools and the picture changes. The next part drifts further. If you pause a minute, reduce excess clamp, check jaw bore under working load and let the part cool before measuring, half of such problems disappear.
In the shop you often see this: tighten more, cut quickly, measure immediately, adjust. The next piece goes even worse. Taking a moment to stabilize clamps, check tooling and wait for cooling saves many headaches.
Pre-run checks
Ovality often arises not from the cutter but from small things missed before the first part. It's better to spend five minutes checking than to trace scrap root cause across the whole batch.
Start with the clamp. If a working clamping force was already determined for the part, use that recorded value rather than "about the same as last time." For thin rings even a small force increase moves the size.
Then check tooling. Soft jaws or mandrel should have no significant runout at the working diameter. If jaws were bored long ago or the mandrel was moved recently, it's better to run the dial than to hunt strange geometry after a second re-clamp.
Also review the route. The process plan should state the allowance after roughing for the next clamp. If allowance is not recorded the operator decides on the fly and that almost always creates part-to-part variability.
A short shop check is enough: fix clamping force, check jaws' or mandrel's runout, confirm the allowance after roughing and plan roundness checks after each re-clamp, not only at the end.
One more often-ignored point: measuring a thin ring immediately after cutting is risky if the part is still warm. Metal cools, stresses change, and size can move several tenths. So at least the first piece after a regime change should be measured after cooling.
If any of these checks are missing, don't start the series. Fix clamping, tooling and allowance first, then cut metal. The sequence is boring but it usually preserves ring form and saves rework time.
What to do next
If you need to machine thin rings without ovality, make decisions based on measurements, not habit. The same size can be obtained in different ways, but scrap levels and cycle time will differ.
Compare three things: how many parts go to scrap, cycle time, and the cost of retooling. Soft jaws often give a fast start, but on compliant parts the form can "wander." A mandrel tends to give better geometry but needs more setup. A route with rough re-clamps looks longer but significantly reduces the risk of ruining a whole batch.
Test on one trial part. Run the route, take measurements after each clamp and see at which stage the ring goes oval. Then you immediately see where runout arises and which option holds form steadier.
If the difference between options is small, choose the one simpler and faster for the operator. If the difference is significant don't skimp on the correct clamping scheme. A couple extra minutes preparing often cost less than constant scrap and manual fixes.
Sometimes the issue is not the route but the machine capability. In such cases discuss the task early with the machine supplier. EAST CNC, the official representative of Taizhou Eastern CNC Technology Co., Ltd. in Kazakhstan, supplies CNC lathes for metalworking and assists with selection, commissioning and service. For series parts this is often more important than a one-time parameter tweak.
If the ring will go into production, plan not only the first launch but ongoing work: check the first batch, monitor route stability and maintain the equipment. Then the result relies not on a single lucky piece but on the whole batch.
FAQ
Why does a thin ring become oval after removal from the chuck?
Most often the clamp itself deforms the ring. While the part is in the chuck the change is barely visible, and after release the metal springs back and the circle becomes oval. This effect is often amplified by material removal and heat during cutting.
If the size in the chuck is correct, is the part already good?
No. This is a common situation for thin-walled parts. In the jaws the ring holds one shape, and without the clamp it returns to another. Always check the shape after removing the part, not only in the chuck.
When should I choose soft jaws?
Use them when the ring still holds shape but reacts noticeably to extra clamping. They work best if the jaws are bored precisely to the working diameter and you apply a small, repeatable clamping force.
In what cases is it better to switch to a mandrel?
Use a mandrel when external clamping deforms the part and ovality appears immediately after release. For finish passes it often gives a more even support—especially for large-diameter thin rings.
Is an intermediate rough re-clamp needed if the ring is very thin?
Yes. Often that's the correct approach. First remove the bulk of the stock but leave a margin, let the part relax and cool, check the shape, then take the finish size using a calmer clamping method.
How much allowance should I leave after the roughing pass?
A common guideline is to leave a small margin so the part survives release and the finish pass without losing shape. Often 0.2–0.5 mm per side is used as a starting point, but the exact value depends on material, ring size and how the part behaves after the first removal.
Can I just clamp the ring harder so it won't move?
No. Increasing clamping force usually causes hidden deformation. For thin rings, extra force almost always produces distortion. Better to find the minimum force that holds the part reliably and keep it constant during the run.
Why shouldn't I measure the ring immediately after the pass?
Don't rush. A warm part can show a size that changes after cooling. Let the ring cool a bit before measuring diameter, ovality and runout to get a reliable reading.
What should I check before starting a production run?
First check the clamping force, the runout of the jaws or mandrel, and cleanliness of seating surfaces. Make sure the process plan shows the allowance after roughing and that roundness checks are scheduled after each re-clamp, not only at the end.
How do I decide which route to take for my ring?
Look at wall thickness, ring width, diameter, roundness tolerance and material. If the part is relatively stiff, soft jaws may cover the whole process. If the ring is weak and goes oval after release, do the finish pass on a mandrel and don't skimp on a roughing re-clamp.