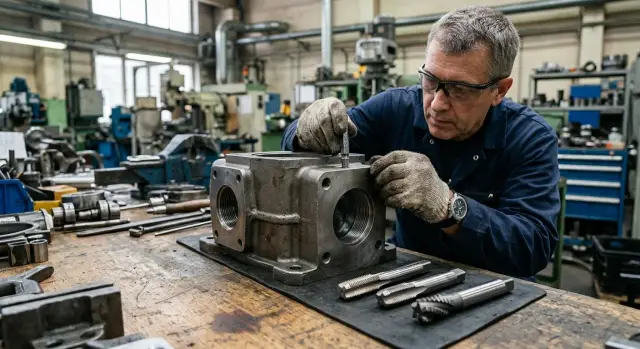
Common mistakes when machining threaded holes in housing parts
We review common mistakes when machining threaded holes in housing parts, compare taps, thread rollers and thread mills, and simplify the choice for the task.
Why threaded holes in housing parts often end up as scrap
A housing part forgives very little deviation. A hole often sits next to an edge, a pocket or a thin wall, and there is little material around the thread. Because of that, the tool has a harder time keeping the axis, and the outer thread turns take extra load.
Problems often start at the geometry stage. In a blind hole chips have almost nowhere to go. If depth is given without allowance, chips collect at the bottom, press against the tool and deform the profile. In soft alloys you see this immediately at the entry. In harder materials the defect sometimes only appears during assembly.
Thin walls tell a different story. The tool pushes, the wall shifts slightly, the hole loses shape, and the thread becomes uneven. From the outside the part may look fine, but the bolt runs tight or only engages some threads. For a pump housing, gearbox or medical assembly that's already enough to reject the part.
Usually a failure ties back to one of four reasons: chips can't exit a blind hole, the tool enters slightly off-axis, the drill gave the wrong diameter for the thread, or there was no depth allowance at the bottom.
An entry misalignment quickly ruins the first turns. If a tap, thread roller or thread mill enters off-axis, the entry gets torn and the thread drifts from the start. The measured size may look OK, but the fastener either won't sit or jams halfway in.
The last turns suffer just as often. Near the bottom the load increases and there's less room for chips. If the program, cutting mode or depth lack allowance, the tool tears off the final turns or leaves an undercut. The hole may seem acceptable from the outside, but such a thread fails quickly under load.
In a production run these small issues create the most costly scrap. The error repeats dozens of times until someone checks not only diameter and pitch, but also tool entry, chip evacuation and behavior at the bottom of the hole.
How a tap, thread roller and thread mill differ
The same thread size can be produced in several ways, and their scrap risk is different.
A tap cuts metal and forms the profile by removing material. It's familiar and fast, but it always produces chips. In a through hole that usually isn't a problem. In a blind hole chips often collect at the bottom, crush the last turns and sometimes seize the tool.
A thread roller works differently. It doesn't cut; it displaces metal to form the profile. There are no chips, so one common cause of scrap disappears. But rolling requires a ductile material, a precise pre-drilled hole and proper lubrication. If the hole is undersize, loads jump and the tool can fail in a single pass.
A thread mill forms threads along a path, gradually removing material. This makes it easier to control diameter, depth and tool entry. For an expensive housing part this is often more reliable, especially in blind holes where space at the bottom is limited.
To simplify: the tap is faster but produces chips. The thread roller removes chips from the equation but depends more on material and hole accuracy. The thread mill is slower but gives more control.
This is especially visible in blind holes. A tap suffers more from chip buildup. A roller doesn't have chips, but still needs room at the bottom and good lubrication. A thread mill usually behaves steadier: chips are small and depth can be stopped precisely before the bottom.
Breakages also look different. Taps often break suddenly and the fragment is hard to remove from a housing. Rollers are most often ruined by the wrong hole diameter and weak lubrication. Thread mills usually give a softer failure: size drifts or profile quality drops first, so you can notice it before the whole run goes bad.
When a tap is the calmest option
A tap works well where the process is stable and unchanging. If the thread is standard, the material consistent, the batch large and holes prepared accurately, a tap often causes fewer issues than more flexible but complex methods.
A tap itself isn't dangerous. Problems start when conditions around it are unstable: variable drill diameter, poor coolant feed, long gummy chips or lack of chip exit at the bottom. If those aren't present, a tap gives a short cycle and predictable results.
It performs best on standard threads that don't change for weeks. For a series of identical housing parts it's convenient: setup is simple, the program short, and an operator can maintain the same regime more easily.
Good materials for tapping are those that cut cleanly and don't produce long sticky chips. In aluminium alloys and steels with steady cutting behaviour the risk is lower if the hole isn't drilled oversize or undersize.
Another important point is where chips go. In through holes a tap almost always fares better. In blind holes it can still work cleanly, but only if depth allowance is provided, tool geometry suits the task and coolant actually reaches the cutting zone.
Before starting a series check a few simple things: the actual hole diameter, tool runout, wear of the first cutting edges, coolant feed and chip exit allowance. This takes minutes but often saves the whole batch. A worn tap rarely breaks without warning: first it tears the profile, then it heats up, and only after that it fails.
If the batch is large, threads identical and material behaves predictably while chips can evacuate, a tap typically remains the most straightforward and fastest solution. But if chips stick, sizes vary or the hole geometry is complex, its advantage quickly disappears.
When a thread roller performs better
A thread roller tends to deliver consistent results where the metal deforms and holds shape rather than crumbles. For housing parts it's convenient also because no chips remain in the hole.
This is especially noticeable in blind holes. A tap can collect chips at the bottom and ruin the final turns. A roller removes that risk and usually produces a cleaner threaded surface.
It performs best in ductile materials: aluminium alloys, low-carbon steels and some stainless grades. If the joint will be assembled and disassembled often, a dense rolled profile is an advantage.
But the roller has a strict requirement: the pre-drilled hole must be very accurate. If the diameter is even slightly undersize, the roller will displace too much metal. Torque rises, the threaded zone heats up, tears appear and the size drifts.
Lubrication matters a lot here. Rolling needs not just any coolant but a medium that helps metal flow. With weak lubrication the metal begins to stick to the tool and stability is lost fast.
In practice ask: is the material ductile or brittle? Does the hole hold size consistently? Is chips-free bottom required? Does the machine hold speed and feed steadily? Is the coolant suitable for metal deformation? If the answers are yes, a roller usually provides a calm process.
Limitations exist. In brittle alloys a roller can give a torn profile instead of a dense thread. In thin-walled housings the surrounding metal can spread and the mating geometry shifts or cracks appear at the edge.
So for cast aluminium housings, thin walls or questionable alloys test a few parts first. Check not only the pass of the thread gauge but also outer dimensions around the hole. Problems often hide there.
If the material is ductile, the hole prepared precisely and chips at the thread are undesirable, a roller often outperforms a tap. It demands discipline on diameter and lubrication, but in production this often pays off by reducing scrap.
When a thread mill is worth the time
A thread mill is needed where the cost of an error exceeds the few extra seconds per hole. If the part is expensive, a broken tap inside a hole can scrap the part or make repair lengthy. A thread mill is often calmer in that sense: even if it fails, it rarely jams inside like a broken tap.
This is particularly important for housing parts. One ruined hole can compromise the basic geometry of the whole assembly. So the fastest method is not always the wisest.
In blind holes a thread mill has another strong advantage: precise depth control. It's easier to keep the required number of turns and avoid hitting the bottom. When assembly involves sealing or precise fits, this is not a small detail.
A thread mill shines in four cases: the part is expensive, the hole is blind and short, diameters or pitches change frequently, or the run is small and flexibility matters more than the shortest program.
There is also a practical benefit. If you need M10 today, M12 tomorrow and a nonstandard pitch later, one tool can sometimes cover multiple tasks. For a cell with frequent changeovers that's handier than keeping a set of taps for every size.
But a thread mill requires a decent machine. If the spindle and axes don't hold interpolation well, the surface will be torn and size will wander. Here not only the tool matters, but also the machine's behaviour on circular paths.
Simply put, a thread mill is not for beating cycle time records. It is for where scrap is expensive and process control is worth the extra 10–20 seconds per hole.
How to choose a method without arguments
Most mistakes are made not at the machine but at the choice stage. A few checks before start make things clear.
First look at the material. Ductile materials often suit rolling. Brittle or harder materials are usually easier with a tap or a thread mill.
Then evaluate the hole type. In through holes a tap is often the fastest because chips have somewhere to go. In blind holes choices are stricter: consider the bottom, chip removal and allowance for tool entry.
Next check the actual depth. Drawing nominal depth rarely equals working depth. Taps and rollers have run-in portions that don't form a full profile immediately. If allowance is small, the tool will hit the bottom before making a proper thread.
After that verify thread requirements. For a standard tolerance and a mass cycle a tap often suffices. If the material is ductile and a smooth, chip-free thread is needed, look at a roller. If tolerance is tight, pitch nonstandard or the part expensive, a thread mill is usually safer.
Only then count money. Not just seconds per cycle, but the full cost of an error. For a simple part extra 3–5 seconds may matter more than rare scrap. For a housing in automotive or medical assembly one ruined blank often costs more than the savings from a faster tool.
If doubts remain after these checks, choose the option that's easiest to keep stable in series rather than the fastest. On the shop floor that choice usually proves cheaper.
What most often ruins a thread
Scrap rarely appears by itself. Usually it's set up before the first pass.
One common mistake is taking the drill diameter from a table and not testing on the actual material. The table is a starting point, not a final answer. The same nominal size behaves differently in aluminium, cast iron and gummy steel. If the material mushrooms or springs back, the thread quickly goes out of tolerance.
Another frequent issue is the wrong tap choice for a blind hole. People check only size and pitch and remember chip behaviour too late. If there's almost no room at the bottom, chips pack in, break the edge and spoil the last turns.
With rolling the error often happens earlier. Rolling needs one specific pre-drilled diameter; cutting uses another. If you drill as for tapping but try to roll, the roller will displace too much metal. Torque rises, heating occurs and turns tear. The opposite mistake — too large a hole for rolling — gives a weak profile.
A small but common cause is missing chamfer at the entry. Without it the tool grabs the edge, shifts the first turn and leaves a torn entry. On the drawing it looks trivial, but in assembly the first turn often decides whether the fastener starts smoothly or begins to bite.
Trying to push cycle time too hard also causes trouble. Excessive feeds and torque quickly create scoring, synchronization loss and microcracks on the edge. This is especially visible on fine threads and deep holes.
Before a run check five things: batch material, actual drilled diameter, chamfer, depth allowance and cutting regimes for the chosen tool. This short check usually saves more time than later troubleshooting scrap on finished housings.
Example for a real part
Imagine an aluminium housing with several blind M8 holes. The part is almost finished: surfaces machined, fits established and machine time already spent. If the threads fail, it's not a single hole lost but the whole housing.
A tap seems the fastest choice: short cycle, simple program. But blind holes in aluminium have an unpleasant tendency: chips go down, hit the bottom and start crushing the final turns. Sometimes a gauge still passes, but the bolt runs tight in assembly.
A thread roller removes the chip issue, which is a big plus for aluminium. Threads come out cleaner and denser, and the hole bottom stays calmer. But rolling requires very consistent drilling. If the pre-drill varies even slightly, torque and final profile change.
A thread mill is usually slower per hole. But it lowers the risk when the housing is expensive and the batch small. Chips evacuate easier, size can be finely adjusted, and if a problem occurs the operator often loses less than when a tap breaks inside a blind hole.
In practice the decision comes down to three questions: how many parts in the run, how steady is the drilling and how much does one spoiled housing cost. If the run is large and drilling stable, a roller often wins. If maximum speed and chip exit are assured, use a tap. If the housing is expensive and rework almost impossible, a thread mill usually reduces risk.
Pre-run checks
Spend 15 minutes on the first part before starting a run. Very often the issue lies not in threading but in hole preparation.
First check diameter and straightness. If the drill deflects or size fluctuates, a tap will cut off-axis, a roller will spike load and a thread mill will produce an uneven profile along the depth.
Then look at the chamfer. Too large a chamfer eats the first full thread. Everything may look tidy externally, but the fastener starts catching later or holds worse than the drawing expects.
Check tool overhang and depth allowance separately. Excessive overhang adds deflection and vibration. Too little allowance to the bottom causes a simple but costly failure: a tap hits the bottom, a roller deforms the entry, and a thread mill misses the final turns.
Don't guess about coolant and chip evacuation. On a dry test everything may seem acceptable, but in a full run chips can collect at the bottom. For a tap this is one of the most frequent causes of torn profiles.
A quick good check: measure the hole on the first parts, ensure the chamfer doesn't remove the first working thread, compare actual depth to tool overhang, observe coolant feed and make several trial holes, checking with a gauge and with the real fastener.
Make not one but three to five trials in the same setup and material. One successful pass proves little. If gauges vary across the first parts, the root cause usually lies in the chain "hole, depth, coolant and regime", not in the tool name.
What to do next
After comparing the three methods gather your own numbers on real parts. The same tool can behave differently on two similar housings if material, depth or chip behaviour differ.
Start with a simple table. Record part material, hole size and depth, hole type, batch size, chosen tool and results from the first parts. That is often enough to see where the process is steady and where scrap risk grows from the start.
Then fix short rules at the machine: when to use a tap, when a roller is safer and when to plan a thread mill. Keep it short. One clear sheet at the machine usually works better than a thick regulation nobody reads.
Make sure the rules are known not only to the process engineer and setup technician but also to the operator. Otherwise shift decisions revert to memory rather than facts.
If a shop changes equipment or starts a new housing series, discuss machine selection in advance. For threading consider rigidity, steady coolant feed, easy setup, commissioning and service. For these tasks in Kazakhstan and CIS countries you can contact EAST CNC. The company supplies CNC machines for metalworking and helps with selection, commissioning and service, so some problems can be removed before the first batch.
A practical next step is simple: take one problematic part, fill the table for it and this week approve a clear rule for tool selection at the shop.
FAQ
Why do threads in blind holes fail more often?
Most often it's caused by chips and lack of space at the bottom. A tap cuts material and the chips collect at the bottom, crushing the last threads and potentially jamming the tool. Leave some depth allowance first, then check where the chips go and whether coolant reaches the cutting zone. If the scrap risk is high, consider a thread roller or a thread mill.
What most often ruins the first threads?
Usually the first thread is ruined by an entry misalignment or missing chamfer. The tool catches the edge, enters off-axis and immediately tears the profile. Check the chamfer, tool runout and straightness of the hole. Even a small entry offset quickly makes the fastener hard to start.
Why does the bolt run tight though the gauge passes?
This happens when the size seems OK, but the thread profile is already irregular. Another common reason is that the hole has slightly deformed (thin wall), so the bolt engages only some of the threads. Don't rely on a single gauge. Try the real fastener and check how it runs through the full depth, not just the entry.
When is a tap the best choice?
Use a tap when the thread is standard, the material is stable and chips can exit. For through holes it often gives the shortest cycle and predictable results. But don't use it by habit for every job. If the hole is blind, chips stick, or drilling is unstable, the risk of scrap rises quickly.
In which cases does a thread roller reduce scrap?
A thread roller works well in ductile materials that deform rather than fracture. It doesn't produce chips, so in blind holes it often gives cleaner results than a tap. It has a strict requirement: the pre-drilled hole must be very accurate and lubrication must be good. If the hole is even slightly undersize, torque jumps, heating occurs and threads can tear.
When should you pick a thread mill?
Choose a thread mill where the cost of an error is higher than a few extra seconds. For expensive parts, short blind holes or frequent changes in diameters/threads, a thread mill often reduces risk. It gives better control of depth and size. If it breaks, it usually doesn't jam inside the hole the way a broken tap can.
How to choose the drilling diameter for a thread?
Don't take the drilling diameter from a table as a final answer. The table is a starting point — then check the actual hole size in your material and with your tool. Do several trials on the same batch, measure the hole after drilling and then lock the regime. The diameters for tapping and rolling differ — don't mix them up.
Is a chamfer needed before threading?
Yes — almost always. A chamfer helps the tool enter cleanly and protects the first thread from being torn. Don't make the chamfer too large, though. If it's excessive, you remove the first full thread and the fastener may start working worse even if the entry looks neat.
What to check before starting a series?
Start with five checks: material batch, actual drilled diameter, chamfer, depth allowance and coolant feed. This usually catches the problem before a series goes bad. Then make not one but three to five trial parts in the same setup. One good pass doesn't prove the process is stable.
What to choose for an aluminium housing with blind M8 holes?
If drilling holds size, a thread roller often gives the best outcome: no chips at the bottom and a clean, dense thread. That's a typical working solution for aluminium. If the housing is expensive and rework is difficult, a thread mill reduces risk. Use a tap only when you are confident chips can evacuate and depth allowance is enough.