Stable process when changing a CNC operator
We explain how to record offsets, control measurements and actions on deviations so a stable process during CNC operator changes produces consistent results.
Why shifts get different results
The same CNC program does not produce the same result by itself. The difference usually comes from decisions made between cycles: when to measure, how much to change an offset, which part to take as the reference and how to react when a dimension is near the tolerance limit. If those decisions stay based on habit, each shift will start running the process its own way.
Even experienced operators often follow different logic on the same operation. One will make a small correction after the first part because they like to keep the size near the middle of the tolerance. Another will wait for another measurement and avoid touching the offset too early. Formally both choices are reasonable. But the process starts to "wander" because there is no single clear rule.
Small tweaks that no one considers a problem change the size fastest. A correction of 0.01 or 0.02 mm seems harmless. But if the first shift has already moved the tool and didn’t record the reason, the second shift may easily add another similar tweak. After several parts the machine no longer compensates wear but accumulates random decisions. Then people look for trouble in the tool, the chuck or the material, although it all started with two small consecutive tweaks.
Verbal handover only adds confusion. Phrases like "the size drifted a bit" or "I slightly tightened the offset" make sense only to the person who said them. The next operator hears them differently. One will decide the process is under control. Another will take it as a signal to measure the batch urgently and intervene again.
Different results usually appear in four places: the moment of the first measurement is chosen differently, the evaluation of a size at the tolerance limit varies, corrections are made without recording the reason and magnitude, and the shift is handed over orally without exact numbers or part status.
The cost of this variation grows fast. The shop spends time on unnecessary adjustments and repeat measurements. QC sees more unstable parts. The setup technician is distracted by an operation that was stable yesterday. In a series this becomes hours of downtime and extra tool consumption.
Worst of all, the problem remains hidden for a long time. While parts are still within tolerance everyone thinks the process is under control. But the size margin narrows, the number of checks increases, and the pace drops. In the end two shifts do the same work but each time almost start over.
What to fix before writing the standard
A standard won’t work if shifts don’t have the same starting point. First fix the operation itself, then describe the sequence of actions. Otherwise one person will edit an old program version, another will use a different tool, and a third will measure the wrong dimension.
On the operation sheet name three things without abbreviations: the part, the operation number or name and the exact version of the control program. If the program was changed after the trial part, note that too. The operator must immediately see which version they are working to, and the lead should not have to guess where the discrepancy came from.
Next, list the tools by position. Not a general "what’s on the machine" set, but a specific record: which tool is installed in which position, for which step it is needed and which dimension it holds. Also note the fixtures, the datum and the measuring instruments used to check dimensions on this operation. Then every shift has the same starting point, not a set of assumptions.
If the shop has multiple versions of setup sheets, remove the old copies from use. Formally a standard exists in that case, but in practice there are two. That’s often enough for one shift to follow one set of rules and the next shift another.
How to record work with offsets
If two operators adjust offsets from memory the size will drift quickly. You need a single recording method that any shift understands the same way.
The first rule is simple: don’t mix geometry and wear. Geometry is changed after reinstallation of a tool, replacement of the tool holder, a datum failure or a full re-setup. Wear is adjusted after a control measurement during the run. When changes are mixed, the next shift can’t see what is the baseline and what is the current adjustment.
On the operation sheet specify exactly where to write corrections for each dimension. Not just "correct the size", but concrete instructions: adjust external diameter in wear X, face length in wear Z. Then the operator won’t search for a place to record the change or put the tweak into a random field.
It helps to fix the sequence in advance: which fields are geometry, which are wear, which dimension corresponds to which axis, what step each dimension can be adjusted by, who records measurements and when the operator must stop the run and call the setup technician.
The adjustment step must not be left to the shift’s discretion either. For each dimension set a limit. For example, for a finish diameter adjust by 0.01 mm steps, for a shoulder length by 0.02 mm, and adjust a fit dimension only after a repeat measurement. This reduces unnecessary moves and prevents overadjusting.
Any change without a timestamp and reason should be treated as an error. Recording takes under a minute but brings a lot of value. The next operator immediately sees what happened: normal wear, a insert change, or an attempt to bring the part back after an out-of-tolerance event.
Example record
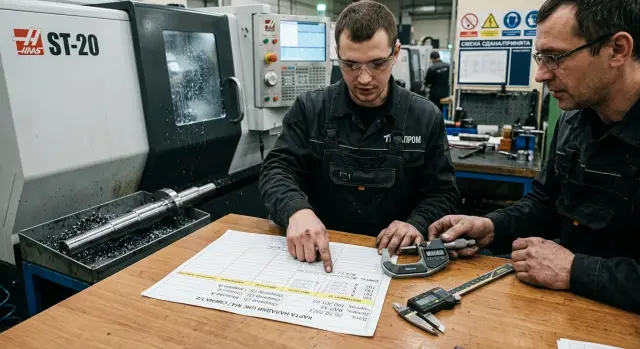
After an insert replacement the operator sets the new geometry baseline, makes a trial part and writes in the log: 14:20, tool T03, insert change, geometry X -0.12, Z +0.04, trial measurement OK. Forty minutes later after a control measurement they add a second note: 15:00, size D32.00 moved by +0.01, correction entered in wear X -0.01, reason — normal wear.
This format may seem strict, but it removes disputes between shifts. People see not only the current number in the offset but also the logic that produced it.
How to set control measurements
Control measurements should not become a "measure everything" rule. If the list is too long the operator will skip checks or do them superficially. A standard usually lists dimensions that drift first: finish diameter, length from the datum, groove width, bore for a bearing or a thread after the finishing pass.
Choose them based on facts, not memory. Look where scrap occurs most often, after which corrections the size drifts and which remarks repeat across shifts. If a dimension hardly varies, leave it for acceptance control and don’t include it in the continuous checks.
Measurement frequency must be recorded clearly. For a stable lot use a rule like "every 5th part." If the material behaves inconsistently, the machine hasn’t stabilized or the tool noticeably wears during a shift, a rule like "every 30 minutes" is more convenient. The point is the operator must not have a reason to interpret the schedule differently.
Specify the first measurement after warm-up separately. A cold machine and a machine after 20–30 minutes of work often give different sizes, especially for length and finish diameter. So the operator should first make a trial part, measure the specified dimensions, adjust offsets if needed, and only then start the series.
Next to each dimension indicate the measuring tool. Not "check the diameter," but specifically: diameter 42 h7 — micrometer 25–50; length 118 +/-0.02 — height gauge or depth gauge; groove 3.0 — gauge or micrometer without calipers; runout after reinstallation — dial indicator. For surface finish specify the instrument or standard if that method is used on the shop.
This format removes needless arguments. One operator will not measure with calipers what another checks with a micrometer.
There are checks tied to events rather than every part. Runout is usually checked after reinstallation or fixture change. Overall length is checked after a tool change or a noticeable axis correction. Surface finish makes sense to check after an insert change, a change in cutting conditions, or a QC remark.
When measurements are described in this detail, results depend less on personal habits.
What to do when a deviation occurs
If the first control size goes out of tolerance, stop the lot immediately. Don’t wait for a second or third part "to be sure." The operator separates the last good part, marks everything produced after it, and records the tool number, the size and the time. This prevents the problem from spreading through the run.
Then check not only offsets but the setup itself. First verify the part datum, clamping and the cutting edge condition. Chips under the support, weak clamping, a chipped insert or heavy wear often produce the same effect as an incorrect correction. If you only change the offset at that point the root cause remains.
Next the operator compares the current measurement with the tool-wear log. If the size drifted smoothly in one direction, it’s often normal wear and visible in the records. If the size changed abruptly, search for a datum, clamping, tool or coolant feed issue.
A short action sequence works well: stop the run after the first out-of-tolerance, check the datum and clamping, compare the size with the last wear entry, make one correction, process one control part and measure the same dimension the same way again. If the size still drifts, call the setup technician.
The rule "one change at a time" is mandatory. If you change the offset, the feed and the tool at once, you can’t later tell what helped. It’s much simpler to make a single correction, take a control part and get a clear result.
A simple example: the diameter began to drift by -0.03 mm and the log shows the same drift on the two previous parts. The operator checked the insert, found no chip, entered a small wear correction and made a control part. If the measurement returned closer to the middle of the tolerance, work continues and an unscheduled check is set a bit earlier than usual.
If the size drifts again after one correction, chasing it manually is not the right approach. Repeated deviation after adjustment often indicates a deeper cause: variable clamping, spindle runout, part setup problems or an error in the operation. This requires investigation, not a series of guesses at the machine.
How to hand over an operation between shifts
Imagine a simple case. The day shift finished a run with a size of 39.98 within a tolerance of 40.00 +/- 0.02. The part is acceptable but the size is already near the lower limit. If they just write "everything’s fine" and leave, the next shift will almost certainly start with guesses.
A proper handover looks different. The day operator records the last confirmed size, the tool number, the current offset and on which control check the size reached 39.98. That’s enough for the evening shift not to search for the cause from scratch.
The next shift does not continue the run at once. First the operator makes the first part and repeats the measurement the same way the previous shift did. If the result is again in the same zone, for example 39.98, they do not tweak offsets by eye. They consult the operation sheet and follow the prescribed sequence.
It’s these small details where results most often diverge. One operator likes to "add a little," another won’t touch the settings until scrap appears. A standard removes personal habits. Decisions are made in advance and both shifts act the same.
For a shift handover record four things: the actual size on the last check, how and when it was measured, which corrections were already made and what the first part of the new shift should do. This record is more useful than any verbal handover. If the size drifts two hours later, the lead sees not only the deviation but the chain of actions.
Where the standard breaks down
Usually the issue is not the complex part or the machine itself. The standard breaks in small things that seem "obvious." While the same operator works it’s almost invisible. Once another shift comes in, variation in size and time quickly appears.
A common mistake is different names for the same tool or offset. One operator writes "cutter 3," another "T0303," a third uses an internal name from an old sheet. The panel and the documents no longer share one language. The next person wastes time guessing and sometimes adjusts the wrong tool.
Another weak point is performing a control measurement with a different instrument without noting it on the sheet. If in the morning the size was taken with a micrometer and in the evening with calipers without recording that, the numbers will disagree. The operator sees the discrepancy, doesn’t know the reason and makes an unnecessary correction. After a couple of parts the size drifts further.
Problems also start when an operator changes two fields on the controller at once. For example, they slightly change tool geometry and immediately add a wear correction. On one shift that may work because the person remembers what they did a minute earlier. On the next shift no one understands which change was baseline and which was temporary.
Verbal handover at the machine also fails. The phrase "I tightened X a bit" is quick but gives no anchor. After an hour no one remembers how much "a bit" was, which tool it was applied to or after which measurement it was entered.
Confusion grows when old and new versions of the sheet coexist. One operator uses an updated card, another takes a printout from a folder with old tolerances, measurement points or control order. Formally the document is one; in practice there are several rule sets.
If such situations repeat, look not for who is to blame but for a gap in the records. The gap usually looks simple: one action has different names, the measurement method is not recorded, a correction is entered in two places, the handover is verbal or an old version of the sheet remains in use.
Quick check before handing over a shift
If the operator spends 3–5 minutes — not 30 seconds — on the handover, variation usually drops sharply. What matters is not general neatness but a few simple actions that remove guesses for the next shift.
First, record the last measurement. Not "part is in tolerance," but a specific number, time and signature. A note like "Ø24.018, 18:40, Ivanov" is more useful than any spoken phrase. If the size is near the upper or lower limit that is visible at a glance.
Then enter current tool wear into the sheet or the accepted shop record. Otherwise the next operator will see one value at the turret and another on paper and start the shift with doubts. In practice this small thing sometimes causes the first questionable part to appear in 10–15 minutes.
Before leaving check five points: is the last measurement recorded with the actual value, time and signature; are all corrections after the last control entered; is it clear when the next measurement should be taken; are suspect and scrap parts separated from good ones; and is there a clear note about what the first part of the new shift should do.
The last item is especially useful. If the first part after the changeover requires mandatory checking, write it explicitly. Not "check as needed" but "first part — full control of sizes A and B." Then the new operator won’t guess and won’t waste time with extra questions.
A simple order on the workbench helps too. Good parts separate, suspect parts separate, scrap separate. If everything is mixed the argument starts not because of the machine but because no one understands which part was measured last.
This check seems minor, but it makes the handover calm. The next operator immediately sees which size was obtained, what wear has accumulated, when to do the next check and what to do with the first part.
What to do next on the shop floor
Don’t try to describe the whole shop at once. Better to take one operation where shifts diverge most often on size, surface finish or cycle time. On one clear example it’s faster to see whether the standard works or just lies in a folder.
Choose an operation where scrap or additional adjustments repeat almost every week. For example, turning a shaft where the day shift keeps size 40.00–40.01 and the night moves toward the lower tolerance limit. If you can get order here it will be easier to apply the approach to neighboring parts.
The logic is simple. First describe actual work: which offsets the operator changes, when control measurements are taken, at what deviation they stop the run and whom they call. Then give this procedure to two shifts for 5–7 workdays and watch results, not just the paperwork. After testing remove words everyone interprets differently: "add a little," "check if needed," "adjust as the situation requires." Finally, match the card to shop reality: the machine must support the needed corrections and the operator must have proper measuring tools and a clear recording form at hand.
If after a week the two shifts get similar results without constant calls to the process engineer, the procedure works. If divergence remains, look for a missing detail in the description: a skipped measurement, an unclear correction limit, or a different action after an insert change.
When the shop upgrades equipment, check the standard against the new machine’s capabilities right away. EAST CNC supplies CNC lathes, assists with selection, commissioning and service. It’s useful if you want to set a unified working order from the start rather than rewrite it after launch.
FAQ
Why does the same CNC program give different results on different shifts?
Most often the size drifts not because of the program but because of different decisions between cycles. One shift measures earlier, another adjusts the offset earlier, and after a few parts the process runs by different rules.
What should be recorded in the operation sheet first?
First fix the part, the operation and the exact program version. Then record the tools by position, the fixturing, fixtures and the instruments the operator uses to measure the sizes.
How is geometry different from wear in offsets?
Geometry is changed after reinstalling a tool, replacing the tool holder or a full setup. Wear is adjusted during the run after a control measurement; otherwise the next shift won’t know what is the baseline and what is the temporary tweak.
What correction step is best for offsets?
Set the correction step in advance for each size. For a finish diameter it is often 0.01 mm, for a shoulder length it might be 0.02 mm, and a fit dimension should be adjusted only after a repeat measurement.
When should the first control measurement be taken?
The first part after warm-up must be measured. A cold machine and a machine after 20–30 minutes of work often give different sizes, especially for lengths and finish diameters.
Which dimensions should be included in continuous control?
Include the dimensions that drift first and most often cause scrap. If a dimension stays stable, leave it for acceptance control and don’t overload the operator with checks.
What to do if a dimension goes out of tolerance?
Stop the run immediately and separate the last good part. Then check the datum, the clamping and the cutting edge, make one correction, process one control part and measure the same dimension the same way again.
What must be recorded when handing over a shift?
Four items are enough: the last confirmed size, how and when it was measured, which corrections were made, and what the first part of the new shift must check. This record removes guesswork and extra adjustments.
Why can’t the same dimension be measured with different tools without recording it?
Because different instruments give different numbers and the operator will start adjusting offsets without a real reason. If you measured with a micrometer in the morning and a caliper in the evening, note it in the sheet.
How to start implementing such a standard on the shop floor?
Start with one problematic operation where shifts most often diverge on size or cycle time. Describe the actual procedure, give it to both shifts for several days and remove vague phrases that everyone interprets differently.