Restarting a Program Mid-Operation Without a Collision
Restarting a program mid-operation requires careful verification of reference blocks, tool offsets and a safe approach — otherwise the machine can easily collide with the part.
Why collisions happen after a stop
After a pause the machine and the program often are no longer in the same state. The operator can see the correct line, but the tool may not actually be where the code "expects" it. So a collision is usually not caused by the line itself but by what happened before it.
The CNC controller does not check whether the tool reached a safe point, whether the correct offset is active, or whether the previous workpiece zero is still valid. If you start the cycle from the middle, the controller will execute the command as if the entire preceding section had completed without issues. For turning this is especially dangerous: even a small Z error can push the tool into the face of the part, and an X miss can quickly cause contact with the chuck or remove too much material.
A common trap is modal commands. They stay active until explicitly changed. After a stop there may still be an old offset, a previous work shift, an unfinished cycle, a leftover feed or cutting mode from earlier blocks. On the screen everything may look calm, but the actual trajectory has already changed.
There’s also a simpler scenario. The operator moves the tool manually to approximately the right point and assumes that’s enough. But the machine doesn’t operate on an "approximate" basis. If you don’t restore the CNC reference blocks and the program state, the system will follow the command as if the tool had reached that position by the correct path.
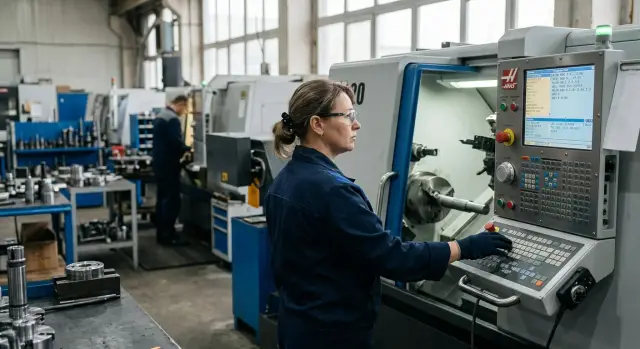
In production of automotive parts, construction machinery components and other series products such an error rarely ends without consequences. One hasty restart after a stop can damage the insert, the part, and sometimes the chuck.
What to check before restarting
Before starting, you need to understand not only the line number but the machine’s current state. After a stop the system remembers some modes while other conditions have changed: the tool stands in a different place, the spindle may be stopped, and a different allowance may remain on the part.
First find the exact block where the cycle was interrupted. An approximate location is not enough. There’s a big difference between a stop before the approach, during cutting, on retract, or immediately after a tool change. If the operator didn’t note the line, check the execution history, the current block and axis positions. On a lathe this quickly shows whether the tool should be entering material, continuing a pass or retracting to a safe point.
Then compare the actual machine state. Usually five checks are enough:
- which tool is active now;
- which geometric and wear offsets are assigned to it;
- which workpiece zero is active, e.g. G54;
- which modes and M-codes should be in effect at this point in the program;
- how much stock actually remains on the part.
Don’t guess with modes. If G96, G97, G95, G99, radius compensation, feed-per-rev or coolant should be active at the point you want to restart, verify them on the screen. The same goes for spindle rotation, clamping, steady rest and tailstock. One missed mode easily causes a collision even when the correct line is selected.
Check the remaining stock separately. This is one of the most frequent mistakes when restarting from mid-operation. The operator sets the cursor on a finishing pass, but after roughing a step or extra stock remains on the part. The insert then cuts deeper than expected.
A simple example: external turning stopped after the second roughing pass. A step remained on the workpiece, and the same insert was still in the turret but the wear offset had been adjusted. If you start from a block where the program expects an almost-finished diameter, the tool will enter the material with a different load. Sometimes that’s enough to chip the insert on the first move.
It’s better to spend a couple of minutes checking than to replace the tool, scrap the part and spend time investigating the incident.
Which reference blocks to restore
After a stop the machine keeps the last modal state in memory. So when you restart a cycle you need to return not to a single line but to a short reference fragment. These blocks re-establish the conditions under which the tool can approach the part safely.
First call the same tool and its offset. For turning this is often a line like T0101, which also loads the position and offset. If you call only the tool number without the correct offset, the tool tip won’t be where you expect.
Then restore the work coordinate system and plane. If the program uses G54 but the machine stayed in a different system, the error may be more than fractions of a millimeter. For turning G18 is usually required. If the start of the program set G90, G21, G94 or G95, it’s better to restore them too, especially after manual intervention.
Before the cutting block give the machine a safe approach. Don’t start on a line where G01 is already cutting into material. First retract the tool higher or away from the contour so it can approach the part with clearance and you can calmly verify the trajectory.
A typical reference fragment includes the tool call with its offset, selection of the work coordinate system, restoration of required modes, spindle and coolant start, and then a separate block for the safe approach before the first cut. Only after that does it make sense to move to the working line.
The logic is simple: tool first, then coordinates and modes, then speed and rotation direction, then the safe point in X and Z, and only after that the feed into the material. If any command in that chain is missing, a supposed safe restart becomes a guess.
How to check offsets and the part zero
After a stop the cycle does not forget active offsets, tool corrections and coordinates. If any of these parameters don’t match the actual position of the tool and the part, a restart can easily end in a collision.
First compare the tool number with the active offset. On a lathe a common mistake is that the correct insert is in the turret but a different geometric or wear offset is active. A difference of 0.2–0.3 mm can be dangerous, especially near a step, face or groove bottom.
Then open the setup card and check tool length and radius. Don’t look only at the position number — compare the values in the holder with the ones from the last measurement. If the insert was changed, the tool taken off, or the overhang adjusted after the stop, the old data can’t be trusted.
The part zero must be checked again too. It can shift after re-measuring, clamping the workpiece, re-mounting jaws or a data entry error. In that case the machine formally follows the program correctly but actually enters the material at a different point.
There are four things to always verify: whether the active tool and offset match, whether the length and radius agree with the setup card, whether the part zero changed, and whether the current axis positions allow a safe approach to the entry point. The last item is often underestimated. If the program first retracts in X or Z but the tool already stands inside the contour, the machine won’t be able to "save itself" with a single start button.
If in doubt, re-measure the tool and the datum. It takes a few minutes but usually saves a lot more time.
Restart procedure step by step
After an emergency stop you can’t just place the cursor on the desired line and press start. If you skip the tool call, offset or approach to the part, a collision can happen within seconds. Therefore restart from mid-operation is best done in a consistent order.
- Manually move the tool to a safe point. Move it away from the part, the chuck, the steady rest and the jaws. If you’re unsure about X or Z, give extra clearance.
- Return the program not to the stop line but to the reference blocks. These blocks re-establish the required state: tool, offset, speed, rotation direction, cycle, plane and the safe approach.
- Step through a few lines in single-block mode. Watch not only the block number but what the machine actually does: where the axis goes, which offset is active, and whether an old feed remains.
- Make a dry run over the part without cutting in. Raise the tool or move it away from the surface so the trajectory repeats safely.
- Only after that enable the working feed and continue the cycle. Monitor the first movements especially carefully.
What is most often missed
Usually two things are lost: the active offset and the point from which the program starts the approach. Because of that even a "correct" start line runs wrongly. On a CNC lathe such a small error can easily cause chuck contact or re-cutting into an already machined diameter.
A calm, careful restart takes a little longer, but it’s almost always cheaper than a new insert, a ruined part and machine downtime.
Example on a turning operation
During a roughing pass on an external diameter the insert began to cut chips worse than usual. The operator stopped the cycle because the insert was worn and the size was drifting. The part could still be saved.
The insert was replaced quickly. The error appeared later: the operator chose the block where the insert had last entered the material and decided to continue from there. On the screen that looked logical, but the machine should have reached that place by a sequence of reference blocks first.
Before the working move the program expected several CNC reference blocks: tool call with offsets, retract to a safe point and a repeat approach in X and Z. After the stop that chain was no longer guaranteed. If you skip at least one block, the insert will follow a different path.
On the dry run this became obvious immediately. Instead of a careful approach the insert went deeper than planned and tried to remove extra material on the first move. There were millimeters left before a collision, but such a start is better to abort immediately.
They solved the problem without rushing. The operator returned not to the cutting block but several lines earlier where the program re-called the correct tool and offset, set safe coordinates in X and Z and approached the part by the same path as in the normal cycle. After that they ran a check in the air. The trajectory returned to normal: the insert approached from outside, stopped at the expected point and only then went into the roughing pass.
That is how a safe restart works: don’t try to guess the correct line from memory; restore the conditions under which that line actually makes sense.
Where mistakes happen most often
The most common mistake is starting from a working block without a full tool call. The needed tool number and offset may have been earlier in the program. If you start from here, the turret can be in a different position and length or radius offsets remain from the previous pass.
Old compensation creates no fewer problems. After a stop G41 or G42, length compensation, a constant cycle or a mode required several blocks earlier may remain active. The operator sees a familiar start point, but the machine executes movement under old conditions.
Another slip concerns the part zero. After measuring or replacing a workpiece it’s easy to restore the wrong shift, especially when multiple coordinate systems are stored. Everything looks correct on the screen while the actual datum is offset.
Haste often ends badly. Trajectories are sometimes checked too close to the workpiece because that area was already machined. But after a pause offsets, the tool or the approach sequence may have changed. It’s safer first to move the tool to a safe point and run a few blocks in the air.
If the stop was long, make the first moves cautiously. Reduce the entry feed, compare actual position with expected, and watch the whole first approach, not just the end point. Restore the working feed only after this check.
If you keep five things in mind — tool, offset, active cycle, part zero and a safe approach point — mistakes become much less frequent. Usually a collision happens not from one big error but from two small ones missed in a row.
What to standardize on the shop floor
After such an incident the worst thing is to rely on the operator’s memory. In a week people and parts will be different, but the risk remains. So the shop needs a short procedure posted near the machine that is followed every time.
For typical operations a one-page checklist is useful. No generalities: where to stop the cycle, which safe point to move the tool to, which blocks to restore, what to check in offsets, and at what distance to do the test approach. Such a reminder greatly reduces risk when time is short and a decision must be made quickly.
If possible, mark safe re-entry points directly in the programs. These can be blocks with a clear approach, cancellation of unnecessary modes and a predictable tool position. When the programmer or setup technician marks these places in advance, the operator does not have to guess.
As a rule, three simple rules should be enforced on the shop floor: after a tool change someone confirms offsets, before a test start the operator verifies the part zero and the active tool, and after any contact immediately save the program number, the stop block and a photo of the part. This makes diagnosis of the next incident much faster.
If a shop regularly works with CNC lathes, it’s useful to keep not only internal instructions but also practical setup and machining materials at hand. The EAST CNC blog, official representative of Taizhou Eastern CNC Technology Co., Ltd. in Kazakhstan, publishes equipment reviews and practical tips that can be used as a basis for such checklists.
Restarting from mid-operation rarely forgives haste. First restore the machine state, then verify the trajectory, and only after that return to cutting. That order feels slow only until the first avoided collision.
FAQ
From which line is it best to restart the program after a stop?
Don’t place the cursor directly on the cutting line. Go back a few blocks to where the program re-calls the tool and its offset, enables the required modes, and brings the tool to the part by a safe path.
Can I start directly from the block where cutting is already happening?
No — that’s risky. If you skip the approach, the offset or a required mode, the tool will follow a different trajectory and may immediately cut too deep into the material.
What should I check first before restarting?
First verify the actual position of the tool and the program state. Check the active tool, its offset, the part zero, spindle and feed modes, and then estimate how much stock remains on the workpiece.
Why does a collision happen even when I selected the correct line?
Because the controller remembers modal commands, while after a pause the tool may be physically elsewhere. The line on the screen can be correct, but the conditions leading to it may have changed.
Which reference blocks should be restored before starting?
Usually you should restore the tool call with its offset, the work coordinate system, required modes, and a block with a safe approach. Only after that does it make sense to go to the working move.
How to quickly check offsets and the part zero?
Open the active offsets and compare them with the setup card and the turret position. If you changed the insert, tool overhang or the workpiece datum, re-measure the tool and the part zero.
Is a dry run needed before the working start?
Yes — almost always. A dry run immediately shows where the tool really goes and gives you a chance to stop before touching the part or chuck.
What if extra stock remains on the part after the stop?
Then don’t start the finishing or next pass without checking. Extra stock changes the load on the insert, and even the correct trajectory can cause chipping or excessive material removal.
Should I reduce the feed after a long stop?
Don’t rush to restore the normal feed. Make the first moves at a reduced feed rate, verify actual position against expected, and watch the entire initial approach before returning to the normal cycle.
What is useful to record at the moment of a stop so you don’t make mistakes later?
Record the program number, the block where it stopped, the active tool and take a photo of the part if there was contact or a questionable situation. This makes it much easier to diagnose the cause later and restart safely.