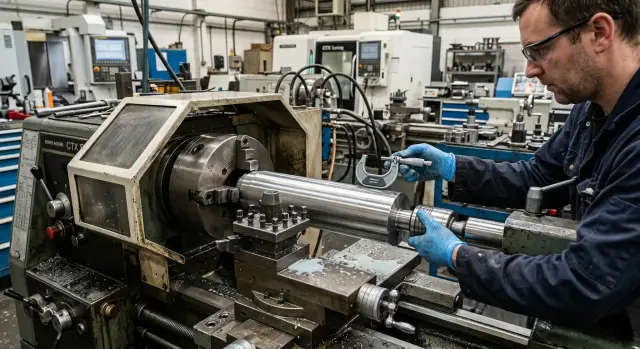
Radial Rigidity of the Tool Holder: Marks on the Part and Size
Radial rigidity of the tool holder affects chatter marks, waviness, and dimensional drift. Let’s look at how to connect marks on the part with the holder, overhang, and cutting mode.
Where the problem starts
During cutting, it’s not only the insert that carries the load. Under force, the tool holder itself, the tool holder body, the clamping unit, and the part of the carriage that supports everything all bend a little. If there is a weak point in that chain, the tool shifts to the side, and the part immediately starts to “respond” in the surface and the size.
Most often, it is not the thickest part that gives way first, but the longest one. That is why tool overhang matters more than it seems. Add an extra 15–20 mm, and the tool already becomes noticeably softer at the same feed and depth.
The operator usually sees this not on instruments, but in simple details. The cutting sound changes. Light streaks, dull patches, or a repeating mark that was not on the previous part appear on the surface.
The most annoying part is that the defect often comes and goes. Today the part is clean, an hour later there are marks on the part surface, and then they disappear again. That happens when the load changes because of stock allowance, blank shape, insert wear, or the contact point. Even a small chip under the clamp or a loose seating of the holder can give a different result from one run to the next.
Radial rigidity of the tool holder is often confused with vibration, but they are not the same thing. Low rigidity is first of all an elastic shift of the tool under load. It may happen with almost no noise and no obvious shaking, but it will cause dimensional drift in turning and a rough trace. Vibration is already oscillation. You can usually hear it, and it leaves a more pronounced periodic pattern on the part.
One often leads to the other. If the holder is soft, oscillation appears more easily. But even without obvious chatter, the part may already go out of tolerance. So when the size starts to “float” and the machine seems to cut calmly, it is worth looking not only at the settings, but also at the radial rigidity of the tool holder, the overhang, and the tool holder itself.
In practice it looks simple: the farther the cutting edge is from the support, the easier the system bends. And the more it bends, the harder it is to get the same part on every blank.
How the surface shows weak rigidity
When the radial rigidity of the tool holder is low, the surface shows it almost immediately. After the pass, the diameter does not have a random mark, but a repeating pattern. At that moment, the tool cuts unstably: it shifts a little to the side, then returns, and a noticeable rhythm appears on the metal.
Most often it looks like this:
- The diameter has marks with almost the same pitch.
- After a finishing pass, the surface looks not smooth, but slightly wavy.
- In one area, dull and shiny spots alternate.
- With greater tool overhang, the same mark becomes rougher and more visible.
Marks with the same pitch are often confused with a normal feed mark. The difference is that with low rigidity the pattern looks nervous. The pitch seems to repeat, but the depth of the mark changes, and in some places a fine ripple appears on the surface.
A wave after finishing also shows that the system is not cutting rigidly. The insert should already be only smoothing the surface, but instead it alternates between removing metal and rubbing it. Because of this, one part of the zone shines, while the neighboring part looks dull.
This alternation of shine and dullness is easy to see on steel and stainless steel. A shiny spot usually appears where cutting was smoother. A dull area remains where the tool vibrated, rubbed with the edge, or slightly pushed away under load.
Tool overhang makes this effect stronger very quickly. Even if the tool holder itself is fine, a long overhang works like a lever. A small side force bends the holder more, and the mark on the part becomes more obvious.
That is why it helps to look at the surface not only “overall,” but by the character of the pattern. If the marks become stronger as the overhang increases, if a wave remains after the finishing pass, and if the shiny area keeps breaking up with dull spots, the problem is often in the stiffness of the holder, not just in the insert or the cutting mode.
On CNC lathes, this is especially easy to see in finishing, where the surface should come out calm and even. If the part instead “draws” a repeating pattern, the holder and its overhang should be checked first.
How the size drifts because of the holder
If the holder bends noticeably under load, the size starts to live its own life. On the machine everything looks normal: compensation is entered, the insert is new, the program is the same. But the cutting force changes, and with it the actual position of the cutting edge changes as well.
This is especially easy to see after a change in the cutting mode. Raise the feed or the depth of cut, and the diameter shifts, even though the setup person did not touch the offset. This happens often in boring: the force increases, the holder deflects more, and the hole no longer comes out the same as it did on the previous setting. Sometimes the difference is only 0.02–0.04 mm, but for a fit dimension that is already enough.
Over a long section, low radial rigidity of the holder often creates taper. At the start of the pass, the surface may be almost on size, and then the deviation builds up. The reason is not always only one thing. The bar heats up, chips change the load, and cutting at depth is less stable. If the holder is soft, it does not keep the same path along the full length.
It is even more annoying when the size varies from one identical part to another. The blanks are from the same batch, the program is the same, but inspection shows spread. That happens when stiffness is low and the system reacts sharply to small things: the allowance is a little larger, the edge seats a bit differently, the part is clamped with a different force, the temperature rises after several cycles. A rigid holder often forgives these small shifts. A soft one does not.
A repeat pass does not always save the situation either. Many expect a finishing “spring” pass to correct everything, but that does not always work. On the second pass the force is different, the holder deflects less, and the edge may start rubbing instead of cutting. As a result, the size changes only a little or moves the other way. If the system vibrated on the first pass, the second pass rarely makes the surface and size stable.
A good rule of thumb is simple: if the diameter shifts together with the cutting mode, and taper and spread grow over long cuts, first check the tool holder stiffness and the tool overhang. In such cases, the problem is often not the offset, but the fact that the holder gives way too easily to cutting force.
Where the holder and overhang weaken the setup
The tool may be sharp, and the cutting conditions may be familiar, but the part still starts to streak and the size drifts. Often the problem is not in the insert, but in the assembly from the seating area to the tip of the tool. The radial rigidity of the holder drops noticeably when tool overhang grows, even by a little.
The most common mistake is simple: an extra overhang is left for the sake of convenience. It makes it easier to reach a shoulder, calmer near the chuck, and easier to see the cutting zone. But every extra millimeter works against rigidity. The edge is farther from the clamp, and the holder moves aside more easily under load.
Where weakness appears most often
Long overhang is already a risk on its own. If you add a thin holder to it, the risk becomes almost expected. On a light cut this may give only a barely visible ripple, but on a heavy cut the metal pushes harder on the tool, and the holder springs.
The same happens when the tool holder is clamped insecurely. A small amount of play in the seating, a weak adapter, or a tired screw creates microscopic movement. You cannot see it with the eye, but it shows up on the part very quickly. The size drifts, and the surface gets a repeating mark.
Dirt and fine chips on support surfaces can spoil the result no less than a bad cutting mode. Just a thin film of oil with chips is enough for the holder not to seat fully. Wear on the support does the same thing: the tool sits slightly crooked, and the load goes where you did not expect it.
The holder section also has to match the job. If a thin holder is chosen for roughing only because it was at hand, the stiffness reserve disappears immediately. A simple example: where the machine and part allow a 25x25 holder, a 20x20 option often starts to lose already on the first serious cut.
What should raise concern during operation
Usually the problem shows itself right away:
- the cutting sound changes and becomes “soft” or shaky
- the mark on the surface goes in a wave or repeats
- the size drifts more as depth or feed increases
- after re-clamping, the result suddenly gets better
If these signs appear together, first look not at the insert, but at the overhang, seating, and holder section. That is often where stiffness is lost, and that is where the cause is easiest to remove.
How to find the cause step by step
If the mark on the part starts not right away, but at one point, that is already a useful signal. Usually the problem is not the insert itself, but how the holder and tool overhang behave under load.
Look not only at the defect itself, but also at where it appears. If the surface is damaged closer to the end of the pass, where the holder sticks out farther, the reason is often a loss of stiffness. If the mark appears right after the tool enters the cut or near a shoulder, check whether the load changes at that moment.
It helps to follow a simple sequence.
- Find where the mark starts on the part and measure the distance from the base or shoulder. This helps show where the holder begins to bend noticeably.
- Compare the roughing and finishing pass on the same part. If the roughing pass looks acceptable, but the finishing pass gives ripples or dimensional drift, the radial rigidity of the holder is already at its limit.
- Reduce the overhang by at least 10–20 mm and make a short test cut. This change quickly shows whether the tool holder is to blame or whether the cause should be sought in the cutting mode.
- On a small area, change only one parameter: feed or depth of cut. If the pitch of the mark changes, you are most often seeing oscillation. If the size shifts more, the holder is usually just deflecting.
- Check the clamping, seating, and runout. Even a small chip under the support surface, weak clamping, or a worn seating area creates the same pattern as an overlong overhang.
It is important not to change everything at once. If you change the insert, feed, overhang, and speed together, the conclusion will be random. It is better to change one factor at a time and record the result after each short pass.
A simple example: on a shaft, the mark started after 40 mm of travel, and the diameter drifted by 0.02 mm by the end. The operator shortened the overhang, kept the same mode, and got a smoother surface on the next cut. That kind of test saves more time than a long series of random insert and setting changes.
Common mistakes when choosing a holder
The most common mistake is simple: people choose the thinnest possible holder, just so it can reach the cutting zone. That is convenient for access, but the stiffness reserve disappears right away. Then the part gets stripes, a light wave, and the size starts to drift even though the cutting mode seems normal.
It is no better to leave extra overhang “just in case.” A few extra centimeters quickly change the behavior of the setup. The holder starts to spring under load, and the tool no longer cuts where it was set.
Another common mistake is the combination of holder and insert. A heavy insert or a geometry meant for rougher work is mounted on a thin holder. As a result, cutting force increases, and the thin tool holder cannot carry it without deflection. From the outside it looks like noise, shaking, and an uneven mark, but the cause is not always the machine.
Another miss is not watching where the cutting force goes. In one position the holder works acceptably, but after a change in operation or a tool rotation it takes a side load and gives way right away. That is why the same holder can behave differently in roughing and finishing.
For this reason, the radial rigidity of the holder is often confused with insert wear. The symptoms are similar: the surface looks dull, the size drifts, and you hear an unpleasant sound during the pass. But if a new insert does not change the picture, and reducing the overhang or switching to a larger diameter helps right away, the cutting edge is probably not where the problem is.
Before choosing a holder, it helps to check four things:
- what minimum overhang is really needed for the operation
- what maximum diameter can pass without interference
- which insert is installed and what cutting force it will create
- which direction the main load will take during cutting
On CNC lathes, this is especially noticeable in production runs. One good setup change can remove marks on the part surface and restore a stable size without changing the cutting mode. In short, access to the cutting zone matters, but paying for it with an unnecessarily thin and long holder usually costs more.
A simple shop-floor example
On a long sleeve with internal boring, the problem is usually not obvious right away. The operator makes the first pass, measures the diameter at the entrance, and gets almost what was expected. It looks like the setup is correct, the feed is normal, and work can continue.
But as the cut gets deeper, the picture changes. Closer to the middle and farther along the length, a slight wave appears on the surface, and then the size starts to drift. On the first 20–30 mm, the diameter stays close, but deeper in, the hole comes out slightly larger. Sometimes the difference is small, only a few hundredths, but the tool mark clearly shows that the cut is unstable.
That is how weak radial rigidity of the holder often shows itself. While the load is small, the system still holds. The farther the cutting edge goes into the part, the more tool overhang matters, and the holder starts to deflect noticeably to the side.
In one such case, the operator did not change the cutting mode right away. First, he shortened the tool overhang by about 25 mm and repeated the pass on the same type of blank. The wave on the surface became weaker almost immediately, and the dimensional drift in turning was noticeably smaller. That is an important sign: if the marks on the part surface weaken after reducing the overhang, the cause should be looked for not in the material or the program, but in the “tool holder - overhang” combination.
After that, the shop did two more simple checks. They removed the insert and looked for a chip on the edge. Then they checked whether the tool holder sat properly in the seat and whether the clamp caused any microscopic movement under load.
Both checks are needed for a simple reason. A chipped insert can also cause a wave, and weak clamping can almost copy the behavior of a soft holder. If the mark changes after shortening the overhang, and the insert and clamping are fine, the conclusion is fairly clear: the holder is too flexible for that boring depth.
In practice, this example is useful because it saves time. Instead of a long search through feed and speed settings, you can quickly understand where the mistake is hiding and why the size is not drifting from the start of the pass, but only deeper in the hole.
A quick check before starting
Before a production run, a few minutes are enough to avoid finding the problem only on a finished part. If the holder bends even a little, the surface will start “talking” before the size changes enough to be obvious. This kind of check quickly shows whether the setup has enough stiffness for a real cut.
It is easiest to follow a short order:
- First, leave only the overhang without which the tool cannot reach the cutting zone.
- Then estimate whether the holder diameter fits the stock removal and the pass length.
- After that, clean the seating surfaces, set the holder straight, and tighten the clamp properly.
- Make a short test pass on the working material, preferably with the same settings or slightly softer ones.
- Measure the size at the start and end of the section and compare not only the numbers, but also the surface mark.
The most common mistake is simple: the operator leaves extra overhang “just in case.” It is convenient during setup, but bad for cutting. The farther the cutting edge is from the support, the easier the holder moves aside under load. That is exactly how the radial rigidity of the holder drops.
The same goes for diameter. If a noticeable allowance has to be removed and the holder is thin, the setup starts to spring. On the part, this shows up as a light wave, dull streaks, or a difference in size along the length. Sometimes the machine and the settings are not to blame at all, and only the tool holder is too weak.
Clean seating also matters a lot. A small chip under the support or on the clamping surface creates a tilt that later looks like dimensional drift in turning. The problem is annoying because it hides as insert wear or a settings mistake.
The test pass is better made short, but honest. If the size at the start and end of the section differs, and the marks on the part surface become rougher toward the end of the pass, first shorten the tool overhang. If the picture does not change after that, look at the holder diameter and the clamping force. This order usually gets you to the cause the fastest.
What to do next
If marks on the surface and dimensional drift keep repeating, do not rush to buy new tooling right away. First separate a setup problem from a stiffness problem. Often simple actions are enough: shorten the tool overhang, clamp the holder closer to the support, check the insert seating, and reduce extra feed on the finishing pass.
Usually, adjustment helps if the defect is small and appears only at more aggressive settings. If the part still “draws” the surface even after a reasonable reduction in the settings, and the size shifts in the same area, then the radial rigidity of the holder is already at its limit. In that case, a new holder or a different tool holder is often cheaper than a batch of scrap and lost machine time.
A small check helps make the decision:
- reduce the tool overhang and compare the result on the same part;
- make a finishing pass with a lower feed;
- see whether the shape of the mark changes along the length of the cut;
- compare the size at the first and last millimeters of the pass.
If the picture barely changes after that, the problem is not in fine tuning.
Long and thin parts require not only a stiffer holder, but also a different machining route. Sometimes it is better to split the operation into a roughing pass and a separate finishing pass, flip the part, add a steady rest or tailstock support, or change the locating scheme. With a weak setup, even a good tool will not save the job: the tool overhang and the part itself start to act like a spring.
When choosing a machine, that should be considered in advance too. Do not look only at power and axis travel. It is much more important how the whole system behaves: the machine, tool holder, holder, part clamping, and pass length. If you machine long shafts, thin sleeves, or parts with deep internal cuts, it is better to choose the layout for those jobs from the start instead of trying to make it work later through settings.
At EAST CNC, these things are usually discussed not from a catalog, but from the real part: material, length, diameter, overhang, cutting mode, and required tolerance. That helps decide whether the current setup is enough or whether a different machine layout and a different machine are needed. One such review often saves more than several trial runs.