Preparing a drawing for routing estimates without extra rework
Preparing a drawing for a routing estimate helps quickly align datums, tolerances and contentious points so the file doesn't get sent back for revisions.
Why files get passed around in circles
A file rarely gets stuck because of one big mistake. Usually several small issues slow it down, and each raises another question. The technologist opens the drawing, can’t quickly understand the datums, material or actual precision, postpones the calculation and asks for clarification.
A quick estimate then turns into a chain of messages. The manager waits for the technologist, the technologist waits for the customer, and the deadline shifts by a day or sometimes two.
Often the wrong revision is used. The file name looks right, but inside the dimensions, tolerance or chamfer have changed. If the estimate started from the old version, the route must be reviewed later.
Just as much time is lost when datums aren’t explicitly shown. Then the technologist decides where to reference, how to clamp the part and which surface to machine first. Sometimes they guess right, sometimes not, and the file returns with questions that could have been avoided with a few notes on the drawing.
Typical problem signs: the revision in the title block doesn’t match the file name, dimensions for one operation are scattered across views, tolerances are hidden in notes, and the material is specified too broadly to choose a blank.
Tolerance confusion is especially unpleasant. When critical sizes are placed on different views, the technologist literally pieces the picture together. One size is on the main view, another in a section, another in a table. That eats 15–20 extra minutes and still risks missing something important.
Material causes the same delays. If only the grade is listed without delivery condition, hardness or at least a clear blank type, the basis for the estimate is weak. A bar, a forging and a plate section give different starting geometry, different allowance and different machining time.
So a drawing for route estimation should be prepared not for presentation but for clarity. When the file has a single revision, datums are immediately readable, critical tolerances are in visible places and the material helps choose the blank, the technologist usually provides the first clear answer without extra rounds of questions.
What the technologist checks in the first minutes
First the technologist checks part shape, overall size and blank type. This is the quickest way to tell whether the route is possible at all. If the part exceeds the machine stroke, requires too long a tool overhang or can’t start from the chosen blank, it’s too early to dig into details.
At this stage they typically note an outer diameter, total length, approximate mass and blank type: bar, forging, casting or plate. The difference is significant. The same contour from a bar or a forging yields different machining time, different allowance and sometimes a different first setup.
A simple immediate question follows: what will be used as the datum in the first setup. The technologist checks whether clear datums exist, what can be reliably clamped and where the first accurate dimension can be taken. If the datum is fine for inspection but not for clamping, the file will almost certainly be returned for clarification.
Next they look at the zones that most affect price and lead time: tight tolerances on diameters, concentricity, runout, flatness and roughness. Even a single fit with a tight tolerance can require a different machine, an extra finishing pass or inspection after each batch. If the part has many Ra 0.8 surfaces where roughness doesn’t influence assembly function, the technologist usually notices and asks about them right away.
They also mark elements that often break a quick estimate: nonstandard thread pitch, deep blind holes, narrow grooves near steps, thin walls close to clamp areas and internal cavities that are hard to reach with tools.
These features affect not only cycle time. They change tooling, fixtures, operation order and scrap risk. A simple housing may look easy, but a deep 10 x 120 hole with a thread at the bottom immediately rules out a typical fast route.
If the drawing is assembled neatly, the first notes are few: usually first-setup datums, contentious dimensions, tight tolerances and anything requiring tool-specific checks. After that it’s clear whether the route can be estimated in 15–20 minutes or the drawing needs to be returned with a short list of clarifications.
Which notes are made first
The technologist doesn’t read the drawing like a book from top to bottom. They immediately look for surfaces that will define the whole process. If those aren’t marked in the first minutes, the file starts circulating: one person calculates the route from the end face, another from the OD, a third references the flange face.
First, mark the datum. For turned parts this is usually the face and the reference diameter. For housings — the support plane and the holes from which other dimensions are referenced. When the datum is obvious rather than inferred from a chain of dimensions, the estimate goes much faster.
Then mark the surfaces that affect assembly: bearing fits, mating planes, dowel holes, sealing surfaces. Short notes like “assembly”, “fit”, “concentricity” are enough. It becomes clear at once where finishing is needed and where normal machining will suffice.
What to note next to dimensions
Then focus not on all dimensions but on those that change the operation order. If a dimension is referenced to an already machined face, that face must be processed early. If a deep groove prevents clamping, it can’t be the first operation. If a tight tolerance sits next to a thread, note it so the finishing surface is not ruined by an extra setup.
Usually four types of notes appear quickly: which datum to use for the route, which surfaces affect assembly, which dimensions determine operation sequence and where data is missing for the estimate.
Also call out unknowns. If there’s no callout for a chamfer, the groove profile is missing or a section doesn’t show an internal step, place the question right on the drawing. One short comment at the right point is more useful than a long, unlinked email.
Heat treatment and coatings should not be postponed either. These change the whole route. Hardening can warp a thin wall, nitriding requires allowance, and coating on a fit surface changes the actual dimension. If these are discovered later, the estimate must be recalculated.
On simple shafts and flanges this initial review is especially effective. It quickly shows whether a standard CNC lathe is enough or a different processing scheme is needed.
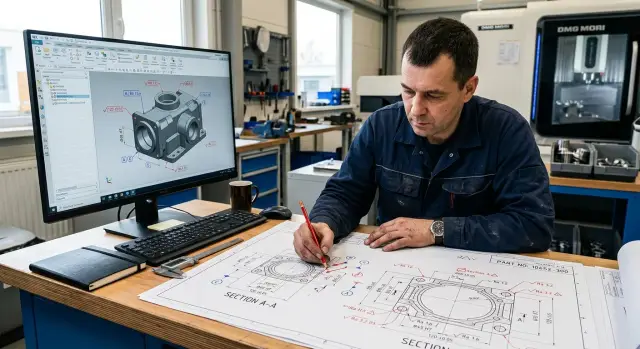
How to assemble a drawing for a quick estimate
Estimates usually fail not because of complex geometry but because of messy files. The technologist spends time searching for the right revision, material and batch size instead of calculating.
If you have a PDF and the source file, put them in one folder immediately. The PDF is for quick viewing and agreed dimensions. The source model helps to understand hidden features and estimate the machining route without guessing.
A simple package is usually enough: the drawing PDF, the source model or drawing file, a short note about the batch and a separate file with comments if there are contentious points.
Then check the revision. The same version should appear in the file name, the drawing stamp and the covering note. If the model and the PDF carry different revisions, the estimate almost always goes into another round of questions.
On the first sheet show material, blank and quantity. These details are often hidden in notes, on the second sheet or in the body of an email. The technologist needs to know quickly what to make the part from, the starting size and how many pieces to include in the calculation.
Even a very simple line works well: Steel 40Х, bar Ø80 mm, 120 pcs. One line often prevents the person from searching for baseline data across the package.
Another useful step is to show the first and second setups with short notes directly on the drawing. You don’t need a perfect route: two phrases near the part views are enough, e.g. “1st setup — reference to OD and face”, “2nd setup — flip, machine second side”. Then the technologist can immediately see clamping risks, runout and tool access.
Also add a short batch and schedule note: two lines are enough — how many parts now, will there be repeats, when is the first run needed. A single piece and a batch of 500 are estimated differently, and it’s best to know that up front.
When a package with material, blank, quantity, revision and two setups lands in the reviewer’s hands, questions drop significantly. Usually the technologist can give an initial estimate without extra edits.
Where time is most often lost
Most time is eaten not by complex shape but by missing data. The technologist doesn’t need a perfect file — they need a drawing that quickly shows material, key dimensions, tolerances and operation order. When these anchors are missing, work stalls within minutes.
A common mistake is mixing reference and working dimensions. A sheet can contain control dimensions, assembly dimensions and machining dimensions without distinguishing them. The technologist then can’t tell which size to hold in an operation and which is just for reading the drawing.
Incomplete thread callouts cause as many delays. If only the diameter is given but depth, pitch or fit class are missing, a normal estimate is impossible. Threading affects tool selection, cutting parameters, pass length and sometimes the entire operation sequence.
Material descriptions are equally important. Terms like “steel” or “stainless” resolve nothing. Specify the grade and the material condition: bar after rolling, calibrated rod, heat treatment before or after machining. Without this you can’t assess allowance, tool wear or the risk of dimensional drift.
Another common blocker is tolerances hidden in notes in small type. The technologist first examines geometry and fits, then suddenly finds a bottom-of-sheet requirement for runout, roughness or concentricity. The route must then be reworked: datums changed, inspection added, and sometimes the process split into more setups.
Low-quality scans cause many problems too. Thin lines disappear, leader lines merge into the background, dimension arrows become unreadable. If it’s unclear from which surface a dimension is taken, the technologist has to guess. That shouldn’t happen in an estimate.
To sum up in a short list, time is most often lost in five places:
- unclear which dimensions are working and which are reference;
- threads not fully specified;
- material described too generally;
- critical tolerances hidden at the bottom of the sheet;
- poor file quality that prevents reading lines and leaders.
If you remove these obstacles before sending, the estimate goes much faster. Sometimes the difference is simple: one file requires three emails, another is estimated in one pass.
Example on a simple part
Take a common flange in Steel 45, batch 200 pcs. The part is simple, but even that drawing often goes to a second round if you don’t immediately mark reference points and the sizes that define the whole route.
The technologist doesn’t start by checking every dimension. First they look at how the part will be held in the chuck, how it will be flipped and where the functional surfaces are. For such a flange the first notes are almost always the reference face and the outer diameter. Then it’s clear whether the part fits in one setup or needs at least two.
On the drawing it looks simple: mark the reference face to show where lengths are taken from; mark the outer diameter as the first turning surface; label the bolt circle holes and immediately check their pattern and referencing; separately call out the sealing plane and its roughness.
This approach works because it divides the drawing into turning, drilling and inspection tasks. If the base face and outer diameter are clear and the holes are not referenced “by eye”, the route is assembled with few disagreements.
Suppose the flange has 8 bolt holes on a pitch circle. If the drawing only shows the pitch circle diameter and hole size, that’s not enough for a quick estimate. The technologist commonly adds a short note: holes after turning base, referenced from the face and the rotation axis. One such note is often enough to decide whether dedicated tooling is needed or whether a standard drilling step after turning will do.
Call out the sealing plane immediately, even if it looks like another face. It often requires a different surface finish and sometimes a tighter runout tolerance. If that zone isn’t marked early the route is read too optimistically and time is then spent recalculating.
After those notes you don’t just see the part, you see a draft plan: where to hold it, what to turn first, when to drill and which surfaces to inspect. For a batch of 200 pcs this is especially useful because any ambiguity multiplies across the run.
Quick checklist before sending
Spend 5–10 minutes on a quick check before sending the drawing. It’s faster than answering a chain of identical questions later. The goal is clarity, not presentation: the technologist should immediately understand what to do, what material to use and where mistakes are unacceptable.
The first common issue is differing revisions. If the PDF shows one version and the source file another, the estimate almost always stalls. The technologist will not choose between them at random and will return a clarification.
Then check material. A grade alone is not enough if hardness, heat treatment or blank type affect price and route. There is a big difference between bar, forging and casting even if the finished part looks the same on the drawing.
Before sending, verify a few things:
- the revision in the PDF and the source file match;
- the material is specified fully: grade, condition, hardness if it affects machining;
- datums are marked so they can’t be interpreted in multiple ways;
- the strictest tolerances are placed near the views where they’re read;
- contentious areas are briefly noted and to the point.
Datums are usually where extra correspondence starts. If one view implies the face and another the OD as the datum, the technologist has to prepare two route variants. Better to show once which surface starts the dimension chain and which surfaces are the setups.
Don’t scatter tight tolerances across the sheet. When they’re next to the relevant view, the technologist quickly sees where finishing is needed, where extra inspection is required and where a normal pass is enough. This is especially true for turned parts where a small runout tolerance can change the whole operation order.
Short comments also save time. If a radius is informative, a chamfer is removed after heat treatment or roughness applies only to one zone, write that on the drawing. One sentence often removes a question that would otherwise stretch across several emails.
Finally add two things people often remember too late: batch size and desired timing. A single piece and 500 pcs are estimated differently. If the deadline is tight, the technologist will immediately know whether a faster blank, different tooling or operation set is needed.
What to do next
When the drawing already has initial notes, don’t send it straight to calculation. First resolve the most expensive questions: which datums to use, which blank to start from and where allowance remains after the first operations.
Without this, the route quickly splits into versions. One technologist calculates from jaws, another from centers, a third includes an extra flip. On a simple part this costs 10–20 minutes per person. On a series or complex housing the time stacks into hours.
A useful order: fix the datums and mark which surfaces get dimensions from them; choose the blank; agree the operation sequence so it’s clear when accurate sizes appear; note where and how tolerances are checked; only then estimate fixtures, approximate cycle time and scrap risk.
Discuss the operation order with quality control early. If a dimension appears between two surfaces but only becomes accurate after the second setup, that must be seen in advance. Otherwise production will run one scenario and QC will inspect by another.
At this stage you don’t need a perfect route, just a working skeleton. For a stepped shaft, for example: cut the blank, 1st setup rough turning, 2nd setup finishing, check runout and diameters. From that it’s clear whether special fixtures are needed, how long the cycle takes and where thin walls or long tool overhangs pose a risk.
For milled parts they look at the same aspects from a different angle: which plane to fixture the housing on, in which setup to make the base holes, when finishing pockets appear and how relative positions are later measured.
When the logic is built, involve the estimator, the shop foreman or the equipment supplier. At EAST CNC, where they select CNC lathes, machining centers and automated lines for metalworking, this early review helps to quickly decide whether a standard machine is enough or the part requires a different processing scheme and launch service.
A good rule of thumb: after your notes another person opens the drawing and within a couple of minutes understands where to start machining, how to control sizes and where risks will appear.
FAQ
What should I send to the technologist with the drawing?
Send the PDF, the original model or drawing file, material, blank type, batch size and deadline. If the part has contentious areas, add short notes directly on the drawing instead of a long email.
How to quickly check the revision before sending?
Compare the revision number in the file name, in the drawing stamp and in the covering note. If any of these differ, fix the package before sending for estimation.
Which bases should be marked first?
Mark the bases for the first setup first. For a turned part this is usually the face and the reference diameter; for a housing — the support plane and the primary locating holes. That way the technologist immediately sees what to clamp and what to reference.
Why specify the blank if the material is already listed?
Yes — you should. The material grade alone doesn’t show the starting blank: bar, forging, casting or plate. That affects allowance, the first setup and machining time.
Where is it best to show strict tolerances?
Place tight tolerances next to the view where the technologist reads that surface. Hiding runout, concentricity or roughness notes in the bottom of the sheet forces a route recheck later.
Why is the file most often returned for clarification?
Different revisions, unclear bases, incomplete thread notes, overly general material and poor scans are the most common causes. Even a simple part enters a cycle of clarifications when the technologist has to guess.
Should I note the first and second setups?
Yes — and it doesn’t take long. Two short phrases beside the part views are enough to show flips, clamping risks, tool access and possible runout.
What to do if there’s a contentious area on the drawing?
Don’t stretch the question into a long email. Place a short comment directly at the relevant point on the drawing and show what’s missing: fillet shape, depth, chamfer or dimension reference. The technologist will answer faster and more precisely.
Is such a review necessary for a simple part?
Yes. Even for a simple part: a single missed tolerance on the sealing plane or an unclear hole reference can change the route, inspection and cycle time for the whole batch.
When is the drawing ready to hand over for estimation?
Send the file when another person can open it and, in a couple of minutes, understand the revision, material, blank, bases, critical tolerances, batch size and deadline. If they stumble on any of these, fill the gaps first.