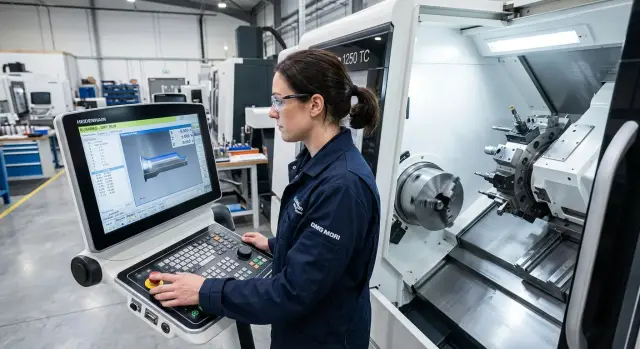
Post-processor for a new machine: tests before the first part
Перед первым запуском новой станка проверьте постпроцессор: оси, ноль, циклы, коррекции и безопасные высоты — сделайте сухой прогон и простой тест до первой детали.
What can go wrong before the first part
Even if the CAM trajectory looks clean, a post-processor for a new machine can produce a program with subtle but dangerous issues. The problem is usually not the geometry itself but how the machine interprets axes, work zero, cycles and transitions between operations.
The most dangerous failure is a reversed axis direction. On the screen everything may look logical, while the tool actually moves negative instead of positive. On a lathe this quickly leads to the tool moving into the chuck or cutting into the stock. On a machining center a similar mistake sends the tool toward the clamp or table.
An incorrect work zero causes equally many problems. If the post outputs offsets in the wrong coordinate system, the whole trajectory shifts. Sometimes it’s just 2–3 mm, but that’s enough for the first approach to miss the edge and cut into the material. The reverse can also happen: the machine is cutting air and the operator wastes time trying to understand why the program seems to do nothing.
Cycles are another risk area. Drilling, boring, threading and other repetitive commands often fail in non-obvious ways. The program may choose the wrong retract plane, wrong depth or an extra pass. As a result the drill goes too deep, touches the bottom, or retracts at the wrong place.
Safe heights may seem trivial until a tool crosses a clamp at too low a level. This often appears during moves between holes, tool changes and rapid traverses. If the clearances were set too tight, an extra millimeter of stock is already dangerous.
There are also quiet errors. Length or radius compensation can be applied at the wrong moment. Then the first cut leaves excessive stock or, worse, removes too much metal. On a new machine you want to catch these before the first part, not after a ruined blank.
Major breakdowns rarely come from one big mistake. Usually two small issues coincide: a slightly shifted zero, a low retract and a wrong axis sign. That's enough for a routine test to become an emergency run.
What to prepare before testing
Rushing is the worst enemy when setting up a post-processor. A single wrong axis sign or a Z offset can go unnoticed until the first real cut. So before you run anything, assemble a simple verification kit.
First, get the machine kinematics diagram and the axis list. Know which axes are linear, which are rotary, where their zeros are, what direction is positive and what travel limits exist. If the post outputs a command for axis C while the machine expects A, the error will show immediately.
Keep the machine manual or axis spec sheet at hand, a short test program with simple G0 and G1 moves, the current tool table and offsets, and a cheap blank or empty chuck for a test run. Also have a notebook or file to record observations. Notes save a lot of time.
The test program should be simple. That's a benefit, not a drawback. The less complex the geometry, the faster you’ll identify whether the issue is axis direction, zeroing, compensation or command format.
An empty chuck works if you’re watching the air moves. A blank is better when you need to check approach, retract and height margin. Don’t use an expensive blank for the first test.
Verify the tool table before running. Check tool length, radius, compensation number and magazine position. Often the problem isn’t the post but that the program calls a tool number that has a different tool in the table.
Write each error and correction immediately. Three notes are enough: the line/frame number, what went wrong and what you changed. After half an hour small confusions about compensations or axes are easily forgotten, and those notes save time.
How to check axes and directions
Start with the shortest moves. Don’t allow long traverses right away. On a new machine it’s safer to check each axis separately: on a lathe typically X and Z, on a machining center X, Y and Z, and on a 5-axis machine also B or C.
Watch what the machine actually does, not what appears in the code. The display may show the expected direction, but a post error is often visible only by the real movement of the saddle, turret or table.
Order of checks
Command short manual or program moves, for example 1–2 mm, moving only one axis at a time. After each move look for two signs: where the axis moved physically and how the coordinate changed on the screen. The plus/minus sign must match both on the CNC display and on the machine.
A typical sequence is:
- Check X alone.
- Then Z, then Y if present.
- Then give a small rotation on C or B.
- Return the axis back by the same step.
Don’t rush with rotary axes. A sign error there is especially unpleasant because the tool can turn the wrong way before cutting. Apply a small angle, e.g. 5 degrees, and visually confirm the table or head rotates as expected by the machine kinematics.
Then check return to reference. The axis should reliably come to the same point without strange shifts. Repeat the short back-and-forth several times. If the position drifts, don’t proceed to a full dry run.
A simple sequence X+, X-, Z+, Z- and then one move on Y and the rotary axis takes a few minutes, but often catches errors before you mount a blank.
If something doesn’t match, stop immediately. Don’t continue hoping the rest will work out. A direction error on one axis almost always brings problems with zero, plane selection and safe retracts.
Zero, planes and coordinate systems
First verify where the machine actually sets the work zero. For the first run it’s better to choose a simple test zero on a safe blank or plate and manually check G54. Then set G55 or G56 with an offset of a known distance (for example 20–30 mm) and confirm the program moves to the place you expect. This quickly shows whether the post confuses work offsets.
One common error is simple: everything looks right in CAM, but the wrong plane is active in the code. On milling this is usually G17, on turning often G18. If the plane doesn’t match, arcs, cycles and even the tool approach can move in the wrong direction. Don’t rely only on the simulation; check the program header for which plane and which coordinate system are active and whether any local offsets remain.
It helps to run the same short contour in two offsets. For example, make a square or circle in G54, then repeat the same contour in G55. If the shape is identical and the location shifts exactly by the set offset, the offsets are working correctly. If in the second offset the contour shifts along another axis or mirrors, catch the error now.
The work base must also remain after a tool change. Some posts or manual edits accidentally insert commands that reset local shifts, plane or compensation modes. Test this with two tools: the first approaches the check point, then tool change, and the second should return to the same point without unexpected deviation.
A quick check is four actions: activate G54 and approach a reference point, change tool and repeat the approach, enable G55 and repeat the same contour, and then confirm the plane G17/G18/G19 matches the operation and there are no stray G52 or G92 commands.
If the machine reproduces the same geometry in different offsets and keeps the base after a tool change, you can move on to compensations and a dry run.
Tool compensation without surprises
Compensation errors often ruin the first run even when the trajectory itself looks correct. Check the post not only for axes but also for how it handles tool length and radius compensation.
Separate two things immediately: length compensation and radius compensation. In milling these are usually different commands and different tables in the control. In turning add the insert geometry and tool orientation, so confusion happens even more often.
Match tool numbers and compensation numbers. On some controllers tool T05 takes length from H05 and radius from D05. On others the logic differs: the tool number and offset number need not match. If the post calls T07 but the machine expects H07 and D07, find that out beforehand.
What to check in the program
Inspect several short code sections to find where the post enables compensation and where it cancels it. If a compensation is enabled too early, the tool may move aside before the approach. If cancellation is too late, the machine will perform unnecessary moves after retract.
Check four things: the tool number matches the compensation needed, the control understands the length and radius call format, compensation is enabled during a safe approach, and it is canceled only after a clear retract. Also ensure old values from a previous setup didn’t remain in the offset table.
Then do a short pass with a generous stock allowance. Leave an extra 2–5 mm on a wall or face to observe machine behavior without risking the tool or blank. This test quickly shows where the trajectory actually shifts.
If the control reads offsets in a different format, the error appears immediately. A typical case: the post outputs one scheme for calling compensations but the CNC expects another. On the screen the program looks normal, but the machine either ignores compensation or picks the wrong entry from the table.
A good sign is when after the test pass you can explain every shift: what the post did, what’s stored in the table, and why the tool ended up where it did. If you can’t answer that clearly, it’s too early to run on a real part.
Cycles and safe heights
When the post produces initial cycles, don’t run a long program. Do three short tests: one drilling cycle, one boring cycle and one threading/pass. On these simple examples an error shows up fast with much lower risk.
Compare not only the final trajectory but also the cycle logic. The depth must match the specification, the retract should return the tool to the expected place, and the retract plane must not be too low or too high. If CAM specified one level but the machine goes to another, stop and find the cause.
Set the safe height with margin. For a milling center allow clearance above clamps, vises and protruding bolts. On a lathe keep clearance above the chuck, jaws and any long overhang. Extra 10–20 mm usually costs far less than one collision at rapid traverse.
A convenient test sequence is: one short cycle at one position, the same cycle at a neighboring position with a rapid move between, then repeat with a different tool or different tool length, and finally a dry run at reduced feed and slowed rapids.
Watch rapid moves between positions separately. Often the cycle itself is correct but the tool moves low on the straight line between holes and clips the fixture. This is easy to miss if you only look at the entry and exit points of the cycle.
Another frequent issue is unnecessary raises inserted by the post. The machine lifts too high between cycles and then descends again, wasting time. This isn’t a crash, but on a production run these extra movements add minutes per part. If you see an unnecessary lift after every hole, check safe plane settings and transition rules.
A short test quickly shows whether cycles are fine. For example, perform drilling in one point, threading in a nearby point. If the depth is correct, retracts are predictable and the transition is clear with a safety margin, the cycle can be considered working.
Dry run step by step
The first run shouldn’t cut metal. Remove the risk: disable cutting if the machine allows it, and immediately reduce feed. Keep feed override low so you can stop the program at any time.
The first run is better above the part, not on it. Set a safe Z offset or raise the trajectory so the tool moves visibly higher than the blank, chuck and clamps. On a lathe this is especially important near the jaws and tailstock. On a machining center also watch vises, parallels and exposed fasteners.
A good order is simple:
- run the program above the part at a safe height;
- step through frames at tool changes;
- separately check the approach before the first cut;
- observe actual clearances at each rapid move;
- after a clean dry run repeat the run at low feed.
Don’t try to watch everything at once. During a tool change check where Z goes, the point where the spindle turns, and whether the tool comes too close to fixtures. Before the first cut step through frames. It’s easier to spot an error in height, plane or direction this way.
Rapid moves cause the most surprises. Stop the program before each G0 and imagine where the tool will be in a second, not where it stands now. If the path clears the part with margin and the approach to the cut-in point looks logical, the first stage passed.
Then repeat the dry run closer to real conditions: set a small feed and slightly higher rapid override. This second pass often catches things invisible during a slow frame-by-frame check: an extra bounce, an awkward approach or a too-low pass between operations.
If two dry runs show predictable moves, you can proceed to a trial cut on a simple blank—not an expensive part and not at full production parameters.
Where mistakes happen most often
A common failure starts with taking an old post and tweaking it slightly. If the new machine has different kinematics, axis order or axis logic, that shortcut quickly causes trouble. The code looks familiar, but the trajectory already sends the tool the wrong way.
Many people check only X, Y and Z. That’s not enough. If the machine uses a rotary axis or table, separately verify rotation sign, home position and transitions through 0° and 180°. One sign error can produce mirrored machining or send the tool into fixtures.
People also rush safe heights. They copy a value from a previous job because it worked there. But a different chuck, different workholding or longer tool changes the real danger zone. Safe heights must match the current setup, not memory.
Another common confusion is between tool compensations and work offsets. The operator sees a size error and moves G54 when the problem is actually tool length. Or adjusts compensation while the zero is wrong. The size may temporarily match but the root cause remains.
And one more trap: trusting simulation too much. CAM shows overall logic well but doesn’t account for all specifics of a particular machine: real axis limits, tool overhang, retract behavior and clamp heights. So a dry run on the machine is always necessary, even if the simulation looks clean.
Before the first cut, quickly ask five questions: did you really adapt the post for the new machine and not just copy old settings; did you check rotary as well as linear axes; is the safe height set for the current clamps; do you know when to change tool compensation versus work offset; and did the program pass a dry run on the machine. If any of these raise doubts, it’s too early for the first real part.
A simple test example on a new blank
For the first run don’t use complex geometry. A simple blank with a face, one hole and one shallow slot is enough. This test quickly shows whether the post outputs axes, zero, a drilling cycle and radial compensation correctly.
Start with facing. The goal is not a perfect finish but to find where the machine considers Z0. Give a small allowance and see whether the tool stops where you expect. If the face is off by a few tenths, don’t edit a single line in the program—look for an error in the coordinate system or in the post logic.
Then test a hole with a short cycle. Use a modest depth and a noticeable retract so you can observe motion without much risk. Watch three things: does the machine position correctly in X and Y, does it reach the correct Z depth, and does it perform a safe retract after the cycle. A too-low retract is an easy cause of collisions later.
Finally run a side pass with radius compensation. A simple slot or wall pass shows how the post writes G41/G42 and when it enables or disables compensation. Even if the on-screen path looks correct, verify entry and exit on a dry run. Errors often hide there.
A convenient short sequence: facing to check Z0 and approach height, hole to check cycles, depth and retract, then a slot or side pass to check radial compensation, and finish with a repeated dry run at increased rapid speed.
If you configure a post for a new machine, follow one rule: fix the post, not the G-code for each part. Manual edits can save one run, but the error will reappear in the next program. It’s much more reliable to correct the output logic once and then receive predictable programs for all similar operations.
Short checklist and next steps
Spend 20–30 extra minutes on a quick check before the first real part—this is far cheaper than dealing with a collision. Even a good post for a new machine should be verified with simple moves rather than a full production program.
For the first run follow five steps: check axes in manual and MDI modes—X, Y and Z must move in the correct direction and return to machine zero without strange shifts; match tool numbers and compensations—T, geometry and wear values must correspond to what the program calls; run cycles in the air—drilling, boring, threading and retracts must clear chucks, clamps and other protrusions; then do a dry run of the whole program at reduced feed and increased height margin. There should be no alarms or strange motions at tool changes, plane switches, compensations and between frames.
If the machine is newly commissioned, it’s useful to review the test program and post settings with the commissioning engineer. For machines supplied by EAST CNC this is a normal step: the company handles selection, delivery, commissioning and service, so it’s best to sort ambiguous items in the first files while the program is still short and clear.
After that don’t rush into a complex part. First run a short training program in the air, then on a simple blank, and only then move to regular production.
If at any stage you notice an unexpected lift, an odd retract or a wrong axis sign, stop and fix the post immediately. These errors rarely disappear by themselves, and on the first part they almost always get expensive.
FAQ
С чего начать проверку постпроцессора на новом станке?
Start by checking axis directions and the work zero. Give short 1–2 mm moves on one axis at a time and observe the machine’s actual motion, not just the screen. Then manually verify G54 at a safe point and only after that move to a dry run.
Как быстро проверить, что оси идут в правильную сторону?
Move one axis at a time with a small step and immediately move it back. If the coordinate on the screen increases while the axis moves the wrong way, stop and fix the post immediately. For rotary axes, give a small angle (for example 5°) and verify the rotation matches the machine kinematics.
Как понять, что G54 и G55 работают без ошибки?
Set a simple reference zero on a plate or cheap test blank and bring the tool to a clear contact point. Then set G55 with a known offset (for example 20–30 mm) and repeat the approach. If the point shifts along the wrong axis or by a different amount, the post is mixing up work offsets.
Что подготовить до первого запуска?
Have the machine kinematics diagram, the axis spec sheet or manual, a short test program, an up-to-date tool table and a simple test blank ready. Also keep a notebook or file for notes. Recording frame numbers, what failed and what you changed saves a lot of time.
Как проверить коррекцию длины и радиуса без сюрпризов?
Check tool number, length, radius and the offset number in the machine. Then find where the program enables and disables compensation. For the first cut leave a 2–5 mm margin so you can see any shift without risking the tool or the blank.
Какие циклы лучше тестировать первыми?
Start with three short tests: one drilling cycle, one boring cycle and one threading/pass for a cut. These examples quickly show whether the machine uses the correct depth, return plane and transitions. Don’t run a long program until these cycles behave correctly.
Как выбрать безопасную высоту для первого прогона?
Set the safe height with margin above chucks, clamps, vises and any protruding bolts. An extra 10–20 mm is almost always cheaper than a single collision at rapid traverse. Check not only the entry point but the whole path between positions.
В каком порядке делать сухой прогон?
First run the program above the part at low feed and reduced rapid. Then step through frames at tool changes, before the first cut and before each G0. If two dry runs look predictable, do a trial cut on a simple blank rather than on a valuable part.
Можно ли просто чуть поправить старый пост под новый станок?
No. If the new machine has different kinematics, axis ordering or compensation logic, a slightly edited old post often causes problems. You can use the old post as a base, but you must recheck axes, zeros, planes, cycles and safe moves. Manual fixes save one run but the issue returns on the next program.
Когда стоит звать инженера пуско-наладки или сервис?
Call commissioning or service when the machine is first put into operation, if axes or offsets don’t match, or if the control reads tool offsets in a different way than the post outputs. With a short test program these issues are easier to sort out early. For machines from EAST CNC this is a normal step since they provide commissioning and service.