Ovality After Fine Boring: What to Check First
Ovality after fine boring often points to more than one cause. Here’s what to check first: the tool, locating, clamping, and cutting conditions.
What ovality after boring means
If ovality appears after fine boring, the hole is no longer a circle but a slightly elongated shape. In practice, this shows up when you measure the diameter in the same cross-section along the 0-180° axis and the 90-270° axis and get different numbers. For example, 40.012 mm in one direction and 40.026 mm in the other. The difference between them is the first clue to look at.
It is important to measure not just anywhere, but in one cross-section and with a clear orientation. If you rotate a bore gauge or a three-point instrument by a quarter turn, the larger size will disappear and then come back. That is normal for ovality: the hole has a major and a minor axis.
Ovality is often confused with taper. But taper means the diameter changes along the depth of the hole. At the entrance it may be 40.020 mm, while at the bottom it is 40.005 mm, even though each individual cross-section is almost round. With ovality, the problem is different: the size changes not along the length, but with the measuring direction.
Waviness is also often confused with ovality. With waviness, the surface does not follow a smooth arc; it looks like small "waves" around the circumference. In that case, the size changes not in two main directions, but at several points around the circle. This is more often related to vibration than to a simple geometric elongation of the hole.
One cause rarely leaves the same mark on every part in a row. On one part the clamping force was a little higher, on another a small chip got under the base, on a third the tool had already warmed up. Even edge wear does not behave perfectly the same from part to part. So the same defect name does not mean the same cause on the shop floor.
The most common mistake is to change everything at once: the tool, the cutting conditions, the chuck, and the program. That makes it easy to lose the original clue. It is much more useful to go step by step: first compare the sizes along two axes, then check the same points at different depths, and only then touch the fixture or the cutting insert. That approach is almost always faster than replacing everything at random.
Where to start checking
Do not blame the boring tool right away. First build a simple picture of the hole itself. Without that, it is easy to spend a long time chasing causes and waste a shift on guesswork.
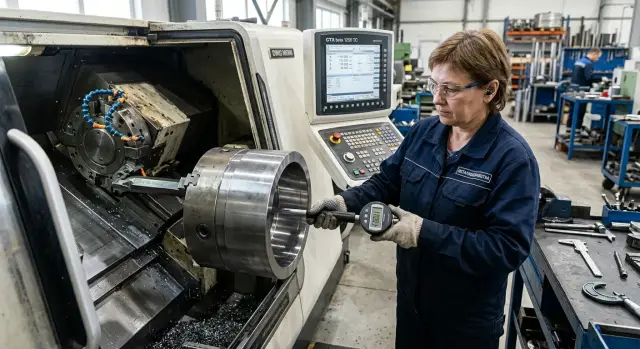
Measure not at one point, but along the depth. You need at least three zones: entrance, middle, and exit of the hole. At each depth, measure in two planes, usually 90 degrees apart. Then you can see not only the diameter deviation, but also exactly where ovality appears after fine boring.
If the shape shifts evenly along the full length, clamping or locating is usually checked first. If the entrance or exit is affected more strongly, the list of suspects changes: tool rigidity, overhang, cutting conditions, edge condition. That is not yet a diagnosis, but it is a solid starting point.
Next, it helps to compare two parts under the same conditions. The first one is right after setup. The second one is after reclamping, without changing the tool or cutting conditions. If the picture shifts noticeably after reclamping, the cause is often closer to the part location or clamping force than to tool wear.
The cutting mark also tells you a lot. Inspect the surface along the hole length and note where the shape gets worse. If the marks in one area become torn, change pitch, or lose their shine, that often matches the point where the problem starts.
It helps to keep the same checking sequence:
- measure the entrance, middle, and exit;
- check two planes at each depth;
- compare the part after the first and second clamping;
- look at the cutting mark and note the worst zone;
- change only one parameter in each cycle.
That last point often solves everything. If you loosen the clamp, change the insert, and adjust the cutting conditions at the same time, you will not know what actually worked. It is much faster to move one step at a time: first recheck locating, then clamping, then the tool. In the shop that is less exciting than a dramatic experiment, but the cause is found much faster.
How to recognize a tool problem
If ovality after fine boring appears suddenly, the tool is the first thing to check. That is quicker than tearing into locating or clamping right away. The cause is often simple: the edge has worn, the insert is seated unevenly, or the boring bar has started to run out.
Start with the cutting edge. Not by eye, but under magnification. A small chip, built-up edge, or flaking can be easy to miss, but these often cause uneven stock removal around the circumference. If the first parts in the batch were good and then the size and shape started drifting, suspicion of the edge only grows stronger.
Then check the insert in its seat. Remove it, clear even tiny chips from under the support, and seat the insert firmly again. One tiny particle under the insert changes the position of the cutting point more than it seems. After such a small issue, the hole can move not only in size but also in shape.
Also check the overhang of the boring bar. After a setup change, a holder swap, or a rushed adjustment, it is sometimes longer than it was in the stable setting. An extra 10-15 mm already makes the setup more flexible. Then the tool starts to deflect or chatter slightly, and on the finish pass that shows up right away.
Runout is best measured with a dial indicator in two places: on the bar and at the mounting area. If the bar is straight but the mount shows deviation, the insert is not the first place to look. If runout is already present on the bar itself, the cause is closer to the tool assembly. This kind of defect often creates a repeatable pattern from part to part.
The marks on the surface also say a lot. When the tool is the culprit, you often see waves, fine ripples, or a repeating pattern on the bore wall. With a locating error, the picture is usually different: the shape shifts, but the surface can stay relatively calm. With clamping fluctuations, the mark often changes from part to part more strongly than with a tool issue.
On the shop floor, this is checked in a simple way: install a known good insert, return to a short overhang, and measure the runout again. If the picture improves immediately, the cause was in the tool, not in the part setup.
How to find a locating error
If the part does not sit on the datum the same way every time, the hole can easily go oval even with a normal tool. First remove the simplest issues: chips, oil, and small burrs on the locating surfaces. One stuck chip is enough to make the part sit slightly higher on one side.
Then look at how the part actually rests on the stop and support points. Not by eye, but with your hands and an indicator. If one point makes contact earlier than the others, the clamp will pull the part in with a tilt, and the boring will then run off the axis you thought was the datum.
A good check takes only a few minutes. Clamp the part as usual, but do not cut. Measure it, unclamp it, reseat the part on the same datums, and repeat the measurement. If the deviation changes without cutting, the cause is almost always in seating or clamping, not in boring tool wear.
It is helpful to compare several parts from the same batch. When ovality after fine boring appears on all parts in almost the same way, look for a common shift in the datum: the stop is in the wrong place, the support surface is worn, or a pin is pulling the part to one side. If the problem appears only on part of the batch, a dirty datum, an accidental burr, or uneven seating of a specific blank is more likely.
Also check the pin and the stop separately. A crooked pin is not always obvious right away: the part seems seated, but when tightened it shifts slightly. The same can happen with a stop whose edge has been beaten up. The contact mark tells you a lot: a clean, even stripe means proper seating, while a small shiny spot on one side often points to tilt.
In the shop, it usually looks simple. The first part is measured, and the ovality is above tolerance. People rush to change the tool for nothing. First they repeat the clamping without cutting, and the size already drifts by several hundredths. After cleaning the datums and correcting the stop, the deviation disappears.
If in doubt, use a short checklist:
- clean the datums and supports down to bare metal
- check contact at the stop and support points
- repeat the clamping without cutting
- compare measurements across several parts from the same batch
This check quickly separates a locating error during boring from tool issues and saves time and good inserts.
How to spot clamping fluctuations
Clamping fluctuations often hide as cutter wear or a locating error. But they have their own signature: the shape of the hole changes not during cutting, but at the moment when the chuck tightens or releases the part.
Start with a simple test. Reduce the clamping force slightly within a safe range and machine the same blank with the same cutting conditions. If ovality after fine boring becomes smaller or shifts along the axes, the cause is often the chuck, pressure, or the clamping scheme itself.
Pay special attention to thin-walled parts. If the jaws press exactly where the wall is weakest, the blank can deform even before the boring tool makes the pass. On the machine everything looks normal, but after unclamping, the hole...
A simple shop-floor example
A common shop-floor case is a thin-walled bushing, a short stock allowance after roughing, and careful fine boring. Everything looks calm, but during inspection the hole comes out non-round. For this kind of part, ovality after fine boring is easy to confuse with tool wear.
Suppose the bushing wall is about 3 mm, and the finish stock allowance is only 0.1-0.15 mm per side. The operator sees ovality and first changes the insert on a new holder. The logic is understandable: if the edge is tired, the size may start drifting. But after the replacement, nothing changes. That means the cause is probably not the insert.
Next, it helps not to guess, but to compare the part in two states. First the operator measures the hole immediately after boring, while the part is still clamped. The size is almost within tolerance, and the ovality is small. Then he releases the clamp and checks again. After unclamping, the hole shifts more, and the difference between the two directions becomes noticeable.
That explains a lot. If the size changes only after unclamping, the tool is not the main suspect. More often the part is being slightly deformed by the clamping itself, especially when the wall is thin and the clamping point is close to the machined zone.
In a similar case, the operator did not change the cutting conditions or the program. He did two simple things: moved the clamping point farther away from the machined area and reduced the clamping force. After that, he ran the same finish pass again and repeated the measurement before and after unclamping.
The difference almost disappeared. The hole stayed more stable, and the ovality moved back within the allowable range. This example is a good reminder: changing the insert does not always fix the problem. If the part is thin and the stock allowance is short, first check how the fixture is holding it and what happens to the shape after the clamp is released.
Mistakes that make it hard to find the cause
When ovality appears after fine boring, the most common problem is not the defect itself, but the way it is checked. People rush, change several conditions at once, and then no longer know what actually had the effect. One pass may get better just by chance, and that causes confusion.
The first typical mistake is changing the insert, cutting conditions, and clamping force all at once. After such a "setup," the part really may come out straighter, but the cause will remain unknown. If you want to find the source of the defect, change only one parameter and take another measurement right away.
The second mistake is measuring the hole only at the exit. That makes it easy to mistake a local vibration mark for the part’s overall geometry. Ovality should be checked in at least several cross-sections: at the entrance, in the middle, and at the exit. Then you can see whether the defect runs along the full length or appears only in one zone.
A common mistake is to suspect the machine too early. That is the third mistake. Before checking datums, jaws, seating cleanliness, and clamping repeatability, it is too early to blame the spindle or guideways. Much more often the problem is in how the part is supported and how the chuck holds it.
Another trap is temperature. If one part is measured right after machining and another after cooling, the comparison will be skewed. This is especially noticeable on thin-walled blanks and with tight tolerances. Temperature changes the size enough to send the diagnosis in the wrong direction.
Finally, do not draw conclusions from one part. One blank may have its own stock allowance, internal material stress, or a slight setup tilt. You need at least a short series to see repeatability.
Usually five simple mistakes get in the way:
- changing several machining conditions at the same time;
- checking the size in only one point of the hole;
- blaming the machine before checking locating and the jaws;
- comparing a hot part and a cold part as if they were the same;
- drawing conclusions from a single part.
If you keep these mistakes under control, the cause is found faster. And most importantly, you do not waste half a shift replacing a perfectly good tool where you only needed to recheck the part setup.
A short checklist before the next part
Before the next part, it is better to spend three minutes on a repeatable check than to dismantle the whole batch later. If ovality appears after fine boring, small things often create the defect: a chip on the datum, a slightly shifted insert, or a different clamping force.
A good habit is simple: check the same things in the same order and write down the result right away. Then the cause is easier to see instead of getting lost in guesses.
- Clean the datums, jaws, and all seating surfaces. Even a thin chip or dried coolant can shift the part by several hundredths.
- Check the runout of the boring bar or boring system before starting the batch. Do not use your eyes only; use an indicator and record the value.
- Make sure the insert is seated firmly. There should be no dirt under the clamp, the screw should pull evenly, and the cutting edge should have no chip.
- Lock in the clamping force and the part position. If the part sticks out of the jaws differently, the result will also be different.
- After the first part, measure in three cross-sections and two planes. This shows exactly where the shift appears: at the entrance, in the middle, or deeper in the hole.
These five actions work best together. If you check only the tool, you may miss part movement. If you look only at clamping, it is easy to miss bar runout that was already there before the blank was loaded.
Look not only at the number in the report, but also at the pattern of the deviation. If the size shifts in the same plane along the full hole length, suspect the tool or the rotating assembly first. If the picture changes after reclamping, the datums, jaws, or part position are more likely to blame.
Another practical step: do not wait for the fifth part. If the first one already gives a questionable hole shape, stop and recheck the setup right away. That usually saves more time than trying to "tune out" the issue with feed or size correction.
What to do next if ovality comes back
If ovality after fine boring appears again, do not adjust the cutting conditions blindly. A repeating defect almost always leaves a mark in the measurements if you look at a series, not just one part.
Build a measurement map for at least 5-7 parts in a row. Measure the hole in the same cross-sections and the same points, for example every 90 degrees. That makes it easier to see whether the defect stays in one direction or changes from part to part. If the pattern repeats, the cause is usually systematic. If it drifts, the process is more likely unstable.
Dimensions alone are not enough. For each part, it helps to record:
- which tool was installed and how many parts it had already machined
- speed, feed, and stock allowance for the finish pass
- clamping force and locating scheme
- fixture number, blank material, and shift
This kind of record quickly removes the guesswork. For example, if ovality does not appear right away but grows after several parts in a row, it is worth checking cutting edge wear and heat buildup. If the defect appears only on one fixture, the search area is much smaller.
Then compare the conditions. Machine a part on a different fixture or take another blank from the same batch. You can keep the same program, but change the tool or reduce clamping within acceptable limits. Change only one parameter at a time. Otherwise, you will see the difference, but not understand the cause.
If the defect does not go away, look deeper: bar runout, spindle condition, chuck stiffness, play, heat in the assemblies, and how the machine behaves under load. At this stage it is better to rely not on memory, but on a measurement log and notes for each part.
When ovality keeps coming back even after these checks, it is worth discussing the situation with EAST CNC specialists. The company provides delivery, commissioning, and service for metalworking machines, so the discussion can be specific: locating scheme, fixture, cutting conditions, and the part itself. The more precise your records are, the faster the source of the problem will be found.