One Program for Two Machines: What to Check Before Copying
One program for two machines does not always produce the same result: before copying, check the kinematics, sensors, zeros, offsets, and cycle logic.
Why identical machines can give different results
Two machines with the same nameplate can produce different dimensions on the very first part. On paper, they are identical. In the shop, that is often not the case.
The same model often comes with different equipment. One machine may have different sensors, a different chuck, another turret, or a different CNC control version. The axis travel may match, but the behavior during acceleration, braking, and homing can still be different. That is why one program for two machines will not give the same result on its own.
The machine’s history and current condition make the difference even bigger. One may have just gone through commissioning, while the other has had repairs, a drive replacement, or guide adjustment. After that kind of work, the machine often runs fine, but its real offsets, backlash, and references are no longer the same as before. The code may be clean. The problem sits in the parameters, offsets, or machine settings.
Even a tiny shift in the zero point quickly turns into scrap. If the part zero moves by 0.05 mm, you may not notice it in roughing. On a finishing pass or a mating dimension, the part may already fail inspection. On turning work, that kind of small error is especially annoying because it shows up directly in the diameter.
There are also less obvious reasons. The tool sensor may trigger a little earlier. The home position may not be where you expect. One machine may hold repeatability better with a warm spindle, while another changes size after the first ten minutes of work. The operator sees the same program, but each machine reads it through its own real settings.
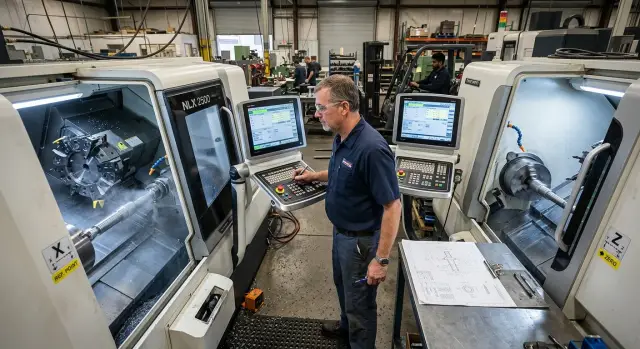
A simple shop-floor example: a program is moved from one CNC lathe to another identical one. The first part is almost right, but the groove shifts by a few hundredths and the face gives a different length dimension. The programmer looks for a code error, even though the cause is often simpler — a zero shift, a different tool setting, or a changed reference after service.
If two identical machines give different results, the first thing to check is not the G-code, but the basic machine settings. That saves time, tools, and a couple of ruined blanks.
What to compare before moving the program
The same housing and the same nameplate still do not mean one program for two machines will run the same way. Even two machines of the same model often differ in control settings, available functions, and service commands. Because of that, one machine may complete the cycle smoothly while the other stops on an M-code or makes an extra move.
First, compare the CNC control and software version. The difference may be small, but the behavior will not be: cycle format, compensation handling, response to nonstandard commands, and error processing order. If one machine has a different system version, do not treat it as a minor detail.
Then check the option package. One machine may have rigid tapping, a C-axis, live tooling, macro support, extended cycles, or special positioning modes. On another machine, those functions may be turned off or set differently. In that case, copying a CNC program turns into a gamble.
There are five things worth comparing before loading the file:
- CNC control model and software version
- active options and special cycles
- axis travel, spindle speed limits, and acceleration settings
- chuck, turret, tailstock, and their control logic
- macros, M-codes, and their actual purpose
Axis travel and spindle limits are not checked for show. If the first machine has extra room on X or Z and the second one does not, the program will hit a limit during approach. The same goes for the spindle: speed, acceleration, or torque limits change cutting conditions and surface quality.
Also look at the mechanics of the units involved in the cycle. The chuck may have a different pressure range and clamping logic. The turret may differ in station numbering or index time. The tailstock is sometimes controlled by different M-codes even on similar machines.
Macros are best checked manually, line by line. In one shop, an M-code opens the chuck; in another, it turns on a completely different function. The same applies to sensor references and service subprograms. Five minutes of checking usually saves a shift, a tool, and a batch of parts.
Where kinematics can break a copied program
Even if you have one program for two machines of the same model, the tool path can drift apart on the very first moves. The reason is often not the code, but the way each machine understands motion on its axes and where it believes zero is.
Start with the basics: X and Z direction. On one machine, a positive move on X may move the tool exactly as expected, while on another, after service settings or a different postprocessor, the logic may be different. That kind of mistake is unpleasant: the program looks fine, but the tool goes the wrong way and removes too much material.
Then return both machines to home positions and compare the actual behavior. Not just the numbers on the screen, but the real position of the units. If the carriage or turret sits slightly differently after homing, the same program start will no longer be the same.
Safe retract points and tool-change positions also often break the copy. On one machine, the retract after a pass is fine; on another, the tool gets too close to the chuck, jaws, or part. This is especially noticeable on short parts, where the clearance is very small.
There is another thing many people underestimate: axis acceleration and deceleration. If one machine enters the path more sharply and the other slows down more gently, the mark on the part changes. On a finishing pass, this creates different dimensions at transitions, marks on radii, or a small step where none was expected.
A good quick test is this: take a short safe program with no cutting, run it in air on both machines, and watch four points — homing return, approach to the part, retract after the pass, and the tool-change position. This takes just a few minutes, but it often saves both a blank and a tool change.
On the shop floor, it looks simple. One CNC lathe machines a bushing without issues, while the other leaves a barely visible ring near the face on the same program. Often the operator and the code are not to blame, but the difference in kinematics that nobody checked before the start.
Zeros and offsets that create scrap
Even on two CNC lathes from the same series, the result can shift by several hundredths if the zeros are set differently. The program itself may be clean. The error is not in the code, but in where the machine starts counting coordinates from.
First, compare the machine zero and the home reference point. After homing, the axes should end up in the same position not “approximately,” but within your process tolerance. If one machine returns a little differently after service or sensor replacement, copying the CNC program will quickly create a difference in length, diameter, or groove position.
Then check the work offsets G54-G59. On one machine, the part base may be set from the chuck face; on another, from the clamped blank after facing. For the operator, that looks like a small detail, but for the part it is a completely different coordinate world. One program for two machines works only when the part base is set the same way and you know who set it and how.
Another trap is tool compensation. The length and radius of each tool should be rechecked on the second machine, even if the set seems to be the same. The holder may sit slightly differently, the insert may be from a different batch, and the turret may have its own real geometry. One wrong offset often creates more scrap than one bad line in the program.
A simple check order helps:
- return the machine to reference and confirm the axis position
- open active G54-G59 and compare the part base
- check the length and radius of each tool
- remove old temporary offsets and manual edits from the code
- set a separate safe retract point
The last point is often underestimated. The safe retract point should not be copied from the old machine “as is.” On one machine, 10 mm of retract in X and Z is enough; on another, that same point may already be too close to the chuck, steady rest, or tool sensor.
In practice, it looks like this. The operator transfers the program to the second machine, starts a dry run, and everything goes fine until the tool change. Then the tool moves to the usual retract point, but the real zero position and Z clearance are different. The result is a crash or a ruined part. To avoid that, offsets should be set again on each machine, not carried over with the code.
Sensors and references do not work without surprises
When one program for two machines seems safe, the failure often comes not from the G-code, but from how the machine finds zero and how it detects contact. On paper, the models are identical. In practice, they often take different paths to the same point.
The most common trap is that the tool sensor is not in the same place on the second machine. Even if the control is the same, the contact point coordinates can differ by several millimeters. For roughing, that sometimes goes unnoticed. For finishing or parting off, that is enough to miss the tolerance or hit the part.
The same goes for the part probe. On one machine, the measuring cycle may write the result into one offset table; on another, into a different one. The operator runs a familiar program, sees that the measurement completed normally, and then the machine uses an old offset. The error looks strange: the probe worked, but the part zero still shifted.
There is also a less obvious issue: interlocks. The door switch, chuck clamp monitoring, and turret position checks all change the start sequence. One machine goes to reference right after power-up, while another waits for a door or chuck confirmation. If the program or the operator’s routine does not account for that, the start is delayed, a step is skipped, or a manual bypass is used — and that brings risk.
A worn sensor also causes surprises. It does not always fail at once. More often, it starts triggering a little earlier or later, and you get a drifting contact point. Today the tool length drifted by 0.02 mm, tomorrow by 0.05 mm. Then people start looking at the tool, the material, and the control, even though the sensor is the real cause.
Before moving the program, check four things:
- where the tool sensor is physically mounted and what its coordinates are
- which offset table the probe writes measurements into
- what permission sequence is needed for homing and cycle start
- whether the sensor repeats contact several times with no variation
On the shop floor, this is checked quickly: touch the same tool several times, then compare the spread of values. If the numbers wander, it is too early to copy the program. First, bring the sensors and references to the same behavior. Then the second machine will start predictably.
How to transfer the program step by step
Treat moving a program between two similar machines as a new start-up. The file may be the same, but the result is affected by machine zeros, references, sensors, and even the set of enabled options. That is why one program for two machines works only after a calm check, not after a quick copy.
First, collect a comparison baseline. Not from memory and not by eye. Write the parameters from both machines into one table and focus only on what affects movement and startup.
- compare axis zeros, references, and active offsets
- check travel limits, axis direction, and homing return parameters
- mark in the code the commands that depend on machine options, spindle, turret, tool sensor, or C-axis
After that, prepare the program itself. Old offsets often ruin the first run more than the code does. If the program already worked on another machine, do not carry over someone else’s tool wear values, length compensation, or old work offsets. It is better to set them again on the spot.
If the shop uses CNC lathes from the same line, the mistake usually hides in the details: one machine has its own measurement macro active, while another has it turned off; on one machine the M-code logic matches, on another it does not. Because of that, the program opens normally but behaves differently from the very first cycle.
Make the first run with no risk to the part or setup. A dry run saves more time than searching for the cause of a crash later.
- run the program without a part and without spindle rotation
- step through dangerous areas one move at a time or with stops before tool changes and approaches to the chuck
- machine the first part at a reduced feed and keep your hand near pause, not emergency stop
After the first part, do not rush to call the transfer successful. Measure the part, record all corrections, and save them separately for this machine. If the program is loaded again a week later, the operator will not have to look for the same deviations from scratch.
A good practice is simple: one program file, but a separate setup sheet for each machine. That reduces confusion and makes the next start-up calm.
The most common mistakes
Most often, the problem does not start in the G-code itself. The operator copies not only the program, but also the tool table, length or radius offsets, and then gets a different size on the very first part. Even two identical machines rarely run under exactly the same conditions: the tool may sit in a different position, the tool stick-out may change by a couple of millimeters, and wear on the axis may be different.
The second common mistake involves M-codes. The program looks familiar, but on the other machine there is a different chuck clamping sequence, different hydraulic logic, or a different response to coolant activation. Because of that, the chuck closes at the wrong moment, the steady rest behaves differently, and the part shifts before cutting even starts.
A lot of scrap also comes from blind trust in one postprocessor. If the control differs even by version or command set, the same post can output code with no obvious error but a different result on the machine. This most often shows up in cycles, threading, homing return, and subprograms.
Another trap is the model name. One index in the catalog does not mean a perfect match. One machine may have a different encoder, another home sensor, a different PLC revision, or updated firmware. From the outside the machines look the same, but they behave differently during homing and tool changes.
When you need one program for two machines, it is better to stop at a few simple checks:
- compare the tool table and offsets manually;
- open the M-code list for the second machine;
- check which control the file was created for;
- do a dry run before the first part.
Another mistake often appears after service. The machine is returned to work, the axes move, there are no alarms, and everyone rushes to run the old program right away. But after a sensor replacement, reference adjustment, or unit disassembly, a test part is needed first. It quickly shows a size shift, tool rotation issue, or a strange clamping problem. That step is often what saves both material and a shift.
A simple shop-floor example
A single program for shaft machining was running on two identical CNC lathes. On the first machine, the diameter came out at 40.00 mm with almost no adjustment. On the second, the same pass gave 39.84 mm. The difference looks small on paper, but for a fit it is already critical.
The operator did what most people do: opened the G-code and started looking for a mistake in the X lines and tool compensation. The program looked fine. Feed, speed, stock allowance, finishing pass — everything matched. A CNC program copy issue seemed like a logical explanation, but the cause was not in the code.
The problem turned out to be a different axis reference and a tool zero issue. On the second machine, the home sensor started a little earlier after a recent adjustment. The machine honestly considered its home point correct, but the actual position was off by fractions of a millimeter. For roughing, that often goes unnoticed. For a finishing diameter on a shaft, that is enough to move the size.
Then the tool was checked. The insert had been changed at the end of the previous shift, but the X zero was entered using the old value. The errors added up: first the machine took a different reference, then the operator added an inaccurate tool zero. Together, that created a stable diameter shift.
After the check, they did three simple things:
- returned the axis to reference and checked the home position
- remeasured the tool zero on X
- ran one blank part with inspection after the finishing pass
The size came back almost immediately. On the second trial, the shaft came out within tolerance without changing the program.
Cases like this show well why one program for two machines does not always work “as is,” even if the models are identical. In practice, one careful test run saves more time than an hour of searching for an error in code. Sometimes it saves the whole batch. If you have 30–40 blanks in work, it is better to spend 10 minutes checking the sensor and zeros than to sort scrap by diameter later.
A short checklist before the first run
If one program for two machines is supposed to produce the same part, do not start by cutting metal. First, check the things that most often create differences on the very first part. Even two identical models can behave differently because of control settings, parameters, and peripheral logic.
- Compare the CNC control, active options, and parameter versions. One enabled cycle, a different compensation logic, or another M-code format can change program behavior more than it seems.
- Check the machine zero, part zero, and tool offsets. If even one base differs by tenths of a millimeter, copying the CNC program becomes a new start-up with scrap risk.
- Do a dry run on a safe path. Raise the tool higher than usual, reduce feed, and watch where the machine really moves, not where the screen says it should move.
- Compare M-codes, chuck operation, quill, conveyor, and sensors. On one machine, a command may close the clamp immediately; on another, it may wait for a sensor signal and stop the cycle.
- Record the first-part result: dimensions, offsets, operator notes, and cycle time. These notes save hours when the program is transferred again a month later.
On CNC lathes, the mistake often hides not in the path, but in a small detail missed before the start. For example, the operator sees the same turret and the same chuck, but does not notice that the second machine has different tool offsets after a recent adjustment.
If the first run goes cleanly, do not erase those notes. For the next transfer, they are more useful than the operator’s memory.
What to do next
If one program for two machines already works, do not consider the job finished. A good result today does not mean copying the CNC program will go just as smoothly next month. Too many small things change without notice: after service, sensor replacement, zero correction, or even a routine fixture change.
It is better to keep a simple working document for each machine pair. Not one shared file for the whole shop, but a separate difference sheet: how the axes behave, where the machine zero points are, which sensors respond differently, and which acceleration or clamping limits have already caused issues in production. That kind of document saves hours and prevents scrap better than operator memory.
It helps to divide the data into three parts:
- the program code itself
- offsets, compensation, and zeros
- first-run and inspection parameters
That makes it easier to understand what exactly you are transferring. A common mistake is simple: people copy everything at once and then look for the cause in the program, when the problem sits in the tool offset or in an old start parameter.
After a repair or unit replacement, the check should be repeated in full. Even if it is the same model and the same year. A new reference sensor, a different axis drive, or a repeated alignment can create a difference that is invisible during idle motion but shows up on the part as a size error, taper, or tool mark.
If your shop regularly transfers programs between machines, set one storage location and one checking routine. When the code is in one folder, offsets in another, and everyone starts from memory, program transfer errors happen too often.
If you are still choosing a machine, bringing one into production, or comparing two configurations of the same series, it is worth clarifying the differences in advance. At EAST CNC, you can discuss the package, commissioning, and service start-up process so you do not have to find out on the part why two similar machines behave differently. The goal is simple: each machine has its own map, and each program has its own clear route to the first cut.