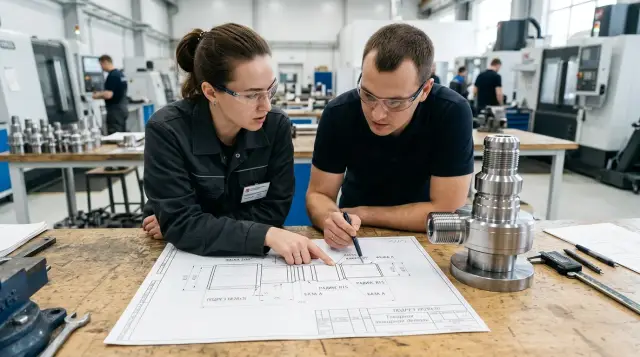
Manufacturability of a Turned Part Before Production
Check manufacturability of a turned part before costing: chamfers, undercuts, datums and tolerances that reduce price and scrap risk.
Where the part becomes expensive already on the drawing
The price of a part often rises before it ever sees a machine. The reason is usually not the material or the operation itself, but the drawing. If the designer sets shapes, datums and precision without regard to actual machining, the shop spends more time on each cycle and often adds risk allowances into the price.
The problem is rarely a single item. More often the cost increases because of a collection of small issues: a sharp internal corner where a standard tool won't fit, dimensions referenced from different datums, an overly tight tolerance on a secondary surface, or a low surface finish where it doesn't affect the assembly. On paper it looks tidy. In production it turns into extra passes, re‑setups and additional inspections.
A simple example is a bushing with an internal shoulder, an outer diameter and an end face. If the internal transition is drawn as a sharp corner with no tool relief, the machinist can't achieve the dimension with a single standard tool. If the outer diameter and the bore are referenced from different datums, the part will most likely need repositioning. The price goes up for both reasons.
Another common mistake is making the entire part more precise than necessary. A bearing fit requires one level of accuracy, while a free end nearby can be specified much more loosely. When the same tight tolerance is applied everywhere, the machine runs longer and inspection can take more time than the machining itself.
A good drawing doesn't have to look complicated. On the contrary: it leaves room for standard tools, minimizes datums and specifies precision only where it truly matters. Those kinds of edits have the biggest impact on price even before quoting.
What to check before costing
Before costing, read the drawing not as a set of sizes but as a description of the part's function. That way it's clear which requirements are essential and which only complicate machining.
First, compare the specified precision with what the surface actually does in the assembly. If a surface only receives a cover or is just a fastening location, it rarely needs the same tolerance as a bearing fit. The common logic is: better safe than sorry, make everything tight. In practice that almost always raises the price.
Mark working surfaces separately. These are fits, thrust faces, grooves for retaining elements, and sealing locations. Production needs to know immediately where concentricity, runout and surface quality matter, and where ordinary turning without extra passes or grinding is sufficient.
A few questions to go through before sending the drawing to costing:
- are there dimensions that define the same geometry in different ways;
- is it clear which surfaces are functional and which are auxiliary;
- does the tolerance match the part's function rather than being a catch‑all;
- is the material specified completely and unambiguously.
Duplicate dimensions often complicate costing. For example, a total length, lengths of two steps and an additional end reference. If the dimension chain doesn't close even within a tenth of a millimeter, the technologist and quality inspector start interpreting the drawing differently. The operator usually builds in a risk allowance.
The same goes for material. An entry like "40Х, harden, coating as needed" explains little. Much clearer is a single full line: material, condition or hardness, then the coating. For example: "Steel 40Х, 28–32 HRC, chemical oxidation." That tells the shop the cutting regimes, tooling and operation order.
If the part goes into a series, this check is almost always more effective than lengthy price haggling. Fixing a few lines on the drawing is simpler than arguing over tolerances later, reworking the first batch and losing time on the launch.
How to choose datums to avoid unnecessary re‑setups
On a turned part the datums should match how the part will actually be held on the machine. For rotating parts it usually makes sense to build the primary datum from the axis. Diameters, runout and concentricity are then interpreted without extra assumptions.
The rule for lengths is the same: it's better to reference them from a single end face. If one dimension is from the left face, the second from the right, and the third from a shoulder, the operator has to recalculate the chain and more often recheck the part. On the drawing this is tolerable. In the shop it costs extra minutes and creates avoidable errors.
A good layout looks simple: all diameters referenced to the axis and axial dimensions taken from one face. The part can then be machined with fewer setups and inspected faster.
A bad layout is common. A fit diameter is referenced to the axis, the overall length to the left face, a groove to the right, and a chamfer referenced to an adjacent step. Formally the dimensions exist. But the technologist must decide which setup is primary. That's where extra re‑setups appear.
Don't mix datums from different setups unless necessary. If the first side is turned in the chuck and the second side is done after flipping, avoid tying dimensions from both sides into a rigid chain without good reason. It's more reliable to decide in advance which setup provides the reference face and which dimensions are truly held in it.
Clamping is another issue. A thin wall, a long neck or a narrow collar can deflect in the chuck. The drawing may show a datum, but the part behaves differently in the machine. As a result, a dimension is hard to hold even on good equipment.
Before launch answer four questions: from which axis will diameters be held, which face becomes the zero for length, is a second setup needed, and will the clamp crush thin sections. If these answers are vague, correct the drawing in advance.
Which chamfers and undercuts are easier to turn
Chamfers and undercuts may seem minor, but they're often where the drawing conflicts with real machining. Simple geometry almost always wins: the part is costed faster, machined with fewer worries, and the risk of chipping or extra hand finishing is lower.
If the assembly doesn't require a special shape, choose standard chamfers. A common 1x45° chamfer is usually easier than an unusual angle or a very small land. A nonstandard chamfer doesn't make the part better but easily adds another pass, a tool change or manual finishing.
Leave room for the tool to exit at step transitions. When the end face and diameter meet with no relief, the tool has nowhere to finish the cut. That leaves an undercut, a burr, or forces an extra profiling pass. A small relief in the right place usually solves the problem with little effect on function.
A repeated mistake with undercuts is specifying a groove to match a nonstandard insert width. On paper it looks neat. In production that calls for a special tool or several awkward passes. If the undercut serves a simple utility purpose, set its width to match a standard insert.
Check areas near threads and grooves separately. Too large a radius prevents proper thread runout, while too small a radius forces a fragile tool or an extra finishing pass. It's better to review the geometry together with the intended tooling rather than guess.
A good minimum: a standard chamfer without exotic angles, tool exit at the step, an undercut not narrower than a standard insert, and a reasonable radius next to threads. Small edits like these noticeably simplify the launch.
Where tolerances and surface finish inflate the price
Overly strict requirements on the drawing almost always hit the price before they improve function. The tighter the tolerance and the finer the surface finish, the longer the machining, the more passes, the higher the scrap risk and the stricter the inspection.
Designers often apply tight tolerances to several diameters to avoid missing anything. In practice only surfaces that enter a fit, a seal, or affect assembly concentricity are critical. If a bearing mounts on one diameter, make that diameter tight. A neighboring area that doesn't mate with anything can have a looser tolerance.
The same goes for surface finish. Hidden faces, end faces intended for later assembly, or areas that don't rub or seal are often given unnecessarily low roughness. That adds finishing without meaningful benefit. The part only looks better on paper.
A good example is a stepped shaft. The bearing fit needs precision and a fine surface, while a tail for a nut or an area for a circlip usually doesn't. Applying the same strict requirements across the whole shaft raises cost for no reason.
Another mistake is mixing assembly dimensions with reference dimensions. When a reference size is presented as a controlled dimension, the shop holds extra accuracy. A part can then be rejected not because it fails function but because the drawing demanded more than necessary.
Be careful with runout too. Specify runout only where it affects assembly: a bearing seat, a seal or a critical mating diameter. If runout is required on a surface that has no role, inspection becomes harder without benefit.
Before launch, separate surfaces into two groups: those that actually function in the assembly and those that only form the part geometry. Then it's usually clear where tolerances can be relaxed, surface finish raised, or unnecessary inspection removed.
How to agree edits before launch
Confusion before launch often starts in communication. The wrong file was sent, the 3D and the drawing don't match, or nobody marked the surfaces that must not be changed. As a result, cost is calculated for one variant while the part is expected in another.
To avoid this, assemble a clear package: the drawing, a 3D model and photos of the assembly if the part works in one. Photos often eliminate extra questions. They make it easier to see which dimensions need to be held and where chamfers, radii or undercuts can be simplified.
Mark surfaces that must not be altered: bearing seats, thrust faces, threads and sealing areas. Leave everything else open for discussion. If every detail is frozen, the technologist can't propose a simpler tool path or a standard undercut.
A very useful question to ask production is: which dimensions interfere with standard tooling? That quickly reveals where the price rises without benefit. Sometimes it's enough to increase a groove radius, relax a secondary diameter tolerance, or shift a datum slightly to remove a re‑setup.
Don't make edits piecemeal. It's safer to collect all changes into one revision and agree it with design, purchasing and production. Otherwise two versions remain in circulation and a dispute starts after launch.
After edits, request a new cost and lead‑time estimate. Even a small geometry change can remove a special tool, shorten machining time and reduce scrap risk.
Errors that lead to scrap
Scrap often starts on the drawing. If a turned part is designed without real machining in mind, the operator has to guess where to measure from, how to hold dimensions and where the tool can exit. Even an experienced shop will work slower and later argue about what the designer meant.
A frequent error is too small an internal corner radius. It looks neat on paper, but a standard tool won't fit. The shop must use a different tool, add an extra pass, or leave the corner undercut. If that area is also in a tight tolerance, the scrap risk rises immediately.
The same applies to threads and end faces. If the drawing doesn't provide a thread runout or an end relief, the tool hits the wall and the profile becomes distorted or incomplete. The part may not assemble or may bind during assembly. Fixing such details after launch is almost always more expensive than agreeing them beforehand.
Another source of scrap is applying tolerances to almost every dimension. Then operator and inspector watch everything even though only a few sizes matter for function. Extra strict requirements increase the number of measurements and the chance of failing an otherwise acceptable part.
Dimensions referenced from different faces are also problematic. One area is measured from the left face, another from the right, a third from a groove. After re‑setup the error accumulates, and the chain no longer closes. It's much calmer when the main lengths are taken from one datum.
State a control datum for inspection. Otherwise the shop may machine from one reference and quality checks from another, producing strange discrepancies: individual dimensions look fine, but the relative positions of features fail.
Example of a simple part before and after edits
A common example is a shaft with a step, external thread and a groove for a circlip. The part looks simple, but such items clearly show how a drawing affects price before the first cut.
First version
The initial drawing had no tool relief at the step. The transition was a sharp corner, the thread had little runout, and dimensions were partly referenced from the left face and partly from the right.
In production this causes issues: the tool can't reach the sharp internal corner, the thread lacks a proper runout, the operator struggles to hold dimensions because datums are scattered, and one diameter had an unnecessarily tight tolerance. On paper the differences seem small. On the machine they become an extra pass, additional checks and risk of scrap at the shoulder or thread.
Second version
After edits the part remains essentially the same but is easier to work with. A chamfer is added at the step, a normal relief before the thread, and primary lengths are referenced to one face as the common datum.
Accuracy requirements become sensible. The bearing diameter stays tight while the secondary section gets a more relaxed tolerance and ordinary surface finish.
The effect is clear: the tool passes the transition without risking nearby surfaces, the thread can be cut cleaner and faster, the part is easier to measure from one datum, and the chance of losing a functional part due to an extra tight tolerance is significantly lower.
Even for a series of 100 pieces, such changes often save hours of machine time in total. That's why chamfers, undercuts and datums should be discussed before launch, not after the first sample piece.
Quick checklist before launch
Before sending the part to costing, remove items that almost always add cost or cause disputes in production. A short check usually suffices:
- primary lengths and diameters are referenced to one clear datum;
- chamfers and undercuts are standard unless the assembly needs otherwise;
- tight tolerances are kept only on working surfaces;
- there is tool runout for threads, grooves and steps;
- one current revision of the drawing is used for production.
A quick example: a shaft with a thread near the shoulder, varied chamfers and dimensions from two faces. After edits add a small thread runout, standardize the chamfers and reference dimensions from one face. The function doesn't change, but the part is easier to cost and to machine.
This quick review saves not just time in approvals. It often removes an operation, reduces the chance of scrap on the first batch and makes the cost estimate more accurate.
What to do after checking the drawing
Once edits are made, don't run the part to production via a chain of exchanged files. The shop should get one final revision and old versions should be withdrawn.
Then match the drawing to how the part will be clamped on the machine. A datum may look convenient on paper, but in a chuck or collet it's different. If a size holds only when clamped on a thin wall, the part may shift on the first operation. If a live‑center support is required, confirm that in advance.
Four steps are usually enough: approve one revision number, show the drawing to the technologist or setup operator with the clamping method, agree a pilot batch and list which dimensions are checked first. A pilot of 5–10 pieces is almost always cheaper than reworking an entire series.
If equipment selection is happening in parallel, this conversation is especially useful. EAST CNC supplies CNC lathes and machining centers, assists with selection, commissioning and service, so these topics can be discussed before launch. That helps not only to pick machine parameters but also to understand whether the drawing is ready for stable production.
A good start looks simple: a final revision, a clear clamping method, an agreed pilot and a known inspection sequence. After that the series usually runs much smoother.