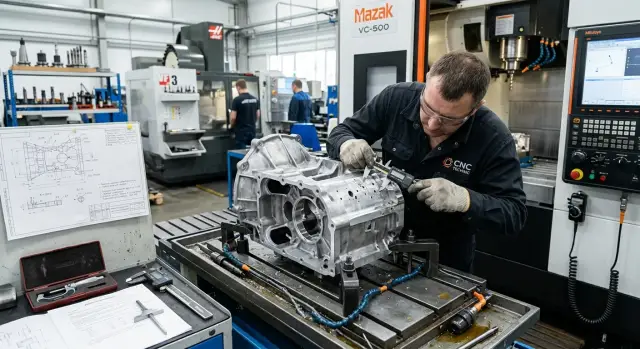
Machining Cast Aluminum with Gas Porosity Without Extra Finishing
Machining cast aluminum with gas porosity requires a precise route: where to leave a control pass, how to protect the base, and how to reduce manual finishing.
Why pores break the usual route
On cast aluminum, the problem is rarely visible before cutting. The blank may look normal, but after removing the first 0.5–1.5 mm, gas pores open up. At that point, the usual route, where roughing smoothly turns into finishing, starts to fail. The worst part comes when the base has already been chosen and the rest of the dimensional chain is built around it.
As long as the surface is solid, the base sits evenly. Once the cutter opens areas with pores, the support becomes patchy. The part no longer sits as steadily, clamping works differently, and the size shifts even with the same program and the same cutting conditions. On the first part, this is easy to miss. By the tenth, the spread is already visible in the measurements.
Then the familiar chain begins. The operator sees cavities, tries to improve the contact area, removes extra material, hand sands the part, or changes the order of operations right at the machine. Outwardly, the part looks cleaner, but after such correction the base rarely remains predictable. The next casting with the same setup behaves differently: the pores opened in another place, the support pattern changed, and the final dimension moved by several hundredths or more.
That is why cast aluminum with gas porosity does not handle a standard route well. Such a route is built for more uniform metal, where the base after roughing remains solid and repeatable. With a casting, that condition is often not met. This is especially true for housing parts, where a wide flat surface seems like a convenient base but loses normal contact area once the pores open.
Usually the problem shows up in the same places: the final base has breaks instead of a flat contact surface, clamping loads the part differently each time, the operator spends time on manual finishing, and the batch loses repeatability even though the program did not change.
If you do not leave a separate surface check before the final base at this stage, the route quickly turns into a set of local fixes. On the shop floor, it looks simple: the machine follows the card, while the stable result depends mostly on the operator’s experience. For a one-off part, that is still manageable. For a series, it is expensive and stressful.
What to check on the casting before the first setup
Before the first setup, look at several castings from the same batch, not just one. That helps avoid false conclusions. One part may look dense, while on the next, pores open after only 0.5–1 mm has been removed.
Start with a light roughing cut on sample castings in the exact areas where the base and finishing will later be located. This shows not only the porosity itself, but also its character: whether it appears in patches, runs in a strip, or gathers around a thick section. That is more useful than looking at the cast skin before cutting.
Also check the zones where a thick wall transitions into a thin one, as well as heavy bosses, lugs, and corners with sharp section changes. These areas cool unevenly, and hidden defects open more often there. If a future base or sealing surface passes through such an area, the risk of manual finishing rises immediately.
On trial parts, it helps to divide the surfaces into three groups right away: future bases, sealing faces, and holes from which the dimensions will later be taken. Then it becomes faster to see what can be used in the first setup and what is better left untouched for now. Otherwise, the route breaks very quickly: the base is already removed, the pores are open, and there is nowhere left to move the support.
Before production starts, it is useful to answer four simple questions:
- Where do pores open after the first cut, and where does the metal remain dense?
- Is there enough stock left on future bases after roughing?
- Do cavities fall on sealing faces and mating areas?
- Can the base be moved to the next setup without cutting it down to zero?
A simple example: on a housing part, the top face looks convenient for the first base on the drawing, but after a trial cut, a scattering of tiny pores appears on that face. The side boss, however, remains cleaner and more stable. In such a case, it is better to build the first setup from the side surface, even if the setup becomes slightly less convenient.
If the check shows that the remaining stock on the planned base is almost gone, the route is better revised immediately. An hour spent on a trial assessment usually saves many shifts of manual deburring and a lot of argument during inspection.
How to choose a base when the metal behaves differently
In cast aluminum, the same face is often nonuniform: the metal is dense in one place, and pores appear nearby. That is why the final base should not be chosen by the principle of "the surface looks flat." You need to rely not on the most convenient area, but on the most predictable one.
A common mistake is to take a wide area where pores open in patches. On the first part it seems fine, but by the third, the geometry is already drifting, and by the tenth the operator starts manually cleaning up what the route should have held by itself. If the metal is unstable across the area, the base will be unstable too.
It is better to look for solid metal near a rib, boss, or lug. In these places, the section is usually stiffer, and the area itself changes less after roughing. You do not need a large contact area. You need a zone that behaves the same on both the trial part and the production part.
Thin edges are a poor choice for a base. They are easier to pull out of shape with clamping, they open hidden defects faster, and they hold repeatability worse. For the same reason, it is better to move the base away from gate marks and transition zones where the metal structure changes. Even if such a face is convenient for setup, it often adds extra hundredths and extra finishing later.
On a trial batch, it is enough to check the base area against a few criteria: the surface opens evenly after a light cut, there is no thin wall or long weak edge nearby, the area is close to a rigid element of the part, and the base itself can be shifted a little without breaking the whole route.
The last point often matters the most. Leave a little extra stock and some flexibility in the first setup so that, on the first trial, the base can be moved a few millimeters into denser metal. Then there will be no need to rework the fixture or rewrite the entire route.
If the base is chosen well, finishing runs more calmly, and manual finishing does not become a permanent part of the process.
Where to leave a control pass before the final base
The control pass is better placed not at the very beginning, but after roughing the neighboring areas. Before that, the casting is still "alive": the metal opens differently, residual stresses change the shape a little, and the future base may look better than it really is.
In practice, a sequence like this usually works: first remove the main allowance around it, and leave stock on the future base area. Then make a short test cut of a small layer and look not only at individual pores, but also at their pattern across the whole support area.
If, after such a pass, the pores are mostly at the edges, do not cling to the original base outline. It is often better to shift the base slightly inward, to where the metal is denser and the contact patch is more even. Losing a few millimeters of area here is almost always better than a shaky setup and hand finishing after the machine.
When the pores are scattered across the whole area, the situation is worse. In that case, do not immediately bring the surface to size and call it the final base. It is easier to move the support to a temporary process face, a boss, or another area that can hold the setup until the main operations are done.
This is especially noticeable on housing parts. A flange may look acceptable after the first touch, but after one more pass, new cavities suddenly appear. If the base is already at size at that moment, there is almost no room to maneuver.
The decision criterion is simple. After the test cut, the contact patch should stay even across the support zone. If the pores are only at the edge, the base can be shifted inward to the dense area. If they are scattered across the entire surface, a temporary process base is needed. Final size only makes sense where the metal has already shown stable behavior.
A good rule is simple: first make sure you have solid metal for a reliable setup, and only then close the size on the base. One extra control pass takes minutes. Manual finishing, re-fixturing, and arguments with quality control take much more time afterward.
Step-by-step route without extra finishing
On cast aluminum, do not go straight to the final size. Defects often open only after the first metal removal, and then the shop ends up with extra fitting, grinding, and a questionable base. It is much safer to first see the real condition of the casting and only then close the dimensions.
A practical sequence usually looks like this. First, remove the rough stock from surfaces that do not define accuracy. That takes away excess metal, partially relieves stress, and shows how the casting holds its shape.
After that, make a control pass on the future base. Do not bring it to final size. The operator needs a short stop for inspection: where the pores opened, whether there are loose areas, and whether the part can be safely supported on that face.
Only after the check does it make sense to tie the dimensional chain to a stable base. If the pores appear in patches on the support zone, do not try to save that surface with hand finishing. It is easier to choose a nearby calm area than to correct every part on the spot later.
It is better to leave finishing surfaces until the end. They should be machined in one logic: from the same base, with a clear remaining stock, and without unnecessary re-clamping. That makes it easier to hold concentricity, flatness, and size between related elements.
On problematic zones, it is useful to keep separate stock until the final check. These are usually areas near pockets, bosses, ribs, and local thickened sections. Pores there often appear later than on the main surface.
On a housing part, this works very clearly. First, the operator roughs the outer secondary surfaces and removes gate marks. Then a control pass is made on the lower support face. If the face is clean, holes and seating features can be machined from it. If porosity appears on one corner, that area is better left with stock and returned to last.
This route removes the main reason for extra finishing: trusting the base too early. When the technologist leaves the check until after roughing, defects are seen sooner, and there is much less hand work at the end.
Example on a housing part
Take a cast aluminum pump housing with a top face for the cover and an internal bore for the bearing. On the drawing, the top face was first planned as the base for the entire second setup. In practice, that led to extra hand work.
After roughing the top face, small gas pores opened near one edge. They did not form a continuous line, but appeared in patches. In the center, the metal remained dense, the cutter ran smoothly, and the area provided a calm support. This is a typical picture: the edge may start breaking up, while the center holds size without surprises.
If the route is continued as originally planned and the whole face is used as the support, the machine starts adjusting to the weak area. The operator removes extra stock at the edge, opens more pores, and then the fitter has to grind almost the whole surface, even though the problem is local.
In this situation, the base is better moved to the central area. It is first brought in with roughing, then a control pass is made before the final base only in the zone where the metal has already shown stability. Not across the entire top of the housing, but only across the part that truly carries the support.
After that, the route becomes simpler: the center of the top face is brought to a flat setup surface, the bore and holes are machined from that surface, the edge area with pores is not forced into full finish, and it is left for local removal. The finishing pass across the whole face is then given with minimal stock removal, without trying to "cure" the defect with the cutter.
This base shift solves two problems at once. The height size for the cover and the concentricity of the internal bore are held on dense metal. The porous edge does not disturb the geometry and does not force extra removal over the whole part.
In the end, the final size can be held without long grinding across the entire face. The fitter only needs to remove the local defect at the edge if it affects gasket contact or appearance. In production, that often saves not minutes but hours per shift, because manual finishing no longer spreads across the whole part.
Mistakes that add manual rework
What consumes the most time is not the pores themselves, but the wrong sequence of operations. If the base is brought to final size on the first setup, the route loses its margin for correction. Pores often open not immediately, but after the next cut. By then, the base is already finished, and the part has to be saved by grinding, shims, or a new setup.
The same problem appears when the operator uses a thin wall as support simply because it is easier to clamp the casting that way. The thin zone flexes, moves slightly under load, and the base looks "clean" only in the chuck or vise. After re-clamping, the size drifts, the face shifts, and manual finishing becomes almost unavoidable.
A uniform stock removal across the whole part also works poorly. A casting rarely behaves the same along the entire contour. In one zone the metal is dense; in another, pores are close to the surface. If everything is cut the same way, the weak area opens too early, and extra work appears exactly where the route could have avoided it.
One of the most expensive mistakes is trying to solve the problem with long manual grinding. Grinding removes tool marks, but it does not fix porosity and does not restore the support geometry. If pores have opened in the base or near it, the right answer is usually not more grinding, but a different operation sequence: leave stock before the final base, check the surface after a control cut, and only then move to size.
Batch-to-batch variation is also often underestimated. On one batch, the defect appears at the edge; on another, in a pocket or near a rib. If the route is rigidly tied to the "average" casting, the shop starts compensating by hand. It is easy to spot from indirect signs: operators change clamping force from part to part, the fitter spends longer correcting the same area, the finishing pass suddenly opens pores after a calm roughing, and the new batch needs a different shim or a different support point.
It is more practical to build in a short check after roughing and before the final base right away. On a housing part, that can save 15–20 minutes on every problematic piece. When the route accounts for weak zones, the batch runs more smoothly, and manual finishing remains a rare exception rather than a normal part of the process.
A quick check before starting a series
Do not start a series right after the first good part. On cast blanks, pores may open where you did not expect them. Because of that, the base on the second or third part may already work worse, even though the program and tools have not changed.
First, separate two situations: either the pores are visible before fixturing, or they appear only after the first metal removal. That changes the meaning of the whole check. If the defect is already in the support zone, that base should not be taken into production. If the pores appear only after roughing, the route can still be corrected without completely redesigning the setup.
Before production starts, look not only at the size, but also at the part support itself. The base should sit on solid metal across the whole area, without accidental contact at the edges and without support on a zone where the wall is locally weak. It helps to run at least a few parts in a row with the same clamping and check whether the contact patch changes after the control pass.
If the picture already differs on the second or third blank, do not hope that the series will "settle down" by itself. That is usually an early sign that the base is too wide, the stock allowance is distributed poorly, or the control pass is placed too late.
Where to start on your own shop floor
It is better to build the route not from one successful part, but from a short trial on a batch of castings from a normal shipment. Take 5–7 pieces and run them through the first operations with the same cutting conditions. That quickly shows where the pores open first: at the future base, near a rib, in a pocket, or already close to the final size.
After that, transfer the observations to a simple part map. Mark the zones where pores open early and note at which stock allowance they appeared. If this is not done right away, a week later the shop will start solving the same problem by hand again, but now at the machine.
The point where the control pass is made before the final base is better fixed in the route in writing, not kept only in the setter’s head. That is also where the rule for moving the base should be written down: which surface is used first, after which cut the setup shifts to the final base, and in which case the part continues and in which case it is stopped for review.
Usually a short work note with four points is enough: how much stock remains before the control pass, which surface serves as the temporary base, when the operator moves the base to the final one, and what to do if the pores open earlier than normal.
That kind of order removes extra decisions from the operator. He does not have to decide on the spot whether to grind the area, change the base, or push the size to the limit. He sees the rule and follows it. That is the simplest way to reduce manual finishing.
If the trial shows that porosity behaves inconsistently, the route is better simplified even further. Fewer branches, fewer exceptions, fewer manual approvals. For cast parts, that is usually better than a very flexible scheme where every case is handled separately.
When your shop needs to check the route, choose a CNC machine for such parts, or bring the process to a stable series, an outside technical view can help as well. EAST CNC, the official representative of Taizhou Eastern CNC Technology Co., Ltd. in Kazakhstan, handles equipment selection, supply, commissioning, and service for metalworking machinery, so tasks like these are well within east-cnc.kz's area of expertise.
FAQ
Why does a standard route often fail on cast aluminum with pores?
Because the base no longer rests on solid metal. After the first cut, the pores open in patches, clamping works differently, and the part starts varying in size even with the same program.
What should be checked on the casting before the first setup?
Look at several parts from the same batch, not just one. Make a light cut in the areas that will later become the base and finishing surfaces, then check where the metal stays dense and where the pores open right away.
How many trial parts should be taken before starting a series?
Usually 5–7 parts are enough. That quantity quickly shows whether the defect repeats in one area or moves around from casting to casting.
Where should the control pass be made before the final base?
Place it after roughing the neighboring areas, but before bringing the base to size. That way the operator sees the real condition of the metal and can still shift the base without reworking the whole setup.
What should be done if the pores appear only along the edge of the base?
If the pores are only at the edge, move the base inward to a denser area. If the pores are spread across the whole support surface, do not bring that surface into the final base and move the setup to a temporary area.
How do you choose a base if the surface looks flat but the metal behaves differently?
Look for the most predictable area, not the widest or most convenient plane. A zone near a rib, boss, or thickened area often works better because the metal is stiffer and holds support more evenly after a light cut.
Can a problematic surface just be ground down and the old base kept?
No, that is not a good idea. Grinding removes tool marks, but it does not make porous metal dense or restore proper support. It is usually better to keep allowance before the check and change the operation sequence than to rework every part by hand later.
When is a temporary process base needed?
It is needed when the final base is covered with pores after the trial cut, or when the porosity appears too late. A temporary base gives stable clamping until the main operations are finished and leaves room to decide what to do with the problem area.
How can you tell before a series starts that the route needs changes?
The first sign is when the second or third part already sits differently with the same clamping. If the contact pattern changes, the operator starts adjusting the setup by hand, or the finishing pass suddenly reveals new pores, the base and stock allowance should be reviewed right away.
How can this route be documented so the operator does not decide everything on the spot?
Start with a short note in the operation sheet. State how much stock to leave before the control pass, which surface acts as the temporary base, when the operator shifts to the final base, and what to do if pores open earlier than normal.