The First Machining Center for a Contract Shop
Choose the first machining center for a contract shop by your parts range, axis travels, spindle, tool magazine, tooling and service — without overpaying.
Why the first center is often chosen for the wrong task
A contract shop rarely survives on one complex, rare part. Much more often the work is repeatable orders: plates, housings, flanges, covers, brackets. But when buying the first center many focus on the most impressive example: deep pockets, rare material, an unusual angle, a long tool. On paper it looks convincing. In practice, the first machining center is better chosen for the range of parts that arrive regularly.
When a machine is bought for a rare task, everyday orders later become more expensive than they could be. The shop loses both money and time. The machine can do a lot, but on common parts it won’t give the needed speed and simplicity.
Another mistake is budget thinking. People often count only the machine price, and then it turns out that without vises, fixtures, cutting tools, commissioning and training the startup sum looks different. Sometimes there isn’t even enough money for a proper starter kit, and the new center runs at half capacity for the first weeks.
There is also the opposite extreme: buying too much in reserve for power and size. A large table and a powerful spindle look nice on a spec sheet, but for a small shop this often becomes an extra burden. Heavy vises take longer to move, small parts are awkward to place, and changeovers drag out. In contract work profit is often lost not on cutting but on every extra changeover between jobs.
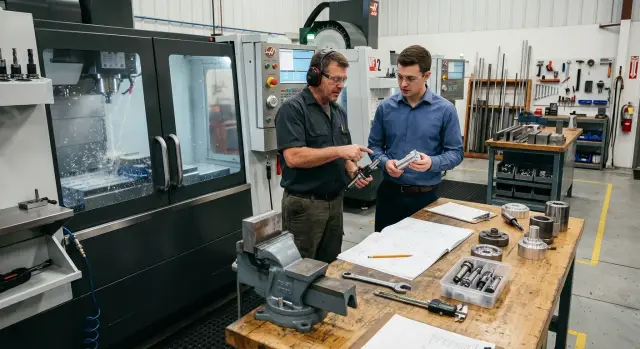
Service problems usually surface after commissioning. At the selection stage everyone discusses spindle, tool magazine and CNC, but not always who will service the machine later. When a center stops, the brochure is useless. You need specialists who will find the cause and quickly return the machine to work.
For a shop in Kazakhstan this is especially important. If a supplier such as EAST CNC handles selection, commissioning and service, clarify this in advance: who travels, what response times, and how spare parts are handled. A good first purchase rarely looks spectacular. Instead, it reliably covers main workload and doesn’t drag extra expenses from month one.
Which orders should you base the choice on
Don’t start selection from the catalog or axis travels. First gather a set of real parts that the shop already runs or plans to take in the coming months. For an initial selection 20–30 items are usually enough. That’s enough to understand which machine will be loaded without unnecessary options.
It’s important not to look at the "average part" but at a live mix of orders. Add simple housings, flanges, plates, brackets and 2–3 more complex parts if those requests already come. If you include only convenient items, machine limitations will show up as soon as an atypical order arrives.
For each part note four things: material, dimensions, accuracy and volume. It’s easiest to describe these in simple words. For example: aluminum or steel, size up to A4 or larger, normal accuracy or high, single piece or repeat batch. That is enough to discuss not the machine "in general" but the specific task.
Suppose half of the set are parts made of aluminum and steel up to 300–400 mm, and batches are small. In that case a vertical machining center with straightforward tooling and a normal tool change often wins. If parts are long, heavy or require multi-sided machining without extra re-fixturing, the picture changes.
After that, split the set by loading type. Single orders show how fast an operator can change the machine. Small batches show where time is spent on clamping, fixturing and tool change. Repeat batches help identify where better vises, pallets, a fourth axis or a larger magazine will pay off.
List separately operations where you lose the most time. Usually it’s not the cutting itself but drilling many holes, threading, repeated re-fixturing, finding datum and inspection after each operation. This analysis is more useful than comparing specification numbers. When a shop looks at real parts rather than maximum capabilities, the choice becomes noticeably easier.
Which type of center to take first
For most contract shops the first machining center is vertical. The reason is simple: it handles mixed ranges, frequent changeovers and small batches better. If today you have a housing, tomorrow a bracket, and in two days a small run of plates, the vertical format usually brings fewer extra costs.
Such a machine is easier to outfit for common tasks. Basic vises, standard fixtures, regular tools and straightforward setup cover the bulk of first orders. For a start this is often wiser than paying for a complex configuration that will stand idle.
A horizontal center makes sense in another situation. If you have many parts that need several faces machined in a single setup, it can significantly reduce time and deliver more stable repeatability. The part is re-fixtured less often, datum errors accumulate less, and the series runs faster. This is especially noticeable on housing parts and blanks with side holes, pockets and faces.
Don’t rush into a 5-axis machine. It’s needed not because it’s "more modern" but because without it a part either can’t be made or is too slow and expensive. If such parts are rare, take a simpler first center and invest the difference into tooling, measuring and fixturing. That usually pays back faster.
Before choosing, check a few simple things. Will your vises fit on the table and will there be space for the part? Will a rotary table fit if you need it later? Is the axis travel enough considering fixture height and tool length? Will the spindle or tool magazine interfere with a tall blank? These questions are often more important than attractive catalog numbers.
An example: if a small shop takes jobs for flanges, covers, adapter plates and simple housings, a vertical machining center almost always gives the best start. But if half the work requires four-sided machining with strict concentricity requirements, then a horizontal option should be considered first.
Choose the machine type not for prestige but for the parts that will pass through it every week.
What to pay for and what to postpone
On the first machine people often overpay for capacity that rarely works. For a contract shop this is especially unpleasant: today you run flanges and housings, tomorrow bushings, and a rare large order may never repeat. So build the first center’s configuration around the parts you will actually make every week.
Select axis travels not for the largest possible blank, but for the real working zone: part size, fixture height, tool length and safe approach. If most orders fit a medium format, a large table and extra Z travel will only raise price, tooling costs and shop space requirements. Reserve is needed, but reasonable.
The spindle is the same. If the shop mainly cuts steel, cast iron and common aluminum parts, there’s no point chasing the highest RPM number. It’s far more useful to know what materials dominate, what tool diameters you use, and whether you need torque at low and medium speeds. For many jobs a stable, well-understood spindle pays off better than an expensive “just in case” version.
Tool magazine size should be based on daily work. If common operations are roughing and finishing, drilling, threading, chamfering or boring, the main thing is that these can be done without constant manual swapping. A too-large magazine rarely pays off at the start if batches are small and changeovers remain frequent.
Leave expensive automation for phase two. Pallets, robot loading, complex inspection systems and rare options are good when you already have a steady parts flow. Until then, money is better spent elsewhere: on proper CNC fixturing, cutting tools, part inspection after machining, commissioning and service.
For a shop in Kazakhstan this is often more practical than any flashy option. If the supplier can quickly start the machine and doesn’t delay service, that usually brings more benefit than a function you’ll use twice a year. Extra options can be bought later. Fixing a wrong base configuration costs much more.
How to shortlist 2–3 models step by step
Choose the first machining center not by catalog or advertising. The working scheme is simpler: take your typical parts, calculate the full startup cost and quickly eliminate models that don’t suit the shop’s real work.
Collect a short list of 10–15 parts you expect to earn from in the first year. Include not only easy items but also parts with thin walls, long tool overhangs, multiple setups or heavy blanks. That makes the selection honest.
Then follow these steps.
- First set an overall budget. Count not only the machine but also vises, chucks, fixtures, cutting tools, measuring, commissioning and operator training. In practice fixturing often eats the budget that was forgotten at the start.
- Then filter models by the real geometry of parts. Look not at an attractive travel margin but at blank size, mass, fixture height and loading convenience. If a table holds a part tightly and the spindle reaches with an awkward overhang, drop that model immediately.
- On remaining models compare changeover time for similar batches. For example, today you have 20 housings, tomorrow 40 flanges. How much time will go to tool change, fixture setup, referencing and the first good part? On paper two machines can look similar but behave very differently between batches.
- Finally clarify the commissioning timeline. You need not vague promises but delivery dates, commissioning, training and service visit times. For a shop in Kazakhstan this is crucial: downtime waiting for an engineer can quickly make an attractive price unprofitable.
After this filtering you usually have 2–3 models left. Then a simple table is enough: entry cost, part limitations, changeover time, startup schedule and service conditions. If a supplier, including EAST CNC, can go through this list point by point and confirm support, their offer looks workable rather than just pretty.
Example for a small contract shop
A small shop usually lives on a constant rotation of jobs. Today it’s aluminum plates, in two days steel housings, then stainless flanges. Batches are small, lead times short, and changeovers happen almost weekly.
In that situation the first machining center shouldn’t be the most complex. It should start quickly, handle different materials and not require expensive tooling per new part. For this profile a 3-axis vertical machining center is often more sensible than jumping to 5 axes.
A 5-axis machine is tempting, but for the first center it often strains the budget. If the shop mainly makes housings, plates and flanges, most of those tasks are solved on 3 axes. However, don’t skimp on factors that affect daily work: tool magazine, rigid vises and easy setup.
What a practical choice looks like
Imagine a shop in Kazakhstan that takes contract jobs with varying lead times. It needs a machine that smoothly switches between aluminum, steel and stainless parts. The buying logic is simple: not the most expensive machine, but a stable and clear configuration.
Money saved is better spent on a good set of tools for different materials, a probe for quick part and tool referencing, reliable vises, simple CNC fixturing, operator training and a commissioning/service buffer. This approach usually brings more benefit than overpaying for rare features that will sit idle. One probe often saves 15–20 minutes per setup; on small batches that quickly adds up to hours per month.
For a small shop service is also crucial. If the machine stops, a pretty catalog doesn’t help. When choosing, check who does commissioning, who trains staff and how fast service issues are resolved. At EAST CNC this is part of the normal workflow: selection, delivery, commissioning and service. For a first machine this often matters more than an extra axis.
Mistakes on the first purchase
The most costly mistake is simple: the shop buys a machine for a rare order, and then spends most of the year looking for work to fill it. One large client may send a heavy part once a quarter, but the first center should earn on everyday parts, not await a rare job as a birthday.
For a contract shop this is particularly risky. Today housings and flanges, tomorrow small batches of bushings, next week parts with various holes and threads. If the machine was chosen for one large blank, it often turns out too expensive, slow to change over, or simply idle.
The second frequent mistake is buying too large a table. It seems a reserve will never hurt, but in real work it often becomes inconvenient. Small parts take longer to fixture, heavy tooling is harder to move, and changeovers take more time than necessary.
The third mistake is underestimating startup costs. The machine itself may fit the budget, but without tools, holders, vises, measurement and training the start is weak. As a result the center exists but normal productivity does not.
And another common slip is discussing service too late. It’s good when the supplier confidently explains specs. But it is far more important to know who will do commissioning, who will fix failures and how fast help is available after startup.
Quick checklist before ordering
Before ordering put next to you not a brochure but a list of parts the shop will live on in the first year. Without such a list the choice almost always drifts toward something too expensive.
Take 10–15 typical parts and note for each material, size, tolerance and expected batch. Add two more items: how many setups needed and which tools are used most often. Then it becomes clear whether a usual vertical center is enough or you’re looking at options that won’t pay back yet.
Break the budget down: machine, fixturing and tools, commissioning with training, first consumables. One lump "purchase" number almost always deceives. If the whole budget is spent on hardware, the startup will be tough. Without proper vises, holders, tools and measuring equipment even a good center will idle longer than expected.
Ask the supplier to show the delivery contents as a simple list without vague wording. You should understand what’s included in the base, what is paid separately, who performs commissioning, how long the run-in takes and under what service terms. When comparing offers in Kazakhstan, request this in the same format. It makes differences between models easier to see.
Another quick test: have an operator and a setup technician sit at the table before payment. They should envision the first month of work: who accepts the machine, who sets up tools, who runs the first parts, who tunes cutting modes and corrections. If the answer is only "we’ll figure it out as we go," you’re buying extra risk.
Good preparation before signing is simple: parts described, budget broken down, delivery contents clear, people understand their startup plan. If at least one item is vague, delay the purchase a week rather than lose months after delivery.
What to do next
When you narrow the choice to 2–3 options, don’t ask for the "best deal" from the catalog. Ask for a comparison based on your parts. For a contract shop this is fairer than looking only at spindle power, axis travels and price.
Send the supplier several typical parts: drawings, material, batch size, tolerances and photos if available. With that set it’s easier to see which first machining center gives a normal cycle time, won’t be blocked by fixturing and won’t force you to overpay for unnecessary options.
Ask all suppliers the same things: a cycle estimate for 3–5 of your parts instead of brochure numbers, a list of what’s included in the base delivery, a list of what must be bought immediately for startup, and deadlines for commissioning, training and the first service visit.
Also check the kit. Often the machine looks affordable and then budget holes appear in the small items. Clarify at once whether holders, vises, coolant system, chip conveyor, tool measurement, a probe, a setup kit and training are in the price. If something is missing, add it to the total table. Then you’ll see the real sum, not an attractive headline price.
After that make a loading plan for at least the first three months. Not by hopes but by orders you can actually take. Write down how many hours a week the machine will cut, how much time will go to setup, tool changes, first trials and program fixes. At startup you almost always spend more time than expected.
If you have small batches of flanges, housings and plates made of steel and aluminum, run them in sequence. This simple plan quickly shows whether the chosen model will pay off with your range.
If you work in Kazakhstan and want to close the issue end-to-end, involve a supplier who handles not only sales but selection, delivery, commissioning and service. For such tasks EAST CNC can help analyze your parts, pick a suitable model and show in advance what tooling will be needed for startup.
FAQ
Where should I start when choosing the first machining center?
Start not with a catalog but with your parts. Gather 20–30 real items the shop already makes or plans to take in the next months, and note material, size, tolerance and batch size for each.
Which type of center is usually chosen first?
Most small contract shops start with a 3-axis vertical machining center. It's easier to set up, handles frequent changeovers better and doesn’t require expensive tooling at the start.
When should I choose a horizontal center instead of a vertical one?
Consider a horizontal center if you have many housing-type parts that need several faces machined in one setup. It reduces re-fixturing and keeps run-out and concentricity more stable for repeat batches.
Do I need a 5-axis machine right away?
No, not immediately unless those parts are common. First focus on common housings, plates, flanges and brackets on 3 axes, and invest the difference into tooling, vises, a probe and commissioning.
What is included in the real budget besides the machine price?
Include more than the machine price: vises, holders, collets, cutting tools, measuring, commissioning, operator training and first consumables belong in the budget from the start.
How do I know if the axis travels and table suit my parts?
Check not only blank size but also vise height, tool length and safe approach. If a part fits the table tightly or the spindle reaches awkwardly, that will create problems in practice.
Which options are better to defer at the start?
Delay expensive automation: pallets, robot loading and rare control options can wait. For small-batch shops, better spend on good vises, simple fixturing and a tool magazine that reduces manual swaps.
Why discuss service before purchase?
Because downtime eats profits faster than any discount. Before buying, clarify who will perform commissioning, who responds to breakdowns, service response times and spare parts availability.
How to fairly compare 2–3 models?
Take 10–15 typical parts and ask suppliers to run calculations for them instead of giving brochure figures. Compare entry cost, part limitations, setup time, commissioning schedule and service terms.
What mistake is the most expensive on the first purchase?
A common costly mistake is buying a machine for one rare complex order and then struggling to fill it with everyday work. The first center should earn on weekly-named parts, not wait for a quarterly large job.