Cutting Demo Before Buying a Machine: When You Need One
A cutting demo before buying a machine helps you understand whether the equipment can handle your part. Let’s look at what to bring for the test and how to evaluate it.
Why a presentation is not enough
A catalog and a presentation help quickly rule out clearly unsuitable models. For the first round, that is enough. But buying a machine based only on slides is risky: they do not show how it behaves in real cutting.
On screen, everything looks convincing — spindle power, axis travel, CNC system, list of options. The problem is that these numbers do not answer the main question: can the machine handle your part specifically? A presentation cannot show how it holds size on a long pass, what happens during finishing, or how the result changes after several parts in a row.
Even a similar part does not give an exact answer. Another company may use the same material grade, but with a different allowance, different tool, different clamping setup, and very different cutting conditions. Sometimes a small detail changes the result — something nobody pays attention to at first: tool overhang, clamping rigidity, or the condition of the blank.
Usually the difference shows up in three places: the surface, the size, and the cycle time. First, the roughness turns out worse than expected. Then the size starts to drift, especially on long or thin sections. And after that, it turns out that the calculated machining time does not match the plan.
That is why a test before buying is not just a formality. It shows whether the machine can do your job, not some abstract part from a showroom. One successful factory video cannot replace that check.
Imagine a simple case. At the demo, the machine confidently turns a short bushing from an easy material. In your production, the part has a thin wall and a surface finish requirement. The jobs look similar from the outside, but the result can differ a lot: the demo goes smoothly, while your part starts vibrating, the cycle gets longer, and the size drifts.
It makes especially good sense to ask for a test when a mistake will cost more than a trip, preparation, and a few hours at the supplier’s site. If the machine is needed for a new part family, a tight tolerance, an expensive blank, or a short cycle, it is better to check everything in advance. That is cheaper than rebuilding the process after purchase.
When it is better not to decide without a test
A catalog, a video, and a conversation with a manager give only a general impression. They do not show how the machine will behave on your part, with your material, and at your required cycle time. That is why cutting should be tested whenever a mistake would be expensive later.
The first warning sign is a complex shape. If the part has thin walls, a long overhang, narrow grooves, or a weak clamping base, a pass on a training blank says almost nothing. On the real part, vibration, size drift, and marks from re-clamping may appear.
The second case is strict size and runout requirements. When hundredths matter, it is not enough to see that the machine simply removes metal. You need to know whether it holds size after several parts in a row, how it behaves on finishing, and whether the result changes after warm-up.
You should also insist on a test if the material itself is difficult. Tough steels, heat-resistant alloys, some stainless grades, and even ordinary metal from an unstable batch can cut very differently. On paper, the cutting conditions look fine, but in real work you get built-up edge, fast insert wear, and extra stops.
Another common case is when the cycle must be short and repeatable. For a one-off part, you can live with an extra 40–60 seconds. For a series, that quickly turns into lost shift time, extra tool consumption, and constant stress for the operator. In that case, do not look at one nice pass — watch at least a few identical parts in a row.
If you plan a production run, the test helps evaluate not only the machine itself, but the whole process. You can immediately see how chips evacuate, how convenient tool changes are, whether the tooling gets in the way, and how much time is spent on approach moves, measurements, and re-clamping.
A good example is the series machining of a long bushing made from tough steel with a tight runout tolerance. On the drawing, the task looks calm. Without a test, it is easy to choose a machine that makes the first part fine but starts drifting in size by the fifth. If you are discussing a purchase with a supplier like EAST CNC, it makes sense to ask for a demo on your part, not on an easy showcase blank.
If you have at least one of these signs, it is better not to make a decision without a trial cut.
What part data to bring with you
If you bring only a drawing to the test, you will see a nice machining process, but you will not understand how the machine will behave in your work. A proper check needs a package that reflects the real job, not a training example.
It is best to bring:
- a drawing with dimensions, tolerances, and datums;
- a blank made from the same material you use in production;
- a finished part or a fresh sample after machining;
- hardness data for the material or a batch certificate;
- roughness requirements and the desired cycle time.
A finished part is not just for illustration. It shows which surfaces matter most to you, where problems have already occurred, and what you consider an acceptable result. If you have a rejected sample, bring that too. Sometimes it says more than a perfect part.
It is better to provide the full drawing, without trimmed-out sections. The supplier should see not only the dimensions, but also datums, form tolerances, threads, grooves, fits, and surfaces where even a tiny error is unacceptable. If some dimensions are secondary, mark that in advance. Otherwise, the test may spend time on the wrong area.
People often make mistakes with the blank. For a trial cut, you need the same material and, if possible, the same hardness as in your real production. Steel of the same grade from a different melt can cut noticeably differently. If the part comes after heat treatment, bring that exact version.
Also mark the critical zones separately. For example, an outer bearing seat, an internal groove for a retaining ring, or a thread that will later be checked during assembly. These are usually the areas that decide whether the machine is suitable for your job.
And one more thing people often forget: state right away, in numbers, what surface finish and cycle time you need. The phrase “it needs to be good” does not help. The phrase “Ra 1.6 and no more than 2 minutes 40 seconds” sets a clear target immediately.
Which tools and conditions to prepare in advance
The most common mistake during a test looks harmless: your part is there, but they use a “similar” tool from the demo kit. In the end, the result may seem fine, but you still do not understand how the machine will behave in your normal work. If the working tool has already been chosen, bring exactly that one.
Everything matters: the tool holder, overhang, seating, clamping method, insert radius, and cutting edge geometry. The same material with a different insert can produce a completely different chip, sound, spindle load, and surface quality.
Usually, a test needs the working tool for the operation, several sets of inserts of the same grade and geometry, your clamping setup if it affects runout and rigidity, and a short sheet with cutting conditions and coolant delivery.
Clamping is often underestimated. And for no good reason. If the part is long, thin-walled, or sensitive to runout, the difference between a “nearly the same” chuck and your real clamping setup becomes obvious very quickly. On the test, you can see it right away: the size changes, vibration appears, and the surface gets worse.
It is better to prepare the conditions in advance instead of trying to figure them out at the machine on the spot. Write down roughing and finishing separately: spindle speed, feed, depth of cut, finishing allowance, and acceptable cycle time if that matters to you. When the operator sees the numbers immediately, the check moves faster and without unnecessary arguments about which conditions were used for the calculation.
Coolant should also not be left to chance. If the material is difficult, say in advance whether you need heavy coolant flow, through-tool coolant, or a specific cooling setup. Otherwise, it is easy to draw the wrong conclusion about the machine when the real issue was the cutting conditions.
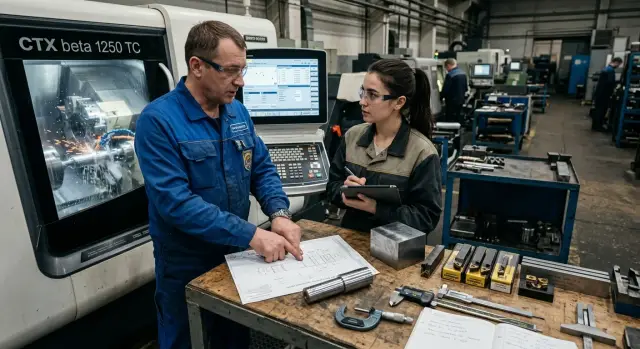
How to run the test calmly and usefully
Chaos at a demo starts not at the machine, but a couple of days before the visit. If the goal is vague, you will get a show, but not an answer to your question. So first agree on what you are actually checking: finishing quality, size retention, cycle time, performance on a complex contour, or behavior under heavy cutting.
It is better to choose one or two operations that really exist in your production. Do not try to test everything in one visit. One clear scenario is more useful than a long list without priorities.
Before the trip, send the supplier the drawing, a photo of the part, and a short description of the task. Photos often show things that are not obvious on the drawing: thin walls, deep pockets, awkward tool access. From the drawing, you can figure out in advance which chuck, tooling, and tool overhang will be needed.
Before the meeting, it also helps to agree on four simple things: who brings the blank and in what condition, who provides the tool and inserts, which tolerances and roughness must be checked after machining, and who records cycle time and when timing starts. That kind of conversation saves a lot of nerves. Often a customer arrives for the test, but the blank is wrong, the tool is different, and the whole check loses meaning.
During the machining itself, do not rely on memory. Ask for every change made during the test to be written down immediately: spindle speed, feed, depth of cut, number of passes, coolant flow. If the required size was reached only after several adjustments, that is also part of the result.
After each operation, measure what affects the purchase decision. Usually three things are enough: size, surface roughness, and actual cycle time. If the part is for series production, separately note loading and reloading time. That is often where the missing minutes go — the minutes nobody included in the calculation.
A good test is calm. Everyone already knows the part, the tool, the goal, and the order of checking. Then after the visit, you are left not with general impressions, but with numbers you can rely on.
Where people most often make mistakes at a demo
The first mistake happens before the first cut. They bring a material that is only “roughly the same” and then draw conclusions about the machine. If the blank has no confirmed grade, hardness, or even a clear origin, the result can easily go off track. The same pass on different metal batches gives different chips, load, and surface finish.
The second mistake is showing a part that is convenient for the seller, not your part. A simple bushing or a short shaft looks impressive, but it does not answer the main question: how will the machine behave with your geometry, your allowance, and your tolerances? If you have a thin wall, deep boring, or a long overhang, a test on an easy part is almost useless.
The third mistake is breaking the basis for comparison. People use someone else’s tool, someone else’s tooling, and then try to compare the result with their current process. That stops being an honest comparison. If you work with one insert and a specific holder in-house, but a different set is used for the test, you are not only looking at the machine — you are looking at someone else’s technology too.
Another trap is judging only the first part. It is often handled more carefully, with settings adjusted along the way and extra time spent on control. It is much more useful to watch a repeat: the second, third, and sometimes even fifth part. Then you can see whether the machine holds size, how the temperature rises, and how the tool behaves after several cycles.
Finally, many people are hindered by messy notes. Cutting conditions are almost always changed during the test, and that is normal. The problem starts when nobody records why the feed was reduced, why the insert was changed, or why the clamp was moved. It is enough to write down the material, tool, starting conditions, every change made during the work, and the result for each part. That log quickly shows where the machine handled the job on its own and where the result was achieved only through softer cutting conditions, different tooling, or manual corrections.
What to check right there on site
At a demo, it is easy to get carried away by the look of the cut and miss the things that affect defects, delivery time, and cost every day. Focus not on the show, but on repeatable results.
First, do not measure only at the end. It is useful to check a few dimensions after roughing and then repeat the measurement after finishing. That shows how the machine holds geometry during the cycle, not just at the final point.
Second, ask for a series, not a single sample. Three to five parts in a row already show whether the machine repeats consistently. Compare the first and last part by size, surface, and machining time.
Third, count the cycle immediately. If the actual time is longer than your estimate by even 30–40 seconds, that quickly turns into extra hours on the batch. Look not only at cutting, but also at tool approach, tool changes, measurement, and part removal.
Also watch the tool behavior. A harsh sound, noticeable chatter, a chipped insert, blue chips where they should not be, or strong heating of the part often reveal a problem before measurement does.
It also makes sense to evaluate how convenient the machine is for the operator. If tool changes are awkward, it is hard to reach the chuck, remove the part, or make a quick measurement, every shift will lose time. These small things are very obvious during the test.
Agree in advance who will measure the result and with what. If the supplier uses their own measuring tool, ask to check the size in parallel with your micrometer or at least with a second device. A dispute over two hundredths after the test helps nobody.
A good sign is when they repeat the run with the same settings and get a close result. If after every part they have to make long correction changes, reduce feed, or replace the insert, the issue is usually not chance.
A simple example from the shop floor
A small shop was turning a stainless-steel bushing for a short run. The part was not complicated, but on the old machine the size started to drift after warm-up. The first part was within tolerance, but after an hour the operator already had to adjust the correction.
That is why the test before purchase was a normal check for them, not a formality. They did not ask to see a universal showroom part. They brought what they machine every day: the drawing, three of their own blanks, and their own tool with the insert they were used to.
That immediately removed half the arguments. When the supplier cuts someone else’s part, with their own tool and in conditions that suit them, the result says very little about future work in the shop. But when the test uses familiar conditions, you can see the honest picture: how the machine holds size, what happens to the surface, and how long the cycle really takes.
They agreed not to judge only the first part. That is an important point. The first blank is sometimes too flattering: the machine is still cold, the tool is fresh, and the operator is fully focused. It is much more useful to compare the first and third parts. If the size drifts over such a short stretch, the same problem will appear in a real shift.
During the test, they checked the outer and inner size after the first and third parts, repeatability after warm-up, total cycle time without unnecessary pauses, the surface condition in problem areas, and insert wear after several passes.
The result was simple and clear. The new machine did not show noticeable size drift between the first and third bushing, and the cycle became shorter. The insert wore evenly, without unpleasant edge surprises. For the shop, that was enough: testing on their own part was more useful than any presentation.
If you have a part where your old machine already shows weak points, bring exactly that one. It will reveal the answer fastest.
What to do before meeting the supplier
A good meeting starts not in the conference room, but a day or two before it. If you come just to “take a look,” the conversation quickly turns into vague words. To make the test useful, prepare one clear package: the part drawing with dimensions and tolerances, blanks in the right material, the tool if you want a check with your own tooling, the working conditions, and the list of dimensions that need to be measured after machining.
Another helpful step is to assign one responsible person on your side. That person watches the measurements, records questions, and writes down comments about the surface, cycle time, and tool behavior. When everyone asks at once, some answers are lost, and after the meeting the team is left with different versions of the same result.
Do not delay the discussion about what happens after purchase either. Clarify right away who does commissioning, how long it takes to bring the machine into operation, how service works, and who trains the operators. Even a good test does not solve the problem if the machine later takes a long time to start up or nobody can help with the first batch of parts.
If you are choosing equipment through EAST CNC, it is better to discuss that scenario in advance. The company works with CNC lathes for metal machining and supports selection, delivery, commissioning, and service. The more precisely you agree on the material, tooling, conditions, and test procedure, the fairer the result will be.
The most useful outcome of preparation is simple: after the meeting, you should be left not with impressions, but with numbers, observations, and a clear list of next steps.
FAQ
Why ask for a cutting demo if there is a catalog and video?
A catalog and a video help you rule out clearly unsuitable models, but they do not show how the machine cuts your actual part. A test gives you an immediate answer about size, surface finish, and cycle time, not just the numbers in the brochure.
When is it better not to make a purchase decision without a test?
Do not skip the test if the part has thin walls, a long overhang, narrow grooves, a tight tolerance, or a short cycle. Another common reason is a tough or unstable material, where the tool and cutting conditions quickly change the result.
What should you bring for a test on your own part?
Bring a complete drawing with tolerances and datums, a blank made from the same material, and, if possible, from the same batch, plus a finished sample part. Say right away what surface finish and cycle time you need in numbers, otherwise the test will turn into general conversation.
Should you bring your own tool and workholding?
Yes, if you want to see the real picture. The same machine with a different tool, insert, or chuck can show a completely different sound, chip flow, spindle load, and surface quality.
Should you prepare your own cutting conditions in advance?
It is better to provide roughing and finishing conditions in advance: spindle speed, feed, depth of cut, finishing allowance, and coolant conditions. Then the operator checks your task instead of picking a convenient demo setting at the machine.
How many parts in a row should you watch during the demo?
One part proves almost nothing. Ask for at least three parts in a row, and if your series is sensitive to size, compare the first and last part by size, surface, and machining time.
What should you check on site during the test?
Do not look only at the final size. Check the size after finishing, surface roughness, actual cycle time, tool behavior, and the time needed to load and unload the part.
How can you tell whether a demo shows a real result rather than a nice show?
A fair test uses your geometry, your material, and clear conditions. If the supplier offers a convenient showroom sample instead of your part, you will see a nice cut, but you will not get an answer for your own job.
What mistakes most often ruin a demo?
Most often the test is spoiled by a small detail that was not agreed on in advance: the wrong material, someone else’s tool, a different clamp, or no exact measurement requirements. Another mistake is that nobody records which settings were changed during the test.
What should be discussed with the supplier before the meeting?
Before the visit, agree on who brings the blank and the tool, which dimensions and roughness will be measured, and where cycle time starts from. Also assign one person to record measurements and comments so the team does not leave with different versions of the result.