Clearances Around a Machine: How Much Space to Leave Next to It
Clearances around a machine are not just about the aisle. Learn how to account for service access, chuck changes, conveyor removal, and tooling delivery.
Why an aisle alone is not enough
A narrow aisle next to a machine looks good only on a floor plan. In real work, it is almost always not enough. The operator does not just walk past: they bring tools, place bins for parts, change tooling, open the door, lean into the loading area, and step back with a part in their hands.
If a person can squeeze through sideways, that does not mean the machine is easy to use every day. For normal operation, you need extra room for arm movement, a cart, a tool box, and the part itself. Even a routine chuck or jaw change quickly shows that the real working zone is wider than the machine body.
The same applies to service. When a technician opens panels, removes covers, or pulls an assembly toward themselves, they are already working outside the machine footprint. If another machine, cabinet, column, or rack stands nearby, access to the needed point disappears. Then a simple task takes longer or requires taking apart whatever is in the way.
Another common mistake is forgetting the things that constantly take up floor space. A chuck, a set of tools, containers for blanks, a pallet, a lift table, an overhead crane with a spreader beam, a chip cart — all of these need room. On a drawing, these items are often missing, but in real work they are exactly what eats up the needed centimeters.
What really takes up space around a machine
When marking out space for a machine, people often count only the operator aisle. That is not enough. A machine takes up more room than its catalog footprint because people work around it, doors open, and assemblies move out.
There must always be a working zone in front of the machine. The operator approaches the door, opens it fully, changes the blank, watches the screen, and reaches for the control buttons. If they have to stand sideways between the machine and neighboring equipment, the space is already too tight.
On the side and at the back, problems usually appear later, after installation. Many machines have side panels, service hatches, and electrical cabinet doors that open. The technician does not need a narrow corridor, but a place where they can stand, put down tools, remove a cover, and safely reach the needed unit.
Check moving elements separately. A coolant tank, filters, a tray, a drawer in the cabinet, or a chip handling unit can extend beyond the body by tens of centimeters. If there is a wall, column, or another machine nearby, that unit cannot be pulled out properly. Then even a filter change drags on for half a day.
The space around the machine is not only taken by service work. Very quickly, a tooling cart, measuring tools, bins for blanks and finished parts, a place for a removed chuck or arbor, and — if the part is heavy — access for a pallet jack, stacker, or forklift all appear in the same area.
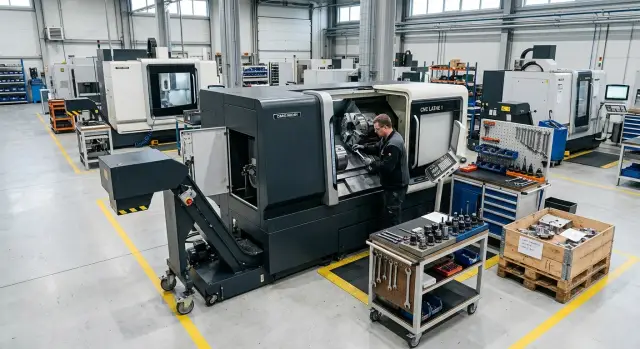
This is easy to see with a CNC lathe. On paper it may look compact, but on the right side it often needs room for the chip conveyor, on the left a cabinet or hatch opens, and in front of the door there must be a loading and operator zone. That is how the real clearances around a machine are formed.
How to calculate clearance step by step
It is better to calculate clearances around a machine not from the aisle, but from the real actions of people and equipment. The operator opens the doors, the service engineer removes a cover, a cart brings tooling, and chips must be removed without extra maneuvering. If there is space only for walking, problems will start in the first week.
Start with the machine specifications. Take the length, width, and height, then mark everything that extends beyond the main body: doors, hatches, electrical cabinet, moving units, tank, hydraulic station. Add space separately for the chip conveyor and the area where it can be pulled out for cleaning or repair.
Then it helps to go step by step:
- Mark the machine footprint on the layout according to the specifications.
- Add everything that opens, extends, or is removed during operation and maintenance.
- Reserve room where a person stands with tools and can turn around comfortably.
- Mark the zone for a cart, container, pallet, and lifting heavy tooling.
- Check how blanks reach the area and how chips are removed.
After that, look at the material flow. Where do the blanks come from, where are they placed before loading, how are finished parts removed, and where is the temporary storage for containers? If the same corner is needed both for bringing in material and removing waste, service access to the machine is almost always too tight.
The most useful tool here is a simple top-view plan. You can draw it to scale on paper. Sketch the machine, nearby equipment, columns, gates, cart, pallet, and the path of door movement. Then walk through a normal day: the blank arrives, it is loaded, the part is removed, the chuck or tooling is changed, the hatch is opened, the conveyor is pulled out.
A small example quickly brings people back to reality. If the machine footprint in the specs looks like 2500 x 1700 mm, that does not mean the same dimensions are enough around it. After accounting for door opening, access to the cabinet, and cart movement from one side or both, an extra 800–1500 mm is often needed. It is better to see that reserve on the plan than to go looking for it after installation.
Where to leave space for service
Clearances around a machine are not only about the operator aisle. The machine must be serviced, opened, cleaned, and sometimes partly disassembled. If only a narrow corridor is left nearby, service quickly becomes awkward.
First, see where the cabinet, pumps, filters, and coolant supply units are located. That side should stay free, with no rack, cart, or stockpile of metal. The technician needs direct access to open the door, remove the filter, tighten a connection, and work comfortably with tools.
A common mistake looks simple: if the door opens according to the spec, then there is enough room. In reality, that is not enough. When a cover is removed, fasteners are loosened, or a unit is pulled toward you, extra space is needed for hands, tools, and parts that cannot be placed on the floor right next to the body.
Check separately for operations that are not done every day, but need the most room. On a lathe, this is usually chuck change, jaw change, and work with the tailstock. A chuck is not removed right next to a wall. You need reach for a hoist, room for a cart, or at least a safe area where the heavy part can be moved out.
If a column, neighboring machine, or tall rack stands opposite the service hatch, access is lost even if the side aisle is normal. You may be able to approach the machine, but you cannot take the unit out, turn it, or bring in a lift. That is why downtime stretches into hours.
Before installation, it is useful to check four things: do the service doors open fully, can the cover be removed without rotating the machine on site, is there enough room to change the chuck and jaws, and do the hatch or cabinet hit a column, rack, or neighboring equipment.
If the project is prepared in advance, it is better to ask the supplier not only for the base dimensions, but also for the service layout. For EAST CNC projects, this is especially useful: the drawing shows not only the machine outline, but also the zones where service engineers will work. That reserve stops feeling unnecessary when it is time for the first filter change, pump repair, or chuck removal.
Space for the conveyor and cleaning
Most often, the shortage of space is not at the machine door, but on the chip conveyor side. While the shop is empty, the aisle seems fine. After startup, bins, coolant drips, a cleaning cart, and forklift forks appear there. If that area is squeezed, the inconvenience becomes daily.
The conveyor should be checked not by eye, but in full working position. Pull it out to its full length and measure the entire path it occupies on the floor. Look not only at the housing itself, but also at the area where a person approaches, removes protection, cleans the unit, or places a container under the chip discharge.
There is a simple rule: the chip container should be placed so it can be removed without extra turning. If the forklift driver has to back up every time, adjust the forks, and go around another machine, the layout is already poor. A few extra maneuvers quickly turn into constant delays and small damage to the floor, containers, and guards.
Cleaning also needs reserve space. Next to the machine there is usually a tray, a coolant runoff area, and a place where fine chips collect. Leave enough room for someone to get in with a brush, vacuum cleaner, or cart without bumping into neighboring equipment. If the pallet cannot be removed or washed properly, dirt will build up for weeks.
Another issue is hoses and cables on the floor. They are often temporarily placed near the conveyor, and then cart wheels and forklift forks start running over them. That leads to cuts, crushing, and unexpected stops. It is better to route those lines above floor level or into a protected channel outside the traffic zone.
For a quick check, just ask four questions: does the conveyor come out fully and not hit anything, can the container be brought in and removed in one clear maneuver, does the pallet and coolant collection area have enough room for cleaning, and do the wheels, pallet jack, and forklift avoid catching cables and hoses? If even one answer is no, the clearances around the machine are already too small.
Example for a small workshop
In a small workshop, a CNC lathe is often placed almost against the wall. On paper, that seems reasonable: there is still an aisle in front, people walk freely, and no extra meters are wasted. But that aisle solves only one task — walking past.
The problems begin when service is needed. The operator has room to stand in front of the door, but as soon as the chuck needs to be removed, a tooling cart rolled in, or a hoist brought over, there is no room left. The machine fits, but working around it is inconvenient.
The same thing happens with the chip conveyor. A rack is placed in the same row as the machine, and the chip container is left temporarily in the driveway. As a result, the conveyor cannot be pulled out without moving boxes, cleaning takes longer, and the aisle is blocked again and again. These small things eat up time every day.
In a small shop, it helps to divide the area not into “machine plus aisle,” but into several work zones: a space in front of the machine for the operator and cart, side reserve for chuck removal and tooling delivery, an area for pulling out the conveyor and changing containers, and a clear route for the pallet jack, crane, or forklift.
Sometimes a very simple rearrangement helps. The rack is moved farther from the conveyor, the container is placed not in the aisle but in a separate collection point, and the machine is slightly turned or shifted so the service side opens up. The shop floor does not grow, but the clearances around the machine start working for the job instead of just meeting a formal standard.
Common planning mistakes
Most often, people only count the machine footprint and the width of the aisle next to it. On paper, everything looks neat, but after installation it turns out there is not enough room for normal actions. Clearances around a machine are needed not only so a person can pass through.
The first common mistake is to see the machine as a rectangle. In real use, it immediately “grows”: doors open, side panels are removed, the chip conveyor extends, and a tooling cart arrives. If there is a wall, column, or neighboring machine nearby, every routine service task turns into a full-area rearrangement.
The second mistake is forgetting the control cabinet and the service zones on the side or at the back. The cabinet door must open fully, and the specialist needs proper access with hands and tools. The same applies to lubrication points, the hydraulic station, filters, and cable entries. If you leave a narrow gap “just in case,” nobody will be able to get through it later.
The third mistake is connected with loading. In theory, forklift access exists, but in practice the forks enter at an awkward angle, the operator has to make extra maneuvers, and the pallet with the chuck or vise hangs in the aisle. In a cramped shop, that quickly creates a bottleneck. It is even worse when the forklift path crosses the place where the operator stands at the machine door.
Another mistake is placing two machines too close together. While both are running, this may not matter. But when one machine needs repair, service takes over the neighboring area: open panels, a tool cart, removed units, and conveyor removal. In the end, the second machine also stands idle, even though it is fine.
Disorder around the area almost always starts with small things. Containers, oil, jaws, arbors, and hand tools are often placed temporarily in free corners. A month later, those corners are no longer free. People start walking around obstacles, cleaning takes longer, and access to the units narrows again.
The right approach is simple: first draw not only the machine outline, but everything that happens around it. Mark door opening, conveyor removal, forklift route, container storage, and the point where heavy tooling will be changed. Then the equipment layout in the shop becomes practical, not just nice on paper.
Check before installation
Before installing the machine, it is better to walk the area with a tape measure, a pallet, and a simple door-opening sketch. At this stage, mistakes are inexpensive. After installation, any rearrangement means downtime, time loss, and extra costs.
A common trap looks like this: a person can walk through easily, so it seems there is enough room. But a machine does not work in only one mode. Doors open, covers are removed, the conveyor is pulled out, a tooling cart arrives, and service needs access to filters, the pump, and the electrical cabinet. That is why clearances around the machine should be checked in motion, not only on a top-view plan.
A short five-point check helps here:
- Open all doors and hatches fully and check whether they hit a column, wall, or neighboring machine.
- See whether the chip conveyor comes out without dismantling the neighboring area and without moving the container.
- Check whether the forklift or pallet jack can approach with the blank and pallet at the right angle.
- Leave room for a cart with tooling, a chuck, jaws, and measuring tools.
- Make sure the service engineer can reach the filters, pump, hydraulic station, and electrical cabinet without acrobatics.
It helps to act out a normal workday. The blank arrives, the finished part is removed, the tool is changed, chips are taken away, and the cabinet is opened for inspection. If at any step people have to back up, move the container, or go around the machine sideways, the area for the machine is already too tight.
In a small shop, people especially often forget the side and rear zones. They leave an aisle in front, and later discover that the cabinet cannot be reached, the pump is blocked by a pallet, and the conveyor can only be removed after moving neighboring equipment. For CNC lathes, this is a common mistake.
If the machine is being selected for a new area, it is useful to discuss the check in advance with the people who will handle installation and service. In EAST CNC projects, the focus is usually not only on the machine dimensions, but also on the real actions around it. This helps avoid the situation where the equipment has already arrived, but it is uncomfortable to work next to it every day.
What to do next
Start not with the machine, but with the room. Measure the real workshop dimensions: length, width, height, the position of columns, gates, doors, stairs, and the equipment already in place. On a drawing, everything often looks straight, but in real life walls, cable trays, heaters, cabinets, and the forklift turning radius get in the way.
Then check not only the place where the machine will stand, but also the route to it. Blanks, chucks, tools, coolant pallets, and chip containers must get there without difficult maneuvers. If a cart or forklift has to back up in a narrow place, that is already a bad sign.
It helps to walk through the future work directly on the floor, even if the machine is not there yet. Mark the footprint with chalk or tape and act out a normal shift: how the operator approaches the door and panel, how the chuck or jaws are changed, where the chip conveyor is pulled out, where tooling is brought from, where it is temporarily placed, and how the service engineer reaches the needed units.
This kind of test quickly shows weak spots. Often the problem is not the aisle itself, but one specific action: there is nowhere to put the removed chuck, the cabinet door does not open, the cart does not fit, or the cover is awkward to remove for service.
When the draft plan is ready, send it to the supplier before installation. You will need the machine dimensions, door-opening zones, access to the electrical cabinet, connection points, and service access on the side or at the back. One short conversation at this stage can save days of rework after delivery.
If you are choosing a CNC lathe, EAST CNC can help you discuss not only the model, but also the shop layout, commissioning, and ongoing service in advance. That is especially useful when there will be a chip conveyor, bar feeder, or another machine nearby.
And one last step is very simple: print the plan and review it together with the shift supervisor, the setup technician, and the person responsible for loading. If they do not disagree about access and routes, the plan is already close to workable.