Chuck Runout Check After Remounting: Procedure
Checking chuck runout after service requires two measurements: on a cold spindle and after warm-up. Here’s the sequence, common mistakes, and a quick checklist.
Why the problem shows up on the first part
After a chuck is removed and installed again, the machine does not return to its previous position by itself. The entire seating chain changes: the spindle nose, adapter plate or flange, chuck body, and sometimes even the jaw position after disassembly. Even if the chuck is mounted carefully, it can seat slightly differently than it did before service.
The most common cause is simple: dirt on the seating surface. A thin chip, dried grease, or a trace of lapping compound is enough to keep the chuck from sitting fully flat. You cannot see that by eye, but the indicator will later show runout, and the first part will get a shift, taper, or uneven stock removal.
The problem is usually caught by the first part because it is started too early. The chuck is already tightened, the jaws move, and everything looks normal from the outside. But a runout check is not for peace of mind — it is to avoid losing the blank, time, and confidence in the setup.
The consequences are very real: the size drifts on the first pass, the surface comes out worse than expected, or the part does not stay concentric with the next operation. If the blank is expensive, the error is obvious right away. If the batch is long, the scrap can keep going.
There is another trap: the numbers on a cold spindle and a warmed-up spindle often differ. On a cold machine, the bearings, shaft, chuck, and grease all work in one state. After warm-up, the metal changes shape slightly, the lubricant spreads differently, and the assembly reaches its normal operating mode. That is why after remounting the chuck, runout may be moderate at the start and worse after some time — or the other way around.
Because of this, a check cannot be considered finished after a single measurement immediately after assembly. If the machine will go into production, you need two control points: on a cold spindle and after normal warm-up. Then the first part is not a trial search for an error — it remains an ordinary working part.
After service, everyone wants to get the machine back to work as fast as possible. But in this case, rushing is almost always more expensive than spending an extra ten minutes on checking.
What to prepare before measuring
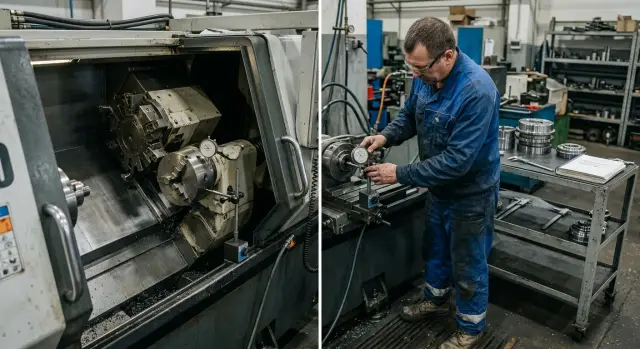
Checks are often spoiled not by the chuck or the spindle, but by small things before you start. After service, it is easy to rush: install the indicator, clamp the first bar you find, see a bad number, and start looking for a problem that does not exist. That is why a proper check begins with cleanliness, suitable tooling, and recording the results.
You should have an indicator with a rigid stand that has no play, clean rags, degreaser, a reference arbor or straight ground bar, and a sheet for recording measurements or notes on a tablet. It also helps to prepare a brush or hook right away to remove chips from the chuck area.
The main rule is simple: clean first, then install. Wipe the spindle nose, the chuck seating surface, the jaws, and any places where abrasive, dirty oil, or fine chips may have gotten in. Even one particle between the seating surfaces can create noticeable runout. After that, many people start blaming the spindle, even though the cause is right at the chuck face.
You should not improvise with the reference part either. It is better to use an arbor you trust. If you do not have one, a short straight bar without scratches, dents, or old clamping marks will do. It is better not to check with raw stock: it may already be bent, and the measurement immediately loses its meaning.
Mount the indicator on a rigid stand, not on a temporary support just to see what happens. If the stand moves when you touch it lightly, you will get random numbers instead of a result. On CNC lathes, this often shows up after removing the chuck for cleaning or grease replacement.
Recording the measurements makes life much easier. Note exactly where the indicator was placed, what the spindle temperature was, and what values appeared at the face and at the overhang. When you compare the cold and warmed-up spindle, the picture becomes clear. Without notes, such differences are easy to mistake for a mounting error.
Checking on a cold spindle, step by step
After assembly, do not start the first part right away. Even a tiny chip on the spindle face, in the taper, or on the chuck seating surface can create a noticeable deviation, and you will see it only after cutting.
First remove anything that prevents accurate seating. Wipe the face, taper, and mating part of the chuck with a clean lint-free cloth. If there is a film of old oil on the surface, remove it completely.
Then inspect the metal carefully. A burr, a dent from a wrench, or a chip mark often causes more trouble than the assembly itself. If you find a defect on the edge or in the seating area, do not tighten the chuck "by force." Fix the cause first.
After that, it is easiest to follow the same sequence every time:
- Mount the chuck without misalignment and snug the fasteners.
- Tighten the fasteners evenly around the circle in the same order. Do not fully tighten one bolt right away.
- Place the indicator near the base, closer to the seating surface, and zero it.
- Slowly rotate the spindle by hand and record the minimum and maximum values.
- Move the indicator to the overhang, for example to the reference arbor, and repeat the measurement.
The meaning of two points is simple. If the reading is almost even at the base but the spread grows at the overhang, the cause may be the chuck, the arbor, or a misalignment during installation. If the runout is already noticeable at the base, look first for dirt, burrs, or an error in seating.
Turn the spindle only by hand and without rushing. A sharp movement can easily create a false jump in the needle. It is better to make two full turns and make sure the readings repeat.
It is useful to write down both results right away. For example: 0.005 mm at the base, 0.02 mm at the overhang. If the numbers change after retightening the fasteners, the chuck did not seat fully the first time.
If there is already unstable spread on the cold spindle, do not move on to cutting. At this stage it is easier to remove the chuck again, clean the seating surface, and repeat the measurement than to search for the cause of scrap on the first part.
How to warm up the spindle after assembly
If you need an accurate check, do not place the indicator immediately after remounting. After assembly, the spindle, chuck, and seating surfaces have not yet reached their normal thermal state. On a cold unit, the machine may show one value, and 15–20 minutes later it may show another.
Rushing here often ruins the picture. The operator sees a small runout after remounting the chuck, takes the assembly apart again, and the reason may not be the assembly at all — the spindle simply has not warmed up yet.
Start the spindle at low speed and increase it smoothly. There is no need to go straight to working speed, especially if the chuck was removed for cleaning, greasing, or jaw maintenance. First let the machine run for a few minutes at minimum or near-minimum speed, then move to the next step and pause again. Continue through a few more steps until you reach a mode close to normal machining. If the machine runs at high speed, keep the top step short — just long enough for the unit to settle into steady operation.
The exact speed and time values are best taken from your machine manual. The general idea is the same: step-by-step acceleration, with no jerks or sudden stops. On CNC lathes, this approach usually gives a truer measurement than a quick start at high speed.
While warming up, listen to the machine. A steady sound matters more than a pretty number on the display. If a new noise, hum, body vibration, burning smell, or a noticeable rise in temperature appears near the front support, stop. First figure out what changed after assembly.
Check the heat by hand only carefully and only in a safe area where the instructions allow it. The temperature should rise smoothly, without a sharp spike. If the body stays calm for a long time and then suddenly gets hot, that is a bad sign.
Repeat the measurement only when the spindle is running steadily at each stage. If the sound is stable, there is no vibration, and the heating is normal, you can move on to a new indicator check.
Checking on a warmed-up spindle, step by step
After warm-up, the numbers often change even where everything looked clean on the cold spindle. The metal expands, the lubricant spreads over the working surfaces, and the weak spot shows itself faster. That is why the check after assembly does not end with the first measurement.
What matters here is not a new method, but an exact repeat of the previous one. If you move the indicator, change the arbor, or alter the order of actions, the comparison loses its meaning.
- Keep the same measurement points. Check the base and the reference arbor at the same overhang.
- Repeat the measurement in the same order: first the base, then the overhang.
- Record the values next to the cold measurements, not separately.
- If the numbers drift, take a short 3–5 minute pause and repeat the whole cycle once more.
Look not only at the absolute number, but also at the pattern of change. If almost nothing changed at the base, but the runout increased at the overhang, the source is usually not the spindle. In that case, check the chuck, jaws, arbor, and the clamping itself. If the increase appears already at the base, look for dirt on the seating surface, misalignment during assembly, or a problem with the mating surfaces.
If the numbers still do not match after a repeat check, do not send the first part into a finish size operation. One extra inspection cycle is almost always cheaper than a ruined blank and a long search for the cause during machining.
How to tell where the runout is coming from
Look not at one number, but at how it changes at different points. During an indicator check, the pattern usually tells you where to look for the cause.
If a large deviation is already visible at the base, near the chuck body, first check the seating surface and the fasteners. Often the problem is simple: dirt remained at the joint, the chuck did not seat fully, the bolts were tightened unevenly, or the body shifted slightly during assembly.
Another picture is also possible: the readings are calm at the base, but the runout grows noticeably at the overhang. In that case, the spindle and chuck seating are not always to blame. More often you should check the jaws, their wear, the cleanliness of the guides, and how they hold the reference arbor or blank.
It helps to compare three points: the chuck body, the arbor near the chuck, and the arbor at the overhang. If the problem is in the seating, the deviation will appear earlier. If the issue is in the clamping or the arbor, the increase will be more noticeable farther from the chuck.
Fluctuating readings can be confusing. Sometimes the problem is not in the machine at all, but in the measurement itself: the magnetic stand is set weakly, the indicator touches the surface at a poor angle, the arbor is dirty, or the contact point changes from one rotation to the next. In that case, stabilize the measurement first, then draw conclusions.
It is also worth checking whether the blank itself is bent. That is why a reference arbor or a known straight bar is needed. If the chuck and spindle give normal numbers, but the workpiece runs out only after clamping, look at the material, the part shape, or the clamping scheme.
If everything looks normal on the cold spindle, but after warm-up the deviation at the base or on the arbor shifts, that usually points to a misalignment during installation rather than a random error. After service, the chuck sometimes seats without an obvious visible skew, but the indicator shows it right away. In that case, it is better to remove the chuck, clean the seating again, and repeat the tightening in the same order.
Common mistakes after chuck service
After cleaning and remounting the chuck, people often rush. Because of that, the machine may look assembled correctly, but the first part immediately shows size drift or poor surface finish. Usually the problem is not the chuck itself, but the way it was checked after assembly.
The most common mistake is measuring on a dirty seating surface. A thin oil film, fine chips, or old grease residue is enough for the indicator to show extra thousandths. Then the chuck is removed again, the operator looks for a defect in the spindle, and time is lost. Before measuring, you need to wipe the seating surfaces, jaws, and reference arbor as if the machine were being prepared for acceptance.
The second mistake is tightening the fasteners any old way. One bolt is pulled harder, another is left looser, and the chuck sits skewed. This often happens when the technician works quickly and does not tighten in the same order around the circle.
Another typical mistake is comparing a cold and a hot measurement at different points. The cold spindle was checked with one arbor and one overhang, but after warm-up it was checked with another part or at another length. Such numbers cannot be fairly compared. If you need a check on a cold and hot spindle, the measurement base must be the same: the same point, the same overhang, the same indicator setup.
A conclusion based on a single check is also misleading. The indicator showed a deviation, the technician turned the chuck slightly, repeated the measurement, and decided the cause was found. But one good result proves nothing yet. It is better to make several repeats after rotating the spindle and after retightening to understand whether the number is stable or drifting.
And the most expensive mistake is starting the whole batch right away. Even if the check gives a normal result, you still need a test part first. It quickly reveals what the indicator cannot see: diameter drift, vibration marks, and how the clamping behaves under load.
A good habit is simple: clean all surfaces before installation, tighten the fasteners in the same order, compare cold and hot measurements at the same point, repeat the check several times, and only then machine a test part.
Short checklist before startup
The first ten minutes after assembly matter more than they seem. If you miss one small thing, the scrap usually appears not on the hundredth part, but on the very first one.
Before the first start, check three things:
- there are no chips, dirty oil, or small burrs on the seating surface;
- the bolts are tightened in the same order, without random retightening;
- the cold measurement has been written down, not just kept in memory.
After that, warm up the spindle in a gentle mode and repeat the measurement at the same points with the same indicator. Before the test part, make sure of three more things: the spindle has already reached a stable state, the hot measurement is within your tolerance, and the first part is run as a short trial with a quick check of size and cutting pattern.
If the numbers drift on the hot measurement, do not convince yourself that "it will even out during cutting." It usually does not. It is much wiser to check the seating, the tightening order, and the condition of the jaws again.
A shop-floor example
In one shop, an operator removed a lathe chuck for a routine cleaning. It was ordinary work: remove chips, wipe the seating surface, reinstall the chuck, and return to the batch. Everything looked normal from the outside. The chuck seated without skew, the fasteners were tightened, and the clamping worked as usual.
The problem showed up immediately on the first part. After the pass, the operator noticed a slight taper on the diameter. By eye, the machine behaved calmly: no extra noise, almost no vibration, and no obvious signs of misalignment. These are exactly the cases that waste the most time, because from the outside everything seems fine.
First they checked on a cold spindle. The indicator on the body and on the reference arbor gave a result that could be called acceptable. If they had stopped there, the machine would probably have gone back into production.
They warmed up the spindle in the usual way, without sudden speed changes, and repeated the measurement on the same arbor and the same overhang. The picture changed: runout at the end of the arbor increased much more than at the base. That already looked less like random indicator error and more like a seating or tightening issue after assembly.
Then the operator did not try to find a complicated cause. He removed the chuck again, cleaned the seating surfaces once more, removed the fine dirt from the face, and checked whether chips had packed into the contact area. After that, the chuck was reinstalled and the fasteners were tightened evenly, without rushing, around the circle.
After the repeat assembly, the cold measurement became steadier, and after warm-up the readings barely moved. The next part came out without taper. The conclusion is simple: if the chuck was removed for service, one cold measurement is not enough. When runout grows at the overhang after warm-up, first check the seating cleanliness and the tightening order. Very often the cause is right there, not in the spindle.
What to do next
One successful measurement does not solve anything. You need a repeatable routine that the operator follows the same way after every chuck removal.
The easiest way is to put it on one sheet and keep it right by the machine. Then the check does not depend on memory, rushing, or a change of operator. Such a routine usually includes the same measurement points on a cold spindle, the same warm-up after assembly, the same points on the warmed-up spindle, and recording the numbers in one log with the date and the reason the chuck was removed.
Do not change the reference from one check to the next. If last time you measured at the chuck seating area, on the outside diameter of the body, and on the reference arbor, return to the same places next time. Otherwise you will get new numbers, but you will not know whether things improved or got worse.
It is useful to record not only the final result, but also the measurement conditions. For example: the chuck was removed for cleaning, the spindle was warmed up for 15 minutes at medium speed, and after warm-up the radial runout on the arbor dropped from 0.018 to 0.009 mm. Such notes quickly show where to look for the cause: in the seating, in the chuck itself, or in the warm-up mode.
If the problem comes back, do not argue based on impressions. Show service both sets of numbers — on the cold and warmed-up spindle — plus the measurement points and the warm-up sequence. With this data, it is easier for a specialist to tell whether there was an assembly error, dirt on the seating surface, misalignment during tightening, or whether the assembly needs a deeper inspection.
If you work on EAST CNC equipment, it is better to verify this routine with the company’s service specialists in advance. The EAST CNC blog on east-cnc.kz also publishes equipment reviews and practical metalworking tips that are convenient to use as a shop reference.
The normal result here is very simple: after every chuck removal, you perform the same check, get comparable numbers, and make decisions based on facts, not by eye.
FAQ
Why does the problem after remounting the chuck often show up on the first part?
Because the fit of the whole assembly changes after the chuck is removed. Even a thin chip, old grease residue, or uneven tightening can create a shift, and the first blank shows it right away in size, taper, or surface finish.
What should be prepared before checking runout?
Prepare a dial indicator with a rigid stand, clean wiping cloths, degreaser, and a straight reference arbor or ground bar. It also helps to record the measurements right away so you can honestly compare the cold and warmed-up spindle later.
Can I check the chuck with an ordinary shop bar?
It is better not to use rough stock. Such a bar can be bent on its own, and you will get a false result. Use an arbor you trust, or a short straight ground bar without nicks or old clamping marks.
Where should the indicator be placed for the first measurement?
First measure closer to the base, near the chuck seating surface. Then move the indicator to the arbor at the same overhang you chose for the check. These two points usually show right away whether to look at the seating, the chuck, or the clamping itself.
Is a check right after assembly on a cold spindle enough?
No, one measurement is not enough. On a cold unit, the numbers often differ from those seen after normal warm-up. If you start machining too early, you can miss a problem that shows up during cutting.
How do you warm up the spindle correctly after installing the chuck?
Start the spindle at low speed and increase it step by step, without a sudden acceleration. Let the unit run for a few minutes at each stage, listen to the sound, and make sure the temperature rises smoothly, without humming or a sharp increase.
How can I tell whether the problem is in the seating or in the chuck?
If the readings are nearly even near the base but spread increases at the overhang, the chuck, jaws, arbor, and clamping are usually the first things to inspect. If the runout is already noticeable near the base, check for dirt on the seating surface, burrs, and whether the fasteners were tightened evenly.
What should I do if the indicator readings fluctuate?
First check the measurement setup itself. Fix the stand firmly, make sure the indicator touches the surface at a proper angle, and clean the arbor. If the numbers still drift, repeat the check after a short pause and do not start the part until you get a stable result.
Can I start the whole batch right away if the measurements look normal?
No, make a test part first. An indicator shows geometry in a static state, while cutting immediately reveals diameter drift, vibration marks, and how the clamping behaves under load. That way you catch the problem before it reaches the batch.
What data should be recorded after the check?
Record the measurement points, the values on the cold and warmed-up spindle, the arbor overhang, and the reason the chuck was removed. These notes make it easier to see where the issue repeats and to show service real numbers instead of guesses.