Axis Zero Drift After a Collision: What to Check Before Startup
A zero shift after a light collision does not always mean a breakdown. Learn the quick checks for the sensor, reference, and mechanics before restarting.
What happens after a light collision
An operator usually notices not the impact itself, but the strange behavior right after it. The zero point on the axis seems to have drifted, the part size suddenly changes, and the return to reference does not work the usual way. Sometimes the machine does not throw a loud alarm, and that is what makes it especially confusing.
After a light collision, the picture is often deceptive. The hit may have been weak, with no obvious marks on the tool or workpiece, the axis still moves, and the servo does not fault out. Because of that, it seems like you can just zero it again and keep working. But it is exactly after these almost invisible contacts that the most unpleasant mistakes hide.
The problem is that different causes can produce similar symptoms. In one case, the reference sensor, encoder, or limit switch loses its signal while the mechanics stay in place. In another, the sensor is fine, but the mechanics themselves have shifted: a coupling, fastener, stop, or drive component. On the screen it may look almost the same, but the risk to the machine is very different.
A rushed restart is dangerous for a simple reason: the system may think the axis is at one point, while in reality it is already somewhere else. Then the next pass will follow the wrong path. At best, you get scrap and lose the workpiece. At worst, the tool hits again, and the next impact will no longer be light.
It is worth stopping right away in several cases:
- the reference returns to a different point after each repeat
- the size jumps instead of drifting gradually
- the axis sounds different or moves in jerks
- an alarm appears for the sensor, encoder, or travel limit
- fresh signs of impact, shifting, or loose fasteners are visible on the unit
If the alarm repeats, there is no point arguing with it. For CNC turning machines, it almost always means a simple alarm reset is not enough. It is better to spend 10 minutes checking than later to find out why the geometry shifted, the tool broke, or runout increased across the whole batch.
First actions at the machine
After a light collision, do not rush to home the axis again, and definitely do not press start. First, preserve the fault picture exactly as the machine shows it. Otherwise the machine will erase useful traces, and only guesses will remain.
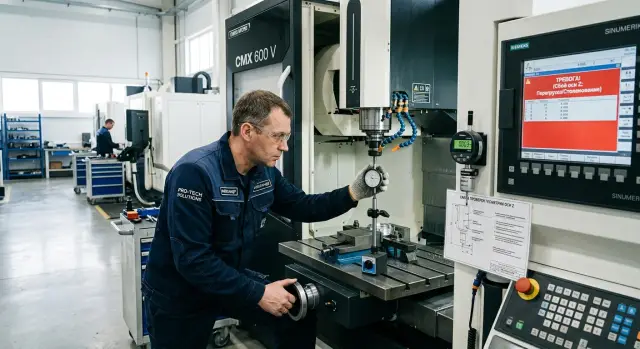
Write down or photograph the screen. You need the current axis coordinates, the alarm text, the tool number, the active offset, and, if the system shows it, the message history. When axis zero drift is suspected, one screen photo is often more useful than a long explanation. In EAST CNC service practice, such photos often help engineers understand what happened before they arrive.
Right after that, check whether the axis holds position while idle. Leave the machine powered on, but do not send new commands, and watch the coordinate for 30-60 seconds. If the value slowly creeps, the axis twitches, or the drive keeps correcting position, that is already a caution sign. In that state, do not try a random home cycle again.
Inspect the impact area only after the spindle and axes have fully stopped. Never open or remove guards while the machine is moving. You need a calm visual inspection without unnecessary actions: where the contact was, what shifted, and whether there are fresh marks on the holder, chuck, part, or fixture.
Most often, the obstruction turns out to be simple:
- chips packed into the travel area
- the part shifted in the clamp
- the tool hit the fixture
- the unit reached a mechanical stop
- a misalignment or burr remained after the contact
Even a small chip buildup can feel like a serious failure, while the mechanics are actually fine. The opposite mistake is also common: the operator sees a light impact mark, dismisses it as minor, and restarts the axis right away, even though the part has already shifted by fractions of a millimeter.
If you find an obvious obstruction, do not try to force the axis with commands. First remove the cause, then move on to the next checks. If there is no obstruction, you already have three anchors for diagnosis: the coordinates at the moment of the fault, the alarm text, and the axis behavior while idle.
How to tell if the sensor is failing
If the axis returns to zero a different way each time after a collision, the sensor and its signal are the first place to look. Mechanical issues after an impact usually produce a more constant shift. A sensor, cable, or connector more often creates an unstable picture.
Open the input diagnostics screen and check the state of the limit switch or home sensor. When the marker passes the trigger zone, the signal should change clearly, without flickering or delay. If the input appears and disappears while the axis is standing still, the problem is almost always in the sensor, wiring, or connector.
After a light hit, do not stop at the screen. Inspect the sensor itself and everything around it: the mount, flag, stop, and cable protection. A small collision may not affect the screw or guideways, but it can shift the sensor bracket by fractions of a millimeter or pull the cable so the contact works only part of the time.
Signs to look at especially carefully:
- damaged insulation or a cable under tension
- a loose connector
- a bent flag or bracket
- chips, oil, or dirt on the sensor area
- a dent near the impact point
Then check how repeatable the homing return is. Run the return several times in a row at a reduced feed, if shop rules and the machine condition allow it. If axis zero drift changes from cycle to cycle, for example 0.01 mm one time, then 0.04 mm, then almost no error, that is a bad sign for the sensor or signal chain.
Mechanical shift usually looks different. The axis does not go to the right place, but it does so consistently. If after three or four home cycles the error repeats at almost the same amount, it is time to suspect not the sensor, but the hardware: the coupling, fasteners, stop, screw, or unit seating.
There is also a simple local test. During inspection, gently wiggle the cable near the connector and near the sensor entry, but without force. If the input status changes, there is almost no need to look further. This kind of fault is easy to miss because the cable can look normal from the outside.
In EAST CNC service practice, these cases appear regularly after light contacts on CNC turning machines: the operator expects major mechanical shift, but the cause turns out to be a moved flag or a connector that was not fully seated. The check takes only a few minutes and often saves hours of unnecessary disassembly.
How to recognize mechanical shift
If the axis returns to the wrong point every time after a light collision, the problem may be in the hardware, not the sensor. A mechanical shift has one common sign: the error repeats almost the same way after each home cycle or test move.
First, look at what could have moved from the impact. On a CNC machine this is usually the coupling, motor mount, stops, key, or clamping screws on the shaft-to-screw connection. Even a slight twist of the coupling on the shaft can create a noticeable axis zero drift.
It helps to check several points one after another:
- the coupling for signs of rotation, cracks, and loose screws
- the fasteners on the bearings, motor, and axis sensors
- mechanical stops and limit elements for shifting
- impact marks: fresh scratches, metal dust, or dented edges
If the machine manual allows it, carefully check for play by hand. There is no need to pull hard. It is enough to understand whether free movement has appeared where there was none before. On a healthy axis, the feel is usually firm and smooth. If the unit responds with a click, moves in a jerk, or has different play in different positions, that is already a sign of mechanical trouble.
Another good clue is old measurements. If the shop has recorded runout, position repeatability, or deviation after homing, comparing those values quickly shows the difference. A sensor fault often gives an unstable picture. Mechanical shift is more often seen as a constant deviation by the same amount.
After an impact, it is also worth checking the geometry. On a turning machine, this may show up as the axis size seeming fine, but coaxiality changes, taper increases, or the tool approaches the part differently than before the collision. That means not only the zero point has shifted, but the unit itself is now working in a different position.
A small example. After a collision, the axis kept drifting by 0.18 mm. Homing completed without errors, but during inspection a rotated coupling and a loose screw were found. The sensor was fine. The amount of shift changed very little, and that is exactly what pointed to the mechanics.
If you see a repeatable deviation, physical impact marks, and new play, it is better not to start machining right away. First tighten, measure, and only then make a test run on a safe path.
Step-by-step checks before restart
After a light collision, do not press "Start," even if the machine looks intact from the outside. Axis zero drift often begins with something small: a chip, a misaligned sensor, a loose stop. If you skip the first inspection, the next part will show the error in the metal.
Stop the cycle and record the current state. Write down the program number, active tool, stop line, screen messages, machine coordinates, and work coordinates. Do not change offsets or make manual moves by eye until you have saved the original picture.
Then remove everything that prevents the axis from moving freely. Clear chips from the guideways, covers, sensor area, and stops. Check whether a piece of metal has hit a limit switch, whether a protective shield has shifted, and whether there are fresh impact marks on the coupling, holder, or fasteners.
The usual order is:
- Home the axis and record the result right away.
- Move the axis to a simple check point where zero is easy to verify.
- Read the value and compare it with the previous measurement or reference.
- Send the axis to home again.
- Repeat the check at the same point.
You do not need a complex part for the check point. A test blank face, a gauge, or another clear reference that the operator has used before is enough. The important thing is that the point is simple and repeatable, so you compare numbers, not impressions.
Look not only at the deviation itself, but also at repeatability. If after two identical home and check cycles you get different values, it is too early to start the machine. When the number shifts differently each time, the problem is often not in the part zero, but in the sensor, dirt in the trigger area, or a loose assembly.
If both measurements match and the check point gives the same result as before the collision, the risk is lower. But even then, it is better to do a short dry run at a safe height before returning the machine to normal work.
Mistakes made most often
When axis zero drift is suspected after a light collision, people often rush. The machine looks fine, the alarm is cleared, so it seems like you can press start again. This is one of the most expensive habits on the shop floor.
The first mistake is simple: the operator clears the fault and immediately resumes the cycle. If the cause is not clear, the next start can easily turn a small fault into a broken part, a damaged tool, or another collision.
The opposite extreme causes just as many problems. One strange home cycle is treated as clear mechanical shift, even though after a light hit the sensor can fail, the flag can get dirty, or one reading can be lost. One fact does not prove anything yet.
People often lose the most useful thing: numbers. They do not record the coordinates before homing, after homing, and after the repeat check. Then everyone argues about the cause, but there is nothing left to compare.
The usual mistakes look like this:
- Clearing the alarm and starting machining without a test run.
- Trusting the first result and not checking homing at least once more.
- Not recording machine coordinates, active correction, and the alarm text.
- Looking only at the sensor and missing the coupling, fasteners, stops, encoder, and play.
- Leaving old offsets as if nothing happened.
The last point is underestimated most often. Even if the axis returns to zero without a new alarm, the old offset can hide a problem during the first moves. In the end, scrap appears not right away, but after several parts, and then finding the cause becomes even harder.
It is better to act boringly and calmly. First record the readings, then check home repeatability, then look at the mechanics, and only after that make a trial move without cutting.
In EAST CNC service practice, these cases are rarely "magic." Usually the cause is either in the sensor chain or in a small mechanical shift that can be spotted before startup if you do not rush.
Five minutes spent on recording coordinates and running a dry check almost always saves a shift from long downtime.
A simple shop-floor example
On a turning machine, the operator was running a finishing pass at a low feed. The tool just brushed the clamp. The hit was unpleasant, but weak: the spindle did not jerk, the sound was short, and it felt like nothing serious had happened.
He stopped the cycle, retracted the tool, and sent the axis home. The system completed the move without alarms. Everything looked calm on the screen, so the shift decided to make a trial part instead of disassembling the unit right away.
The trial part quickly showed that there was a problem. The first part came out about 0.04 mm off from the normal result, even though the machine had held it steadily before the collision. That is often what axis zero drift looks like after a light contact: the machine seems fine, but the size has already drifted.
The operator did not rush to blame the screw pair, coupling, or guideways. He ran another home cycle and compared the result with the previous one. The difference was only a few hundredths. For a major mechanical shift on an axis, that is too little and too unstable. The picture looked more like a CNC machine sensor fault.
The next check took less than ten minutes:
- the sensor and stop area were cleaned of chips and oil;
- the sensor bracket was checked for play;
- the fasteners were tightened;
- the axis was homed again and a control measurement was taken.
That is when the cause was found. One sensor mounting screw had loosened slightly. The sensor itself was working, and the axis mechanics were not damaged. But because of the small shift, the sensor triggered at a moment that was not quite right for accurate return to zero.
After tightening the fasteners and re-referencing, the size came back almost immediately. The next part was within tolerance, and two more confirmed that the unit had not moved. If the shift had simply pressed start and kept going, the shop would have gotten a series of quietly defective parts and then lost time on sorting and re-setup.
Quick checklist before startup
If there was a light collision, do not rush the machine back into production. At this stage you do not need a long teardown, but a short check that rules out obvious risk. It takes only a few minutes and often immediately shows whether it is axis zero drift or a local fault in the sensor, fastener, or cable.
Check five things before startup.
- First, open the alarm log and note which fault was last. The operator should understand exactly what stopped the machine: signal loss, home error, axis overload, or something else. If the message is unclear, do not clear it before checking.
- Then home the axis twice in a row at the same feed. If the return point matches, that is a good sign. If the marker shifts even a little each time, it is better to postpone startup.
- Inspect everything that could have moved during the hit: the sensor fasteners, bracket, stop, connector, and cable. Even a small amount of play or a nick in the insulation can later cause an unstable error that is easy to mistake for something more serious.
- Give the axis a short move forward and back at low speed. Listen to the sound. New grinding, clicking, sticking, or unusual vibration usually points not to electronics, but to mechanics.
- Check one control point that you already know from a previous setup. It may be a dimension from the indicator, the tool position, or a coordinate on a test part. If the value matches the previous one, the risk of hidden shift is noticeably lower.
When not to start
If even one item does not pass smoothly, it is too early to run the machine in production. This is especially true if homing is unstable and the axis sounds noisy. In that situation, it is safer to stop at the check and not try to "push through the shift."
One simple mistake happens often: the operator sees that the machine returns to zero again and assumes the problem is solved. But without checking the control point, that is weak proof. The axis can return home and still have a small offset that is enough to create scrap on the very first part.
What to do next
You can return the machine to work on your own only in one case: you repeated the checks, the axis consistently returns to home, the alarm does not come back, and the test run shows no new deviation. If the result is even slightly unstable, it is better to delay startup. After a light collision, that saves both the part and the operator’s time.
When axis zero drift turned out to be a one-time event and the cause is clear, do not rush to load the normal program right away. First give the machine a short safe task: slow movements, homing, checking the base point, one dry cycle. If the axis behaves the same on every repeat, the risk is already lower.
If the situation is unclear, gather the records before calling service. Relying on memory is very misleading in these cases, and one missed detail later adds hours of searching.
- alarm code and text
- which axis was hit
- how far the zero point or home point shifted
- what the repeat home and indicator check showed
- after which action the error appeared again
Add a screenshot if the alarm is still on the panel, and briefly note what you already ruled out: sensor, fastener, coupling, play, stop, guide misalignment. Then service will not have to start from scratch.
There is a simple working rule. If the shift repeats by the same amount, it is usually worth looking at the mechanics or drive connection. If the error comes and goes and the reference point wanders, the sensor, cable, or its mount is often to blame. But do not guess: uncertainty after a check is already a reason to stop.
When you are not confident, hand over all the data to service and do not run the machine under load. For CNC turning machines, this is a common story: a light hit looks harmless, then later it creates scrap in production.
If you need an outside review, EAST CNC can help with inspection, commissioning, and maintenance. This is especially useful when the alarm log says one thing, but the axis behavior suggests something else. In that situation, it is better to confirm the cause once than later to search for why the size shifted again in the next batch.